Showing posts with label chocolate. Show all posts

Monday, March 2, 2015

Amazing Sourdough Brownies


These sourdough brownies are absolutely amazing. The chocolate flavor is intense, more so than any brownie I've ever tried. The texture of the brownies is dense, smooth, and fudgy. The sourdough adds a touch of tang, but its most noticeable contributions are richness and intensity. The overall combination of flavor and texture makes these brownies divine. I would go on and on, but basically no words can really describe how amazing these brownies are, so you should just make them. If you don't have sourdough starter, make some, then make these brownies.

Don't you want to dive in head first?

I made a batch a few weeks ago, and have been dreaming about them pretty much nonstop ever since. My mouth waters just thinking about these incredible bars of chocolate perfection.


This recipe gives ingredient amounts by weight instead of volume. I have a nice little digital kitchen scale that I use, I just zero it out after adding each ingredient. I prefer volume recipes, but I'm willing to make adjustments for a recipe this delicious.

Sourdough Brownies
(source Chef in Disguise)
300 grams chocolate, chopped (I used chocolate chips for one batch, and a *substitute made with cocoa powder, sugar, and oil the second time, both worked great)
226 grams (2 sticks) unsalted butter
200 grams sugar
6 grams (1 tsp.) salt
8.4 grams (2 tsp.) vanilla
3 eggs, room temperature
40 grams cocoa powder
220 grams sourdough starter

Preheat oven to 325 F.

Line a metal 9×13 pan with parchment paper and grease it ( it makes it easier  to lift the brownies out of the pan if you leave some extra parchment at the 13 inch sides).

In a double broiler, saucepan, or the microwave, melt the chocolate and butter. Stir it often so it does not burn.

Pour the melted chocolate/butter into a large bowl. Whisk in the sugar, salt and vanilla.

Add the eggs one at a time, whisking to combine each addition. Sift the cocoa powder over the chocolate and stir to combine. Add the starter and stir gently until it is completely incorporated.

Turn the batter into the prepared pan and bake for about 40 minutes, or until a toothpick inserted into the center comes out clean.

Cool in the pan 20 minutes then lift the parchment paper out and allow to cool the rest of the way on a wire rack. When cool completely, cut into squares and enjoy!


*To make chocolate substitute: For one ounce of semisweet/bittersweet chocolate, whisk together 1 tbsp. cocoa powder, 3 1/2 tsp. sugar, and 2 tsp. oil or softened butter or margarine.

300 grams of chocolate converts to about 10.5 ounces. So for this recipe I used 10 1/2 tbsp. cocoa powder, 12 tbsp. plus 1 tsp. sugar, and 7 tbsp. oil. I then added this mixture to the melted unsalted butter and continued with the recipe from there.

Complicated enough? I know, I know. But I WANTED these brownies and I was out of chocolate. I did what I had to do.

Le Swoon!

Linking to:
Think Tank Thursday 
Link Party Palooza

Tuesday, February 10, 2015

Sourdough Chocolate Cake

I've been seriously enjoying my sourdough starter lately. You can just do so much with sourdough! I keep trying to find new recipes to try, because the starter needs to be drained and fed every few days. I simply refuse to throw away the starter that I drain off, so I just have to make fun and delicious foods with it instead. Oh so difficult. ;)

My latest sourdough adventure was this delicious chocolate cake. The batter was fun - it looked just like instant chocolate pudding, and tasted similar to pudding too. Yes, I tasted the batter. I licked the beaters, the spatula, the bowl. It was fantastic. I regret nothing.


I topped the cake with a basic cream cheese frosting, and it complimented the cake well. Both the cake and the frosting were sweet with a little bit of a tang, and it was a great combination.

Sourdough Chocolate Cake
(from allrecipes.com)
1 3/4 cups all-purpose flour
2/3 cup unsweetened cocoa
3/4 tsp. baking soda
1/2 tsp. baking powder
1 tsp. salt
2/3 cup shortening
1 2/3 cup white sugar
3 eggs
1 cup sourdough starter (recipe here)
3/4 cup cold water
1 tsp. vanilla extract

Preheat oven to 350 degrees. Grease 9x13 baking pan.

Sift together flour, cocoa, soda, baking powder, and salt.

Cream shortening, sugar, and eggs. Blend in sourdough starter. Add sifted ingredients slowly to creamed mixture, beating until smooth. Stir in water and vanilla, and mix well.

 Pour batter into greased and floured 9 x 13 inch pan.

 Bake for 35 minutes, or until done.

Cool completely before frosting.


Cream Cheese Frosting
 8 oz. cream cheese, softened
1/4 cup butter or margarine, softened
1 tsp. vanilla extract
4 cups powdered sugar

In a stand mixer or with a hand mixer, cream together cream cheese, butter, and vanilla. Slowly add powdered sugar, mixing until smooth and creamy.

I left the cake in the pan and only frosted the top. That way I only used about two-thirds of the frosting, and could keep the leftover frosting in the fridge. Because, let's face it, there are certainly worse things than having a cup or two of cream cheese frosting sitting around waiting to be used. So convenient for delicious snacking...

Linking:
Think Tank Thursday

Monday, July 28, 2014

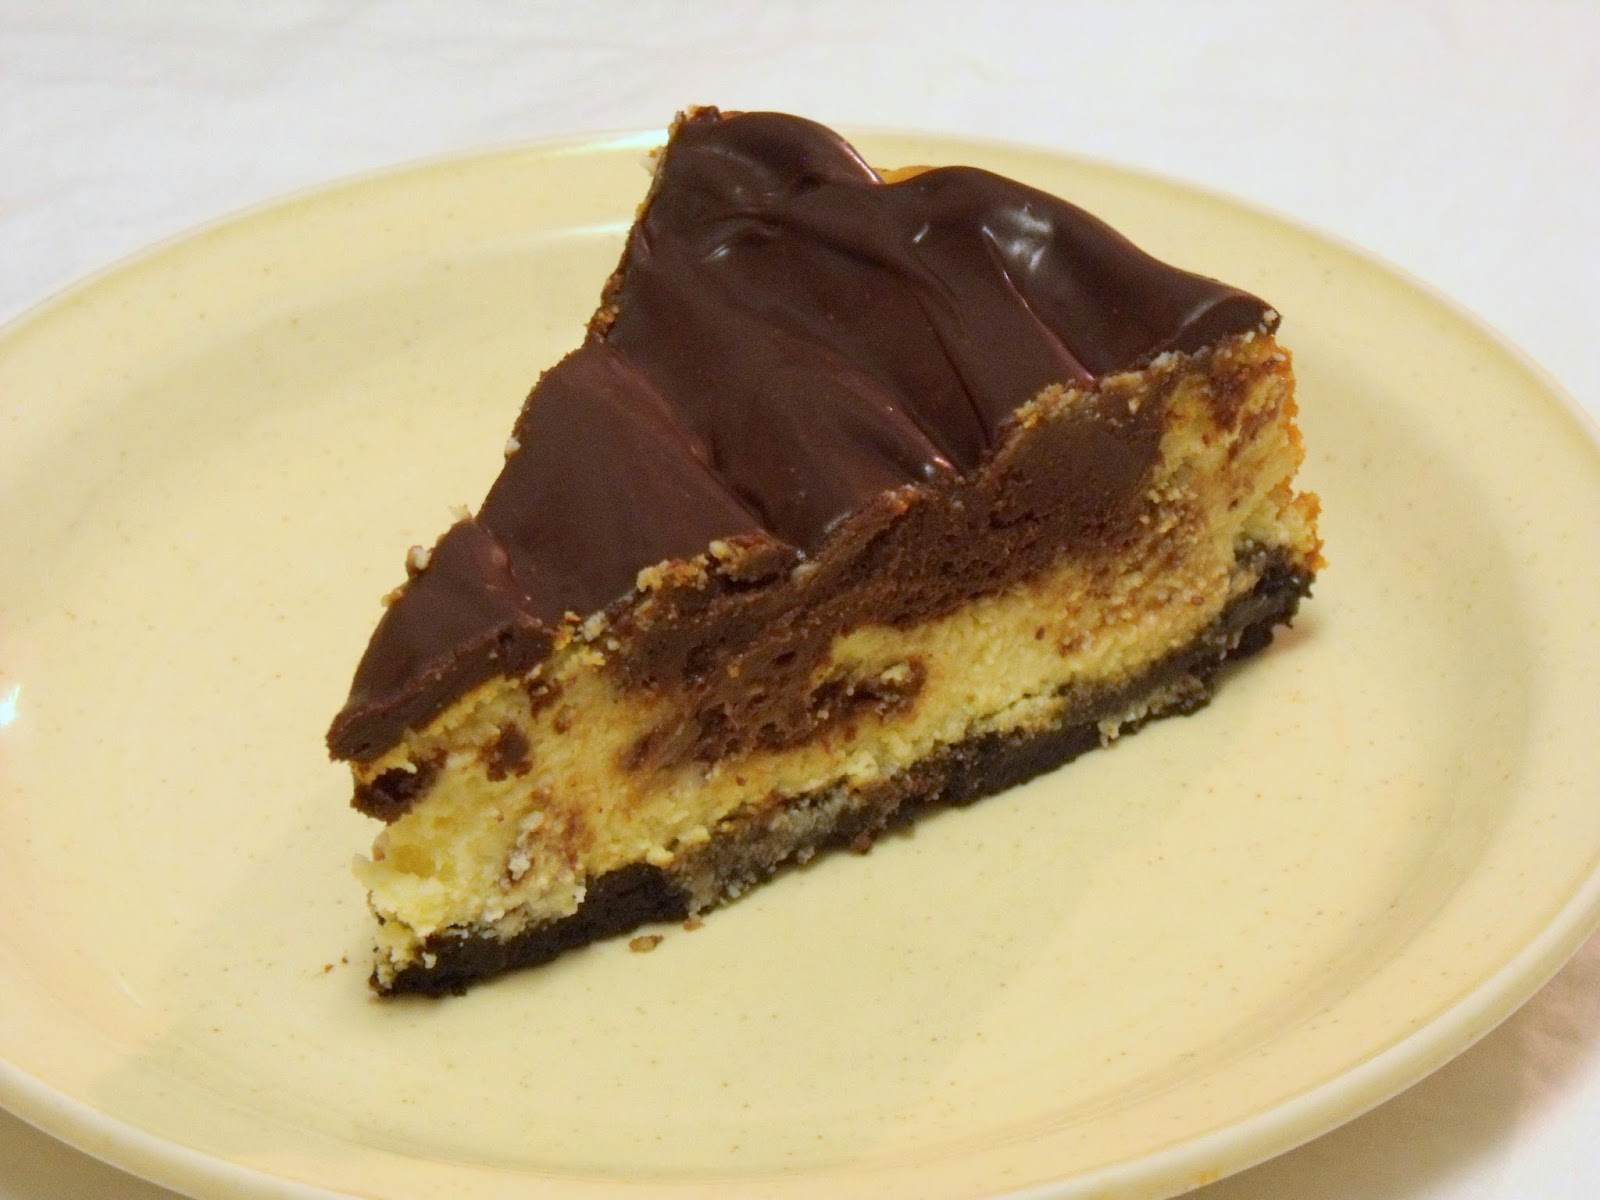
Chocolate Berry Truffle Cheesecake


When I was a teenager, my dad decided he wanted to learn how to make gourmet cheesecakes. He bought a recipe book featuring a large variety of cheesecakes, and started baking. These cheesecakes were a big departure from the no-bake Jell-O cheesecakes of my childhood. There was a year or two when we were almost constantly trying new fancy cheesecake recipes, everything from Chocolate Turtle Cheesecake to No-Bake Peanut Butter Cheesecake to Banana Split Cheesecake. Mmm. Those were good times.

The very first cheesecake that Dad made out of that beautiful little book was called Chocolate Raspberry Truffle Cheesecake. It was a 10-inch cheesecake that used 2 full pounds of cream cheese, a lot of chocolate chips, and seedless raspberry preserves. He took the sides off the springform pan too soon, so it ended up being a giant shapeless blob in the refrigerator. But it was the richest, most decadently delicious shapeless blog any of us had ever experienced. It was amazing.


After that first cheesecake, Dad's skills improved and we had no more shapeless blobs occupying the place of honor on the fridge shelf. With each cheesecake, he (and those of us kids who watched or helped) learned about ways to keep the cheesecake from cracking, how to mix it properly to reduce lumps, how to bake it and cool it just right. For instance, scrape the sides of the bowl very frequently while mixing, especially after adding a new ingredient. The cheesecake is done baking when the middle half is still relatively jiggly - if it doesn't still jiggle it's overdone. Make sure to let the cheesecake cool completely (and slowly) before removing the springform pan sides. If your cheesecake cracks it's perfectly acceptable to top it with whipped cream or sweetened sour cream to hide the cracks! But still, no matter how many successful and beautiful masterpieces Dad turned out, that first sloppy pile of cheesecake-y goodness has always been my favorite.

The recipe calls for seedless raspberry preserves. But I can't always find those, I don't know why. So I'll sometimes use a different type of berry preserves, with great results. This time I used seedless blackberry preserves. I'll compromise on the type of berry the preserves are made of, but I won't compromise on the fact that they have to be seedless. To get the smooth, perfect texture in the chocolate truffles, you need to use preserves that don't have seeds or chunks.


Chocolate Berry Truffle Cheesecake
Crust:
1 1/2 cups finely crushed cream-filled chocolate sandwich cookie crumbs
2 tablespoons margarine, melted
Filling:
1 1/2 pounds cream cheese, softened
1 1/4 cups sugar
3 eggs
1 cup sour cream
1 teaspoon vanilla
Truffles:
8 ounces cream cheese, softened
9 ounces semi-sweet chocolate, melted
1/2 cup seedless raspberry preserves
Topping:
6 ounces semi-sweet chocolate
1/3 cup heavy cream

1. To make crust, combine cookie crumbs and margarine and press into the bottom of a 10-inch springform pan. Set aside.
2. Preheat oven to 325 degrees.
3. To make filling, with an electric mixer set on medium speed combine 1 1/2 pounds cream cheese and sugar until well blended (scrape sides of bowl frequently throughout steps 3-7 to prevent lumps).
4. Add eggs, one at a time, mixing well after each addition.
5. Blend in sour cream and vanilla and then pour into prepared crust. Set aside.
6. Combine 8 ounces cream cheese and melted chocolate, mixing at medium speed until well blended.
7. Add raspberry preserves, mixing together well.
8. Drop chocolate raspberry batter by tablespoonfuls onto plain cream cheese batter in pan (I used my 2-tbsp. cookie scoop). Do not swirl.
9. Bake for 1 hour and 25 minutes.
10. Remove from oven, loosen cake from sides of pan, and let cool on a wire rack for 1 to 2 hours before removing from pan (I actually leave it in the pan until ready to serve).
11. To make topping, cook chocolate and heavy cream over low heat, stirring constantly, until chocolate has melted and mixture is smooth.
12. Remove from heat and spread over cooled cheesecake.
13. Chill for 4 to 6 hours.

After dolloping on the chocolate truffle mixture and placing in the oven.

Immediately after removing from the oven. The cheesecake sinks quite a bit while cooling, that's normal. I baked the cheesecake last night, forgive my use of the camera flash!

After cooling, the cheesecake is at least half an inch shorter than it was before.

Freshly covered in chocolate ganache.


Rich, dense, chocolaty. The most intense cheesecake experience ever.

Linking:
Think Tank Thursday
One Project at a Time
Link Party Palooza
Strut Your Stuff Saturday

Friday, September 6, 2013

Creme de Menthe Brownies

Mint and chocolate - a match made in heaven. Jeff bought some creme de menthe baking chips recently, just for fun. They're basically chopped up Andes bars. Both of us knew right away that they would be delicious baked into some rich, chocolatey brownies.

Andes and brownies, you can't go wrong.


Creme de Menthe Brownies
(adapted from Hershey's)
4 eggs
1 1/4 cups sugar
1/2 cup (1 stick) butter or margarine, melted
2 tsp. vanilla
1 1/3 cup flour
2/3 cup cocoa powder
1 tsp. baking powder
1/2 tsp. salt
1 1/2 cup Andes Creme de Menthe baking chips

Heat oven to 350. Grease 9x13 pan.

Beat eggs in large bowl until foamy; gradually beat in sugar. Add butter and vanilla; beat until blended. Stir together flour, cocoa, baking powder, and salt; add to egg mixture, beating until blended. Stir in baking chips. Spread batter into prepared pan.

Bake 25 to 30 minutes or until brownies begin to pull away from sides of pan. Cool completely in pan on wire rack. Cut into squares.


Linking to: Link Party Palooza at tatertots & jello
Project Inspire{d} at Dukes and Duchesses 
Think Tank Thursday at Joyful Homemaking

Monday, May 27, 2013

Chocolate Cakies with Creamy Chocolate Frosting


Let's just get this out there right off the bat - these were supposed to be whoopie pies. But as I watched the cakes baking in the oven and saw them spreading out to be about the size of my hand I decided that I wouldn't sandwich them like you would a traditional whoopie pie. I mean, those would have been some seriously huge whoopie pies. Instead, just served individually and topped with frosting, these are like little handheld cakes - Cakies! They're kind of like cupcakes, but easier to eat.
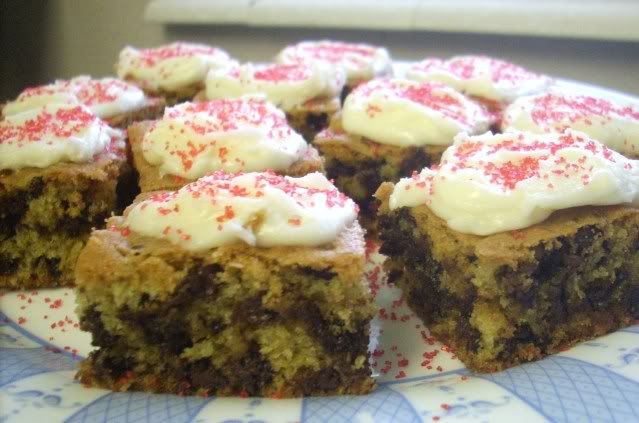
That being said, you could totally use this recipe to make whoopie pies, just scoop the batter out by 2-tbsp scoops instead of 1/4 cup. Then sandwich the frosting between the cakes. Or, you know, just use 1/4 cup and make really big whoopie pies. I won't judge you.

Chocolate Cakies
(from sweet falcon)
2 cups all-purpose flour
1/2 cup Dutch-processed cocoa powder
1 1/4 tsp baking soda
1 tsp salt
1 cup well-shaken buttermilk (or 1 tbsp lemon juice and milk to make 1 cup)
1 tsp vanilla
1 stick (1/2 cup) unsalted butter, softened
1 cup packed brown sugar
1 large egg

Whisk together flour, cocoa, baking soda, and salt in a bowl until combined. Stir together buttermilk and vanilla in a small bowl.

Beat together butter and brown sugar in a large bowl with an electric mixer at medium-high speed until pale and fluffy, about 3 minutes in a standing mixer or 5 minutes with a handheld mixer, then add egg, beating until combined well. Reduce speed to low and alternately mix in flour mixture and buttermilk in batches, beginning and ending with flour, scraping down side of bowl occasionally, and mixing until smooth.

Spoon 1/4-cup mounds of batter about 2 inches apart onto 2 buttered large baking sheets. Bake in upper and lower thirds of oven, switching position of sheets halfway through baking, until tops are puffed and cakes spring back when touched, 11 to 13 minutes. Transfer with a metal spatula to a rack to cool completely.


Creamy Chocolate Frosting
(from Let's Make Whoopie...Pies) 
3/4 cup butter, room temperature
3 oz. unsweetened chocolate, melted and cooled
2 1/2 cups powdered sugar

Beat together butter and chocolate. Add powdered sugar 1/2 cup at a time. Use to frost cakies or to fill whoopie pies.

Linking to:
Project Inspire{d} at Dukes and Duchesses
Think Tank Thursday at Joyful Homemaking
Weekend Wrap-Up at tatertots&jello

Saturday, March 9, 2013

Perfect Chocolate Frosting

This is exactly what the title says - PERFECT CHOCOLATE FROSTING. It is a-freakin'-mazing.


This ain't no grainy buttercream with a bit of cocoa thrown in to make it powdery brown and cocoa-flavored. No, this is frosting of the smoothest, creamiest caliber, with a rich, dark chocolate flavor that simply can't be beat.

It is perfection.


Perfect Chocolate Frosting 
2 1/2 sticks butter or margarine, softened
1 cup powdered sugar
3/4 cup unsweetened cocoa powder
Pinch of salt
3/4 cup light corn syrup
1 tsp. vanilla
8 oz. milk chocolate, melted and cooled

Combine butter, sugar, cocoa and salt in a food processor and process until smooth, about 30 seconds. Scrape the bowl as needed. Add the corn syrup and vanilla and process until just combined, about 5-10 seconds. Scrape the bowl again, then add the melted chocolate and pulse until smooth and creamy, about 10-15 seconds. Pipe or spread onto cake, cupcakes, cookies, or straight into your mouth.


Linking to Tatertots and Jello Weekend Wrap-Up Party

Thursday, March 8, 2012

Cookies n Cream No-Bake Cheesecake


Right about this time, Oreo is celebrating its 100th birthday. So I went and bought a couple packages of delicious chocolate sandwich cookies with the intention of making a yummy dessert to celebrate. This is what Jeff and I came up with - a light and creamy cheesecake filling with chunks of Oreos, surrounded by a crisp cookie crumb crust. Yummers!


Cookies n Cream No-Bake Cheesecake
40 Oreo cookies
1/4 cup butter or margarine, melted
1 8-oz package cream cheese, softened
1 8-oz carton whipped topping
1/3 cup sugar
1 tsp. vanilla

For crust, place 25 cookies in food processor, crush into fine crumbs. Mix well with melted butter. Press into 9-inch pie plate. Set aside in refrigerator while you make the filling.

For filling, cream together the cream cheese, whipped topping, sugar, and vanilla with electric mixer. Coarsely chop remaining cookies and fold in gently. Spread mixture into crust.

Chill in refrigerator for a couple of hours or until set.


Tuesday, September 6, 2011

Black Forest Cobbler

I've been really into cobblers lately. After making that peach cobbler, I tried the same recipe but with a can of apple pie filling, and it turned out delicious. Then tonight, in the mood for another fruity cobbler dessert, I created this easy and tasty treat. I simply topped cherry pie filling with cake mix cookie batter. Sweet success!


Black Forest Cobbler
1 box devil's food cake mix
2 eggs
1/3 cup oil
1 can cherry pie filling

Heat oven to 350. In a bowl combine cake mix, eggs, and oil. Mix well.

Spread pie filling into greased 9x13 baking dish. Drop batter by spoonfuls over pie filling. Bake for 15-17 minutes.


This would be great with ice cream or whipped cream, but even by itself it's super delicious.

Tuesday, June 28, 2011

Whatcha-ma-Crunch


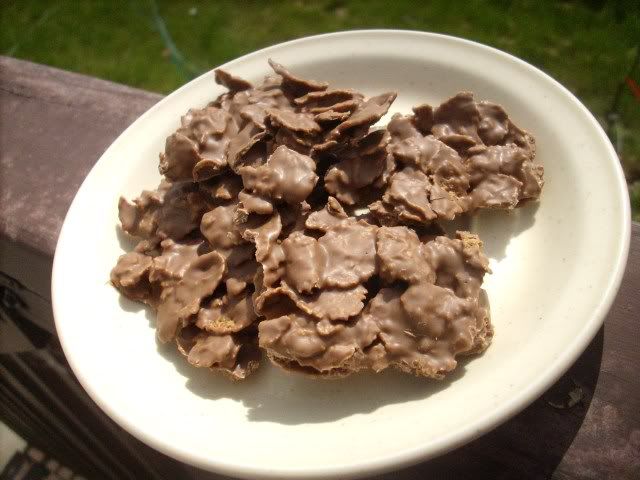
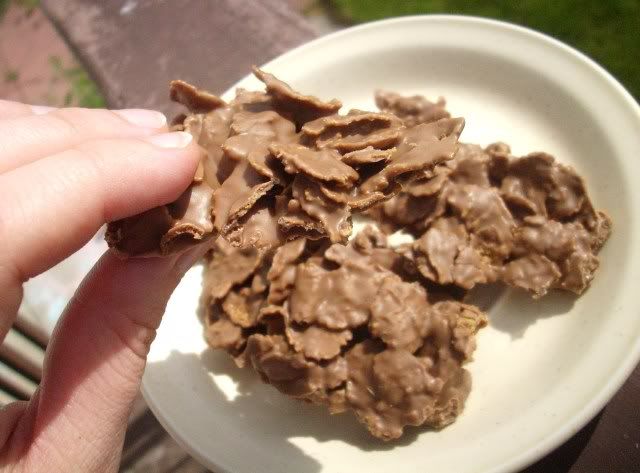
This stuff is seriously addicting. The kids and I wanted a little snack the other day, so I came up with this very simple candy-like treat. Three ingredients, a little time in the microwave and then the fridge, and they're done. And sooooooo yummy! Crunchy, chocolatey, peanut buttery goodness.

Watcha-ma-Crunch
2 cubes (2 oz. each) almond bark candy coating (I like using 1 cube vanilla and 1 cube chocolate)
3 tbsp. peanut butter
1 1/2 cups bran flakes (or other crunchy cereal)

Melt candy coating and peanut butter together in the microwave. With my microwave, 1 minute on high is usually just right. Stir in the cereal.

Spread mixture onto a foil-lined plate. Chill in fridge until hardened, then break into chunks to serve. Store uneaten candy in the fridge. That is, if there's any left to store...

Monday, March 14, 2011

Happy Pi(e) Day! Brownie Pie

Sorry it's been so long since I posted - a whole month, wow! But this is definitely a good recipe to come back with.

Today was Pi Day (3/14 = 3.14 = π). However, since I'm not a mathematician, pi is boring. But pie is cool. So we celebrate Pi Day by making pie! And what a pie this is.


Brownie Pie
1 box brownie mix
1 unbaked 9-inch pie shell

Prepare brownie mix according to package directions. Pour brownie batter into unbaked pie shell. Bake at 350 for 40-45 minutes. Do not overbake. Cool completely, and serve with ice cream or whipped cream.


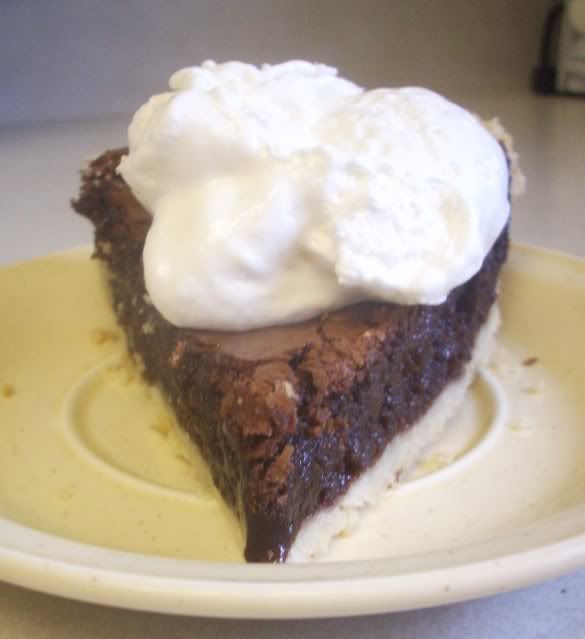
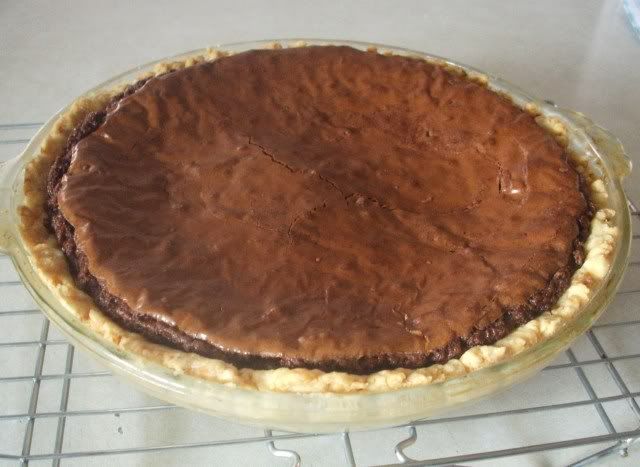
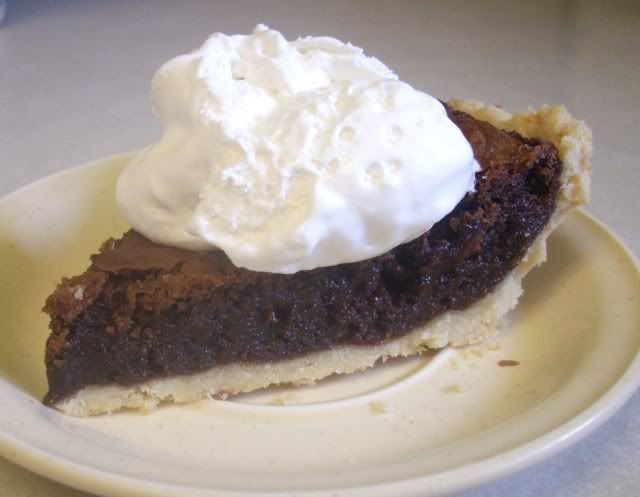
Such simple ingredients, such easy instructions, yet such an incredible dessert! Brownie in a pie crust, does chocoholic life get any better?

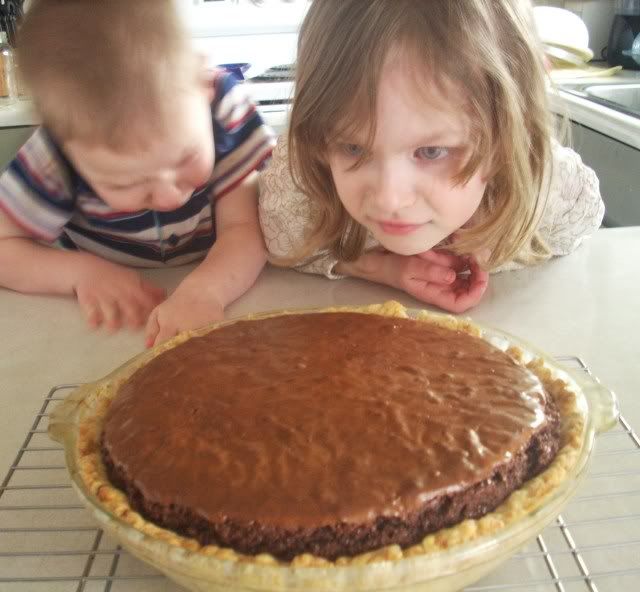
The kids are mesmerized by this pie's scintillating essence.

Tuesday, February 15, 2011

Our Valentine's Dinner


I love putting together simple yet delicious meals for holidays. Sometimes I like giving them names too, I'm weird like that. This one is called "No such thing as too much shrimp."

Shrimp Appetizer

I posted this recipe last year. But I make it every year for Valentine's Day, so I'm posting it again this year. I love this stuff, it's so delicious!

8 oz. cream cheese
Cocktail sauce
1 can tiny shrimp, drained
Buttery snack crackers (Ritz, Town House, etc)

Place cream cheese on serving platter. Pour about 2/3 cup cocktail sauce on top, and top with shrimp. Serve with crackers.

Garlic Ginger Shrimp

I got this recipe from Angie, The American Homemaker. I attended her cooking class at the Pleasant Grove Macey's last week, and really enjoyed this recipe. I figured it would be perfect for Valentine's Day. It's a little pricier than my usual meals, but not by much. Besides, it was a special occasion.

1 1/2 tsp. ginger
4 cloves garlic (2 tsp. bottled)
1/4 cup butter
1/4 cup olive oil
1 1/2 cups chicken broth
3 tsp. parsley
2 tsp. basil
1/2 tsp. salt (this wasn't in the original recipe, but it needed it)
3 tsp. cornstarch
2 tbsp. cold water
1 lb. raw shrimp, peeled and deveined
1 package angel hair pasta (I used spaghetti)

Start water boiling for pasta.

In a large skillet, saute ginger and garlic in butter and oil for about one minute. Stir in broth, 1 1/2 tsp. parsley, and basil.

Combine cornstarch and water until smooth. Add to skillet. Bring to a boil. Cook and stir for two minutes or until thickened. Reduce heat; add rinsed shrimp. Simmer for two to three minutes or until the shrimp turn pink.

Meanwhile, cook pasta. Add sauce to cooked and drained pasta. Sprinkle with remaining parsley.

Salad

Of course, we also had a simple salad, to round out the meal. Five-lettuce mix with chopped oranges and a honey mustard dressing. Colorful and yummy.

Chocolate Almond Pudding Cake

This was a fantastic ending to a delicious meal. It's a slightly healthified version, with less sugar and oil. It was rich and indulgent, but not overly so. Perfect with vanilla ice cream.

1 cup flour
1/2 cup sugar
1/4 cup chopped almonds
1/4 cup unsweetened baking cocoa
2 tsp. baking powder
1/4 tsp. salt
1/2 cup milk
2 tbsp. canola oil
2 tsp. vanilla
1/4 tsp. almond extract
3/4 cup packed brown sugar
1/4 cup unsweetened baking cocoa
1 3/4 cups water
Vanilla ice cream, if desired

Heat oven to 350°F. Spray 8-inch square (2-quart) glass baking dish with cooking spray. In medium bowl, mix flour, granulated sugar, almonds, 1/4 cup cocoa, the baking powder and salt. Stir in milk, oil, vanilla and almond extract until blended. Spread batter in pan.

In 1-quart saucepan, mix brown sugar and 1/4 cup cocoa with wire whisk. Stir in water; heat just to boiling, stirring occasionally. Pour over batter.

Bake 35 to 40 minutes or until center is set. Cool 30 minutes before serving (Haha, yeah right. We at it right away).

To serve, spoon warm cake into individual dessert bowls; spoon pudding from baking dish over cake. Serve with ice cream.

Friday, December 24, 2010

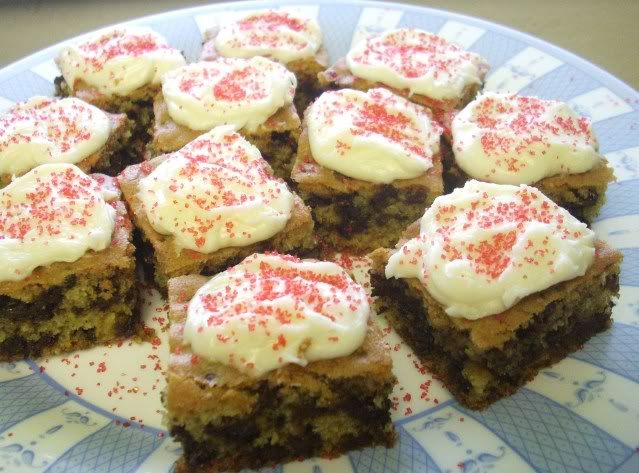
Christmas Cookie Bars

These are the cookies we're leaving out for Santa tonight. The kids had fun helping me measure and stir (and taste, of course) these yummy cookie bars. Crushed candy canes add a barely-there peppermint flavor to the bars themselves, and the frosting puts that minty flavor over the top!


Christmas Cookie Bars
1/2 cup (1 stick) butter or margarine
3/4 cup sugar
3/4 cup brown sugar
1 tsp. vanilla
2 large eggs
2 1/4 cups flour
1 tsp. salt
1 tsp. baking soda
2-3 candy canes, crushed
1 package mini semisweet chocolate chips
Frosting:
1/3 cup butter or margarine
3 cups powdered sugar
3 tbsp. milk
1 tsp. vanilla
1 tsp. mint extract
Sprinkles, if desired

Cream butter and sugars in a bowl. Beat in vanilla and eggs. Combine flour, salt and baking soda, and beat slowly into creamed mixture. Stir in candy canes and chocolate chips.

Grease a 10x15 jelly roll pan. Spread cookie dough evenly in pan. Bake in a preheated 375 oven for 20-25 minutes. Let cool in pan before cutting into bars.

For frosting: Melt butter or margarine. Beat in powdered sugar, milk, and extracts. Spread on cookie bars. I cut the bars and then spread each one individually, or they could be frosted before being cut. If desired, top with sprinkles. Serve with a big glass of milk or eggnog, and enjoy!

Sunday, December 12, 2010

Buckeye Bars

I love buckeyes - peanut butter balls with chocolate coating. My favorite kind are the ones with graham cracker crumbs, because they add a wonderful texture and richer flavor than the ones loaded with butter and tons of powdered sugar.

However, I don't love quite so much the amount of time it takes to roll all those little balls and dip each one into chocolate. So when I found a recipe for Buckeye Bars, I was excited to see that I could just press my peanut butter filling into a pan and top it with chocolate. Quick and easy! So I used the instructions for that recipe, and the filling from my regular buckeye recipe, and made my own delicious buckeye bars.


Buckeye Bars
1 cup creamy peanut butter
1/2 cup finely ground graham cracker crumbs
1 cup powdered sugar
1 cup chocolate chips

Combine peanut butter, graham cracker crumbs, and confectioners' sugar in a bowl or a food processor until smooth. It starts out really crumbly, but keep at it. I like to use my hand and squish it like play dough. It takes quite a while, but it's fun.

Line an 8-inch square pan with foil, with ends of foil extending over sides.

Press peanut butter mixture into pan evenly. Microwave chocolate chips on high for 1 minute; stir. Microwave 15 to 30 seconds or until chocolate is melted; stir until smooth. Spread over peanut butter layer.

Refrigerate 2 hours. Use foil handles to lift bars from pan before cutting to serve.


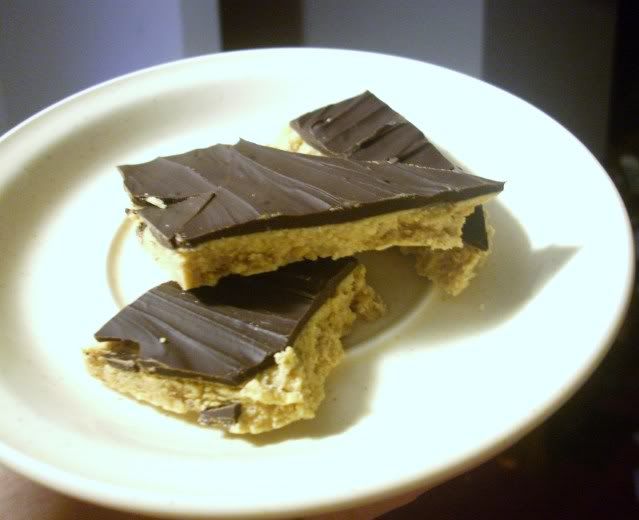
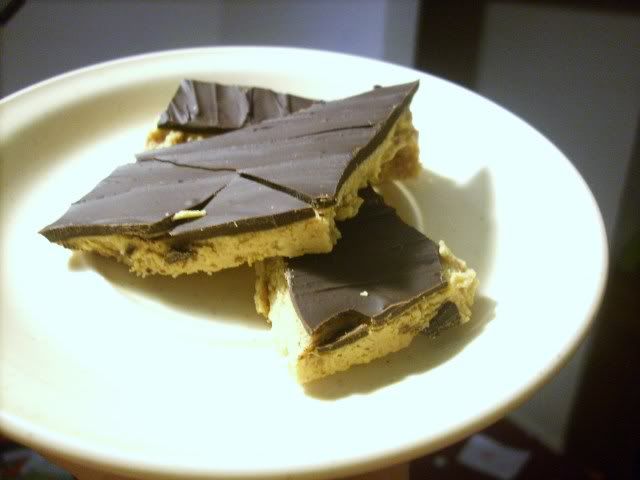
My chocolate actually hardened too much to cut. So I just broke off pieces. To make the chocolate softer so you can cut nice little squares, I would stir in some sweetened condensed milk. But it's fun to just eat big chunks!

Friday, December 3, 2010

Chocolate Covered Shortbread

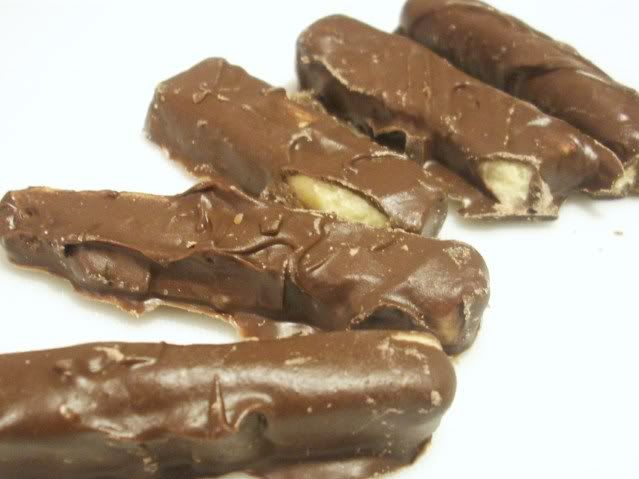
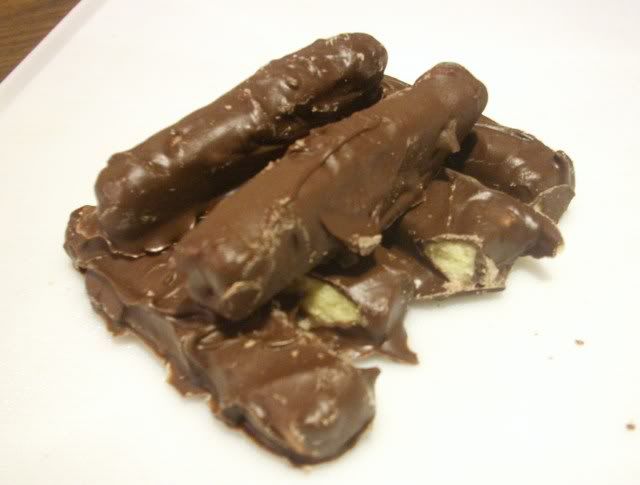
Jeff wanted to make something similar to Twix just for fun, so he came up with these yummy cookie bars. They don't have caramel like Twix, and the cookies aren't quite as crispy, but they are delicious and are being eaten up rather quickly! I don't think these will last long.


Chocolate Covered Shortbread
3/4 cup butter or margarine
1/4 cup sugar
2 cups flour
chocolate candy coating (almond bark)

Heat oven to 350.

Mix butter and sugar in large bowl. Stir in flour. (If dough is crumbly, mix in 1 to 2 tablespoons butter or margarine, softened.)

Roll dough 1/2 inch thick on lightly floured surface. Cut into small rectangles, about 1/2 inch by 3-4 inch. Place 1/2 inch apart on ungreased cookie sheet.

Bake about 20 minutes or until set. Immediately remove from cookie sheet to wire rack.

Melt chocolate coating according to package directions. Dip cookies in chocolate. Let harden, and enjoy!

Wednesday, October 13, 2010

Chocolate Soup

Every once in a while you just gotta have chocolate for dinner, you know? Tonight was one of those nights. I didn't feel like making a big dinner, it was just me and the kids. So we had some bread, some apples, and a nice steaming pot of chocolate soup.

I actually just used a recipe for chocolate pudding, but by calling it soup, I felt a little more justified in serving it for dinner. ;-)

Chocolate Soup
1/3 cup sugar
2 tbsp. cornstarch
2 tbsp. cocoa powder
2 cups milk
1 tsp. vanilla

In a saucepan combine sugar, cornstarch, cocoa, and milk. Heat over low, stirring constantly, until thickened. Remove from heat and add vanilla.

Since it was really hot but I wanted to serve it right away, I sliced a couple frozen strawberries into each bowl before ladling in the soup. The hot soup thawed the strawberries, and the strawberries cooled down the soup so the kids could eat it without scalding their tongues. They sure were excited to be having chocolate for dinner!

Not only is this good served warm as a soup, it's also good served chilled as a pudding. I had some later tonight with a dollop of whipped topping, yummy!

Monday, February 22, 2010

2 Years Old!

Today is Fun Foods' 2-year blogoversary. To celebrate, here is a deliciously dark and dense recipe for flourless chocolate cake. If you like bittersweet chocolate, this is the perfect cake for you! If you prefer your chocolate to be a bit sweeter, you can substitute semisweet chocolate instead of unsweetened.


A great thing about this recipe is that it uses pureed beans instead of fat or flour. It adds lots of protein and nutrients, and keep the cake deliciously dense and tasting fresh. Yummy! And no one will know there's beans in the cake unless you tell them. ;-)


Secret Ingredient Flourless Chocolate Cake
8 oz. unsweetened chocolate
2 cups pinto beans, cooked drained and rinsed
4 eggs
1 cup sugar
1/2 tsp. baking powder
Optional: sliced almonds, powdered sugar, melted white chocolate

Preheat the oven to 350 degrees F. Grease a 9 inch round cake pan, dust with cocoa powder.

Place the chocolate into a microwave-safe bowl. Cook in the microwave for about 2 minutes, stirring every 20 seconds after the first minute, until chocolate is melted and smooth.

Combine the beans and eggs in the bowl of a food processor. Process until smooth. Add the sugar and the baking powder, and pulse to blend. Pour in the melted chocolate and blend until smooth, scraping down the corners to make sure chocolate is completely mixed. Transfer the batter to the prepared cake pan. If desired, sprinkle with sliced almonds.

Bake for 40 minutes in the preheated oven, or until a knife inserted into the center of the cake comes out clean. Cool in the pan on a wire rack for 10 to 15 minutes before inverting onto a serving plate. If desired, dust with confectioners' sugar and/or drizzle liberally with melted white chocolate just before serving.


I might admit to adding more white chocolate on top of the cake after taking these pictures...