Showing posts with label misc.. Show all posts

Thursday, July 28, 2011

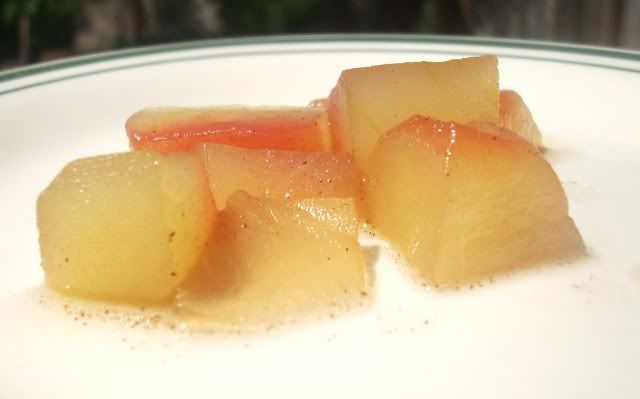
Watermelon Rind Pickles


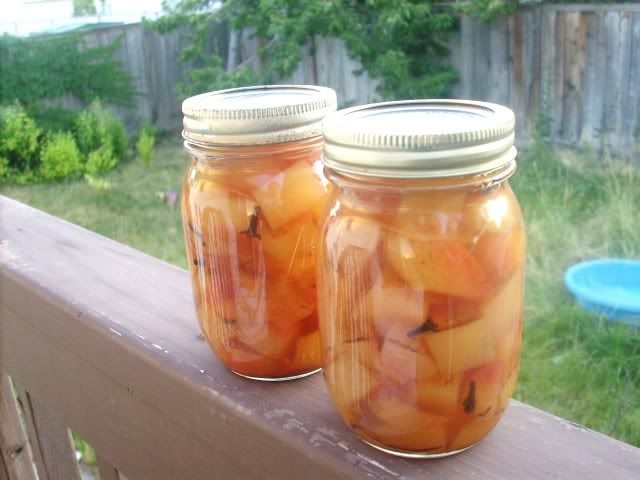
Due to a somewhat extreme case of the lazies during planting season this year, our garden is pretty much nonexistent. But I still get the urge to preserve summer's bounty. So in the absence of homegrown produce, I got creative and used what we had. We bought a watermelon a couple days ago, and after we ate it I got the crazy urge to look up recipes for watermelon rind pickles. Here's the result.


Watermelon Rind Pickles
1 large watermelon
1/2 cup salt
2 1/2 quarts water, divided
2 1/4 cups cider vinegar
2 cups sugar
1 tsp. ground cinnamon
2 tsp. ground allspice
1 tsp. whole cloves

Cut pulp from watermelon rind, leaving a small amount of red pulp on rind. Reserve pulp for another use (if you haven't already eaten it). Remove hard green outer rind. Cut rind into 1-inch cubes, and place in a large bowl.

Stir together salt and 2 quarts water. Pour over rind. Cover and chill 8 hours. Drain; rinse well.

Combine rind with water to cover in a Dutch oven. Bring to a boil; reduce heat, and simmer, uncovered, 10 minutes or until tender. Drain.

Combine remaining 2 cups water, vinegar, and next 4 ingredients in Dutch oven or very large saucepan.

Bring to a boil; reduce heat, and simmer, uncovered, 20 to 25 minutes or until mixture becomes a thin syrup. Add rind, and simmer 5 to 6 minutes or until rind becomes translucent.

Pack hot rind mixture into hot jars, distributing spices evenly and filling to 1/2 inch from top. Remove air bubbles; wipe jar rims. Cover at once with metal lids, and screw on bands. Process in boiling water bath 20 minutes.

Sunday, July 19, 2009

Happy Birthday, Thomas!

My little guy turned 2 years old today. What a little man! Lately he's been really into growling and roaring and stalking around like a predator. So when someone at work gave Jeff a couple green chocolate alligators, we knew we had the perfect inspiration for Thomas' birthday cake.


So cute, and so easy! I made a 9x13 yellow cake (from a mix, they were on sale for 69 cents a box). Then I frosted it with my go-to decorator frosting recipe (found in this post).

I frosted the cake normally, then I built up the "sand" corner with some extra frosting. I wanted it to be a bit of an incline. I left about 1/4 cup frosting for the water. I dyed that blue and spread it over the "water" corner. Then I crushed up some sandwich cookies and pressed them into the frosting on the "beach" to make up the sand, just like I did for his first birthday cake. Yup, when I find an idea that works, I keep using it! :-)

For the plants, I just bought some aquarium plants, one package of the cheapest kind they had; it was less than a dollar. I figured aquarium plants would work perfectly because they're meant to look aquatic. I stuck a couple pieces of the plant along the edges of the pond, and one more on the beach. Then I just plopped on the chocolate alligators, and I was done!


I really enjoy doing cakes that look special, but are simple to make. My cakes are nowhere near professional quality, but I sure think they're cute!

Picture of the birthday boy, enjoying the goodies!


Sorry for the strange lighting. This apartment can very unforgiving in the lighting department sometimes!

Having recently been given a new (to us) ice cream maker, we decided to make ice cream today after church instead of buying some. We didn't have any cream, but nothing stops me when I put my frugal mind to it!

Ice Cream (the cheap version, lol)
4 cups evaporated milk
1 can sweetened condensed milk (made my own, recipe to follow)
2 tbsp. vanilla

In ice cream freezer container, combine all ingredients; mix well. Freeze according to manufacturer’s instructions. Freeze leftovers.


So thrilled to have an ice cream maker! It worked really well. Next time I would let it churn a little longer to let the ice cream thicken a bit more. But it turned out so good!

Sweetened Condensed Milk
1 cup powdered milk
2/3 cup sugar
1/3 cup boiling water
3 tbsp. melted margarine

Combine all ingredients in blender container. Process until smooth. Store in refrigerator until ready to use. Yields equivalent of 1 can sweetened condensed milk.

Yeah, I'm a tightwad and proud of it! The ice cream turned out fantastic - delicious and creamy. It was the perfect way for us to break in our ice cream maker, and the perfect accompaniment to our alligator cake. Having used homemade sweetened condensed milk and canned evaporated milk, it of course had a different flavor than regular ice cream. But sometimes I like different, it makes things interesting!


Happy birthday to my little guy! It's been such a fun two years!

Wednesday, April 1, 2009

Sourdough Bread with Creamy Cheese Dip

***I realized this after I posted the recipe, but today is National Sourdough Bread Day. What a great coincidence!***

I've been making sourdough bread off and on for a couple years. I recently started back up again and have a nice fresh batch of starter in my fridge. I love the tangy flavor of the sourdough. Plus it's super inexpensive - one of the cheapest breads you can make. After you have the starter (a simple mixture of yeast, flour, and water), all you need to make the bread is water, salt, and flour.

Sourdough does take a long time from start to finish. A little bit of planning ahead is necessary if you want the bread done on a certain day. But there isn't any more hands-on time for this bread than there is for any homemade bread. I'm trying to make bread once or twice a week so we always have some on hand.

Last night I went to a girls' night. We had a recipe exchange - everyone brought a favorite dish and copies of the recipe to share. I brought a fresh loaf of sourdough and a delicious creamy cheese dip. I don't have a printer and didn't want to hand write all those copies of this recipe, so this gave me a great excuse to go ahead and post it here. I've been meaning to for a while, so I'm glad I finally had a reason to get around to it!


The recipe I use comes from The Tightwad Gazette. I mostly quote the book directly.

Sourdough Starter
The first step is to make a starter. The simplest way is to mix 1 tablespoon of yeast with 2 cups of chlorine-free water (allow your tap water to "air out" in a jug for a couple of days) and two cups of white flour. Combine these in a glass, plastic, or earthware container - not a metal one. Cover loosely with plastic wrap and allow this mixture to sit at room temperature for at least 48 hours, until it foams and develops a pleasantly sour smell. Cover with plastic wrap and refrigerate. You can also get starter from a friend who makes sourdough. (The sourdough books warn that if the starter turns orange, pink, or any other strange color, you should throw it out.)

Notes on using the starter:
~Each time you remove some starter, you must "feed" it. Just add back 1 1/2 cups water and 1 1/2 cups flour, stir, cover loosely, and return starter to the refrigerator.
~You can use your starter, fresh from the fridge, for weeks at a time. Eventually the loaves may start to rise a bit more slowly. Whenever this happens, just leave the jar of starter out at room temperature overnight to speed its fermentation.
~If you are an infrequent baker, you'll need to drain off some starter and feed it at least once every two weeks to keep it alive.
~The starter separates in the refrigerator. This is normal. Always stir it well before using, and stir it well again when feeding.

Sourdough Bread (To make two loaves of bread)
5 1/2 cups flour (you can substitute whole wheat flour for 1 or 2 cups)
2 cups starter
1 tablespoon salt
1 cup water

Dissolve the salt in the water in a mixing bowl. (Some sourdough books say you should not use a metal bowl.) Add the starter, and then the flour (I have found that in a dry climate, 5 1/2 cups is sometimes too much. I start with 4 cups and just add more as necessary until it's the right consistency). Stir, then knead into a ball. Cover with a damp towel and let rise overnight at room temperature.

The next morning, punch down risen dough and divide in half. Shape each half into a round loaf, make an X-shaped slash on each top, and place the two loaves on a greased baking sheet. Cover with a damp towel and allow to rise at room temperature for about four more hours. Place a pan of water on the bottom rack of the oven and preheat to 400 degrees. Bake for 35 minutes. Cool on a wire rack.


The dip I made to go with the bread was absolutely fantastic. I adapted a different recipe, but can't remember where I found it. This version is changed enough it's not really the same recipe anyway. It turned out so flavorful and delicious - I couldn't get enough!

Creamy Cheese Dip for sourdough
1 8-oz. package cream cheese, softened
3/4 cup mayonnaise
1/4 cup Italian salad dressing
1 cup shredded cheddar cheese
1 stalk celery, finely chopped
2 oz. black olives, sliced
Garlic powder and onion powder to taste (I added about a dash each)

Combine all ingredients with an electric mixer; beat until smooth. Refrigerate until serving.

To serve, cut top off a loaf of sourdough. Cut out the inside of the loaf and tear up inside and top to use for dipping. Spoon dip inside the emptied loaf of sourdough.

I didn't take a picture immediately after arranging all this on the plate, which I do regret. I forgot to take the picture until this morning, after the bread had been thoroughly mutilated. But it still looks delicious to me!

Tuesday, February 3, 2009

Homemade Yogurt in the Slow Cooker

The other morning as I opened the milk to pour over our oatmeal, I noticed that faintly sour smell that occurs when your milk is about to go bad. You know, it's not there yet, but if you let the milk sit much longer it will all have to be thrown out. Well, we still had about half a gallon left so I didn't want to waste it. I hopped online to look up recipes that use lots of milk, and saw that someone suggested making it into yogurt. I've had my eye on a particular yogurt recipe that uses the crock pot (how cool is that?!), but hadn't gotten around to it yet. This was my chance - that milk needed to be used!

I found the recipe on A Year of CrockPotting.


Homemade Yogurt
8 cups milk - she suggests using whole milk, but we had a combination of 2% and skim so I just used what I had
1/2 cup natural, live/active culture, plain yogurt to use as starter

Plug in crock pot (4 quart or larger) and turn to low. Add an entire half gallon of milk. Cover and cook on low for 2 1/2 hours.

Unplug your crock pot. Leave the cover on, and let it sit for 3 hours.

When 3 hours have passed, scoop out 2 cups of the warmish milk and put it in a bowl. Whisk in 1/2 cup of store-bought live/active culture yogurt (if you've used low fat milk, add 2 tbsp. dry milk powder as well to help it thicken better). Then dump the bowl contents back into the crock pot. Stir to combine.

Put the lid back on your crock pot. Keep it unplugged, and wrap a heavy bath towel all the way around the crock for insulation.

Go to bed, or let it sit for 8 hours.

In the morning, the yogurt will have thickened---it's not as thick as store-bought yogurt, but has the consistency of low-fat plain yogurt.


Chill in a plastic container(s) in the refrigerator. Your fresh yogurt will last 7-10 days. Save 1/2 cup as a starter to make a new batch.

She suggests blending the yogurt in batches with your favorite fruit, such as mango, strawberry, and blueberry. I chose to leave it plain until serving. I went to try it the morning it was done - and go figure, Jeff had finished off the granola for breakfast before leaving for work. Phooey. So the kids and I ate it with some sugar and cut up fruit.

My yogurt did turn out quite a bit thinner than I expected. Part of that is just the result of it being homemade, I think. But I also think I should have insulated my crock pot better. I wrapped it in two towels - but only on the top and sides. Next time I think I would wrap it on the bottom as well. Or instead of towels, I could insulate it with our electric blanket, turned to low. Or just move it into our room for the night, because it's warmer there at night than in the kitchen. Lots of options available.

One quick note - if you make yogurt and it doesn't set up - DON'T THROW IT AWAY!! There's no sense wasting an entire half gallon of milk just because it isn't thickened. There are several fun ways to use over-thin yogurt. Mix it with jam and freeze as popsicles. Or just mix it with jam and drink it down like those amazingly overpriced drinkable yogurts. Use it in smoothies. Add to soup in place of milk or cream. I'll be doing some of these with my thinner-than-usual yogurt, as well as just eating it. And I think I need to make some more granola.

Monday, February 2, 2009

A Sweet Potato Meal

Every once in a while Jeff and I will buy a "fancy" vegetable that we normally wouldn't, just for variety. Our latest was sweet potatoes. I know, that's not really very fancy, but when you usually only buy potatoes, onions, carrots, and celery, sweet potatoes do seem pretty special. They sat around in the fridge for a while as I thought of how best to use this vegetable treat. This evening I decided to just serve them as baked potatoes - I've never had baked sweet potatoes before.

Actually, since they were prepared in the microwave, I guess I still haven't technically had baked sweet potatoes. I've had microwaved sweet potatoes.


Microwave Baked Sweet Potatoes
Scrub however many sweet potatoes you'll need to feed your family. We used three - one each for Jeff and I, and the kids split the third. Make somewhat large slits in each potato with a knife - the sweet potatoes have a tougher skin than regular potatoes, so fork pricks aren't quite enough. Then microwave them, one at a time. The cooking times are highly variable, depending on your microwave and the size of the sweet potatoes. Our microwave is old and cooks slowly, and the potatoes were medium-sized. I cooked each one on high for 8 minutes, turning halfway through. If your microwave is fast, only cook them for about 6 minutes. If the potatoes are really large, you can cook them for as much as 10 minutes.

As each potato finishes, cover with foil to keep hot while the others are cooking. You can top them with butter, brown sugar, and cinnamon, or if you are adventurous enough to depart from this conventional topping, you can make some Seasoned Butter.

Seasoned Butter
1/4 cup butter (or, of course, you can use margarine)
Garlic powder, cumin, chili powder, and ginger

I didn't really measure the seasonings, just sprinkled them liberally onto the butter. Then mush it up until well combined. This seasoning combination is one I got from a special-occasion Cornish hen recipe I've made a couple times. It's a unique and delicious flavor combo.


As a side dish, I made some delicious coleslaw. I didn't really use a recipe, just sort of threw stuff together. Measurements are approximate.

Coleslaw
Half a head of cabbage, finely chopped
About 1/2 cup carrot, finely chopped
1 stalk celery, also finely chopped
1/4 to 1/2 cup mayonnaise
1 to 2 tbsp. sugar
1 tbsp. cider vinegar
1/4 cup milk

Combine cabbage, carrot, and celery in a large bowl. Combine mayonnaise, sugar, vinegar, and milk in a jar with a lid. Shake vigorously until well combined, and pour over vegetables. Stir well, and refrigerate until ready to serve.

Monday, November 24, 2008

Whole Berry Cranberry Sauce


I've made this sauce with and without cloves. The cloves added a really great flavor, and this tasted fantastic with turkey!

Whole Berry Cranberry Sauce
1 cup water
1 cup sugar
1 12-oz package fresh cranberries
Dash ground cloves (optional)

Heat water and sugar to boiling in medium saucepan. Add berries. Return to a boil, reduce heat, and simmer 10 minutes, stirring occasionally. Berries will pop and release their juices, making some fun little noises! Remove from heat and add cloves if desired. Cool completely at room temperature, and chill in refrigerator.

The berried contain natural pectins that jellify the sauce, making it almost like a jam. It's so pretty!

Wednesday, November 12, 2008

Cranberry Butter


There weren't a lot of people on my poll who voted for unique cranberry sauces, but there were a few, and I wanted to post at least one special cranberry accompaniment anyway. This is a delicious flavored butter to spread on your Thanksgiving rolls, such as Freezer Crescent Rolls. It is sweet and rich, thanks to the brown sugar and honey, and it is tart and pink, thanks to the cranberries. It's very pretty, and is sure to be a hit.

Cranberry Butter
3/4 cup butter, softened (margarine is okay too)
2 tbsp. brown sugar
2 tbsp. honey
1 cup chopped fresh cranberries
2 tbsp. chopped walnuts, optional

In a small mixing bowl, beat butter, brown sugar, and honey until fluffy, about 5 minutes. Add cranberries and walnuts if desired; beat 5 minutes longer or until butter turns nice and pink.

Transfer to a sheet of plastic wrap; roll into a log.


Refrigerate until chilled. Unwrap and slice or place on a butter dish. Yields 1 1/3 cup.

This would be perfect on those crescent rolls I posted this morning, but since I didn't have any baked right now, I threw together some hoe cake and we ate it with that. Delicious!

Sunday, October 12, 2008

Southern Plate Strikes Again!


Today I'm going to feature two delicious recipes from one of my favorite blogs - Southern Plate! Seriously, check out this blog, because not only are all the recipes fantastic, but Christy is the friendliest and cheerfullest blogger I've ever read! Every recipe I've tried from her website has turned out wonderful, and these two are no exception.

First we have the Southern classic - Fried Green Tomatoes. I first learned about fried green tomatoes a couple years ago when I saw a movie by that name. I loved the movie, and was intrigued by the concept of the dish. So Jeff and I looked up recipes for fried green tomatoes and have loved them ever since. Our first experience with FGT was frying them batter-dipped, just like fried chicken. Christy's recipe uses a cornmeal coating, and is much crunchier. I like it both ways!


Fried Green Tomatoes
Green tomatoes, thickly sliced
Corn meal, about 1 1/2 cups
Flour, about 4 tbsp.
Season All (or seasoned salt), about 2 tbsp.
Milk

Combine corn meal, flour, and season all. Dip thick tomato slices in milk, then in corn meal mixture. Press down to coat both sides well. Fry in hot oil. Christy uses lots of oil - looks like about 1/2 inch of oil. Jeff and I prefer to just use a little bit, only a thin coating on the bottom of the pan that we replenish after each batch. Either way - fry those babies until they're golden brown and crispy on each side. Drain on paper towels and eat!


Frugal bonus - since green tomatoes are something that you usually get in abundance from your garden, they are a very frugal food, in addition to being really tasty!


Next up is this delicious autumn recipe - Apple Orchard Snack Cake. This cake is definitely unique - it uses graham cracker crumbs instead of flour! The result is a moist and flavorful cake with a delicious chunks of apple. I used my homemade graham crackers for that extra really-from-scratch touch!


Apple Orchard Snack Cake
1 cup sugar
3 eggs
2 to 3 apples, peeled and diced
1/2 cup butter or margarine, melted
2 cups graham cracker crumbs
3/4 cup chopped walnuts (optional, I didn't add these)

Blend sugar, margarine, and eggs in bowl with a spoon. Stir in graham cracker crumbs, apples, and walnuts until blended. Spread batter into greased 8x8 pan. Bake at 35 for forty to forty five minutes or until firm to the touch. Sprinkle liberally with confectioner's sugar. Cool and then cut into squares.

Saturday, September 13, 2008

Omnivore's 100

Here’s what you do:
1) Copy this list into your blog or journal, including these instructions.
2) Bold all the items you’ve eaten.
3) Cross out any items that you would never consider eating.
4) Optional extra: Post a comment here at http://www.verygoodtaste.co.uk/ linking to your results.


The Omnivore’s Hundred:
1. Venison
2. Nettle tea
3. Huevos rancheros
4. Steak tartare
5. Crocodile
6. Black pudding
7. Cheese fondue
8. Carp
9. Borscht
10. Baba ghanoush
11. Calamari
12. Pho
13. PB&J sandwich
14. Aloo gobi
15. Hot dog from a street cart
16. Epoisses
17. Black truffle
18. Fruit wine made from something other than grapes
19. Steamed pork buns - so good!
20. Pistachio ice cream
21. Heirloom tomatoes
22. Fresh wild berries
23. Foie gras
24. Rice and beans
25. Brawn, or head cheese
26. Raw Scotch Bonnet pepper - sounds too spicy, I couldn't handle it
27. Dulce de leche
28. Oysters
29. Baklava
30. Bagna cauda
31. Wasabi peas
32. Clam chowder in a sourdough bowl
33. Salted lassi - doesn't sound good, but I'd try it
34. Sauerkraut
35. Root beer float
36. Cognac with a fat cigar
37. Clotted cream tea
38. Vodka jelly/Jell-O
39. Gumbo
40. Oxtail
41. Curried goat
42. Whole insects - fried mealworms in a biology class
43. Phaal
44. Goat’s milk
45. Malt whisky from a bottle worth £60/$120 or more
46. Fugu - sounds too dangerous
47. Chicken tikka masala
48. Eel
49. Krispy Kreme original glazed doughnut
50. Sea urchin
51. Prickly pear
52. Umeboshi
53. Abalone
54. Paneer
55. McDonald’s Big Mac Meal
56. Spaetzle
57. Dirty gin martini
58. Beer above 8% ABV
59. Poutine
60. Carob chips
61. S’mores
62. Sweetbreads
63. Kaolin
64. Currywurst
65. Durian
66. Frogs’ legs
67. Beignets, churros, elephant ears or funnel cake
68. Haggis
69. Fried plantain
70. Chitterlings, or andouillette
71. Gazpacho
72. Caviar and blini
73. Louche absinthe
74. Gjetost, or brunost
75. Roadkill - um, eww.
76. Baijiu
77. Hostess Fruit Pie
78. Snail
79. Lapsang souchong
80. Bellini
81. Tom yum
82. Eggs Benedict
83. Pocky
84. Tasting menu at a three-Michelin-star restaurant
85. Kobe beef
86. Hare
87. Goulash
88. Flowers
89. Horse
90. Criollo chocolate
91. Spam
92. Soft shell crab
93. Rose harissa
94. Catfish
95. Mole poblano
96. Bagel and lox
97. Lobster Thermidor
98. Polenta
99. Jamaican Blue Mountain coffee
100. Snake

I thought that I would be able to bold a whole bunch of these, but apparently not. I've only eaten 31 things on the list. I don't drink coffee or alcohol, so immediately crossed out anything related to either. Other items were crossed off simply because they were too gross for me to consider eating!

Monday, August 25, 2008

House Seasoning


This is a recipe I've seen a couple times, and thought it looked good. I don't remember where online I originally found it, but I think it was attributed to Paula Deen? I need to research my recipes better.

Anyway...

House Seasoning
1 cup salt
1/4 cup garlic powder
1/4 cup ground black pepper

Combine all ingredients, mixing well. Simple as that!
I had a small container to put this in, so I used only one fourth of each ingredient - 1/4 cup salt, and 1 tbsp. each garlic powder and pepper.

This makes a really pretty pattern when you layer the ingredients, before mixing them all together. It kind of reminds me of sand-in-a-jar art.


I use this instead of plain table salt when I season my foods. It's become my new favorite seasoning.