Showing posts with label frozen treats. Show all posts

Saturday, October 9, 2010

6 Years


My sweet husband and I have been married for 6 years, as of yesterday. When Jeff asked if I wanted to go out to eat or make something special here at home, my answer was obvious - I always prefer a great home cooked meal! So here's what we ate for our special meal to celebrate 6 years of marriage.


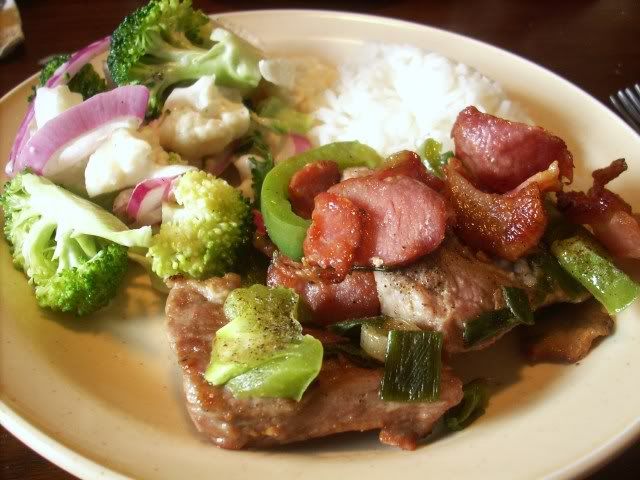
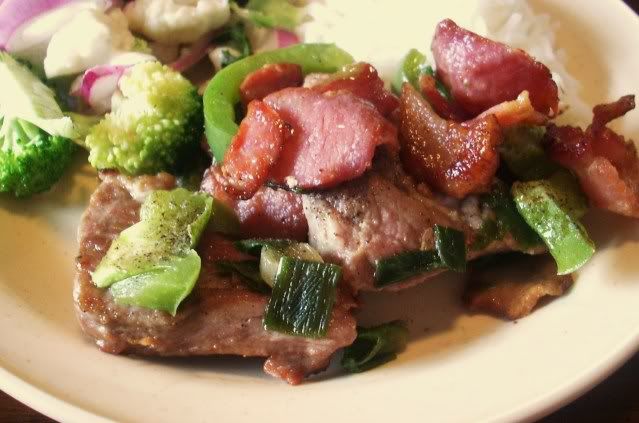
Pork and Bacon Skillet

Jeff created this dish specifically to use cheap cuts of pork and bacon ends. Since he didn't really measure anything, all amounts are approximate.


Start by cooking about 1/4-1/2 lb. bacon ends. Remove from pan and set aside, leaving bacon grease in the pan. Cut about 2 lb. pork into 3-inch chunks and add to pan. Brown on both sides. Add a sliced green pepper, some sliced green onions, 1 cup beef broth (or 1 cup water and 1 tsp. bouillon), and the bacon, plus salt and pepper to taste. Cover and simmer about 30 minutes, stirring occasionally. Serve with rice.


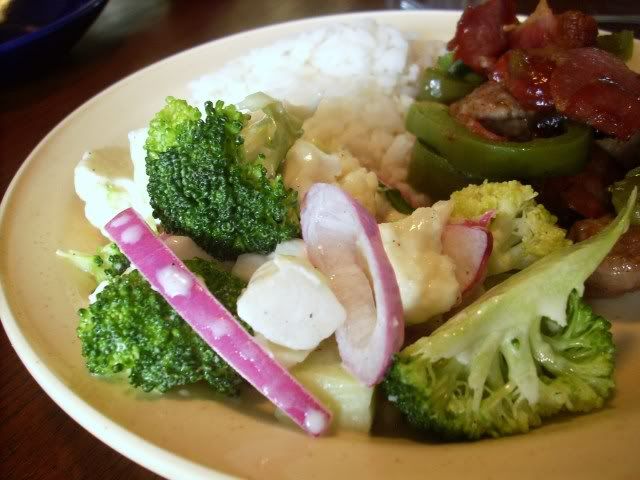
Broccoli and Cauliflower Salad

A delicious and hearty salad from the new Southern Plate Cookbook (love this book!!!!!!!)


1 head cauliflower, broken and sliced
1 head broccoli, cut up
2 small onions, cut and separated into rings (I used half of a large red onion)
1/2 cup mayonnaise
1/3 cup vegetable oil
1/3 cup cider vinegar
1/4 cup sugar
1/2 tsp. salt
1/4 tsp. pepper

Combine the vegetables in a large bowl. Whisk together the remaining ingredients in a separate bowl. Add to vegetables and toss to coat. Refrigerate until ready to serve.


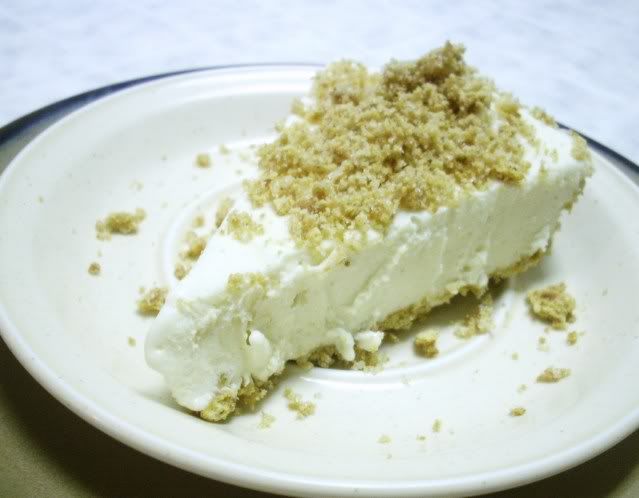
Anniversary Pie

This pie has become tradition since I created it a couple years ago. I've made it differently each time, but it's always delicious. This time I went for a yummy cinnamon flavor.


1 package cream cheese, softened
1/3 cup sugar
1/2 cup eggnog
1/2 cup ice cream (fried ice cream flavor - cinnamon ice cream with shortbread chunks and a caramel swirl, yummmm)
1 graham cracker crust, made with cinnamon grahams
Additional cinnamon graham cracker crumbs

Beat cream cheese and sugar until smooth. Beat in eggnog and ice cream. Pour into crust and freeze until firm. Remove from freezer 10 to 15 minutes before slicing to soften the pie. Return any uneaten portion to the freezer. Sprinkle each slice with additional cracker crumbs.

Friday, October 9, 2009

Our Anniversary Dinner, Yummy!


Yesterday Jeff and I celebrated five years of marriage. Then today we celebrated more by closing on our house - we get the keys on Tuesday and are so excited!!!!

Anyway, we like to do special homemade meals for special occasions. Yesterday was no different. We had an absolutely delicious dinner of Pork Chops with Apples and Stuffing, salad with Basic Vinaigrette, and Anniversary Pie for dessert. It was the same pie I made for our anniversary last year, but I changed it up to include chocolate, teehee. The whole meal was absolutely wonderful.


Pork Chops with Apples and Stuffing


This recipe was based on a recipe I got from my sister a long time ago. The flavors of the pork, the stuffing, and the apple pie filling are absolutely wonderful together. It's delicious just the way it is on her blog, Fabulous Food, but I wanted to give it more of a homemade touch, so I made the apple pie filling from scratch. This is what we came up with.

4 pork chops, about 3/4 inch or thicker
6 apples, peeled, cored, and thinly sliced
1 tbsp. lemon juice (only if the apples lack tartness)
1 cup sugar
2 tbsp. flour
1/2 to 1 tsp. cinnamon
Dash nutmeg
1 box stuffing mix

Combine the apples, lemon juice, sugar, flour, cinnamon, and nutmeg. Spread in the bottom of a crock pot.

Quickly sear the pork chops over high heat on the stove, just until they're lightly browned on the outside. They shouldn't be cooked through. Place on top of the apples in the crock pot. Cover and cook on low until the pork is thoroughly cooked. In our crock pot it took about 8 hours.

Just before serving, prepare stuffing according to directions on the box. Serve with the pork chops and apples.

Next time I might add a bit more flour to the apples - it made a whole lot of syrup because it was in the crock pot instead of the oven. But as is, it was still absolutely delicious.


Salad with Basic Vinaigrette


For the salad, I just mixed together some green leaf lettuce with a bunch of veggies - mushrooms, shredded carrot, tomatoes, fresh chives (from the garden of a wonderful elderly gentleman in our church). Then I topped it with this simple vinaigrette.

1/4 cup oil
2 tbsp. vinegar
2 tbsp. water
1 tsp. mustard
1/8 tsp. each sugar, salt, and pepper

Combine ingredients and mix well. Store unused dressing in the fridge.

This recipe is really easy to customize and make it however you want. Use flavored oil or vinegar, specialty mustard, or add herbs and/or spices along with the salt and pepper. I made it very basic last night, but it's fun to change things around and make it your own.


Anniversary Pie


Last year I made this with butter pecan ice cream and a plain graham cracker crust. This year we changed it up a bit. I used vanilla ice cream and brown sugar instead of white. I also made a chocolate graham cracker crust, and we topped the pie with an easy chocolate sauce. It was divine!

Crust:
18-20 graham cracker squares (9-10 full sheets)
1/4 cup sugar
1/4 cup cocoa powder
6 tbsp. butter or margarine, melted

Crush graham crackers in food processor. Add sugar and cocoa powder, process until mixed. Add melted butter and process again until thoroughly mixed. Empty into a 9-inch pie plate and press onto bottom and sides. Set aside.

Filling:
1 8-oz. package cream cheese, softened
1/3 cup brown sugar, loosely packed
1/2 cup eggnog
1/2 cup vanilla ice cream

Beat cream cheese and sugar until smooth. Beat in eggnog and ice cream. Pour into crust and freeze until firm. Remove from freezer 10 to 15 minutes before slicing to soften the pie.

Chocolate Sauce:
1 cup chocolate chips
1/4 cup milk (approximately)

Melt chocolate and milk slowly, either in the microwave, in the top of a double boiler, or on the stove over very low heat. Add additional milk if it's too thick (I don't really know exactly how much milk I used, I just eyeballed it and stopped adding when it was a good texture). Drizzle sauce over individual slices of pie (I admit that I might have drizzled a bit more on after taking the pictures).


Well, by the time we were done eating, my stomach was very full, but I sure was happy! This was definitely a very good meal for our anniversary. May Jeff and I continue to have many more years of cooking beautiful and delicious meals together.

Sunday, July 19, 2009

Happy Birthday, Thomas!

My little guy turned 2 years old today. What a little man! Lately he's been really into growling and roaring and stalking around like a predator. So when someone at work gave Jeff a couple green chocolate alligators, we knew we had the perfect inspiration for Thomas' birthday cake.


So cute, and so easy! I made a 9x13 yellow cake (from a mix, they were on sale for 69 cents a box). Then I frosted it with my go-to decorator frosting recipe (found in this post).

I frosted the cake normally, then I built up the "sand" corner with some extra frosting. I wanted it to be a bit of an incline. I left about 1/4 cup frosting for the water. I dyed that blue and spread it over the "water" corner. Then I crushed up some sandwich cookies and pressed them into the frosting on the "beach" to make up the sand, just like I did for his first birthday cake. Yup, when I find an idea that works, I keep using it! :-)

For the plants, I just bought some aquarium plants, one package of the cheapest kind they had; it was less than a dollar. I figured aquarium plants would work perfectly because they're meant to look aquatic. I stuck a couple pieces of the plant along the edges of the pond, and one more on the beach. Then I just plopped on the chocolate alligators, and I was done!


I really enjoy doing cakes that look special, but are simple to make. My cakes are nowhere near professional quality, but I sure think they're cute!

Picture of the birthday boy, enjoying the goodies!


Sorry for the strange lighting. This apartment can very unforgiving in the lighting department sometimes!

Having recently been given a new (to us) ice cream maker, we decided to make ice cream today after church instead of buying some. We didn't have any cream, but nothing stops me when I put my frugal mind to it!

Ice Cream (the cheap version, lol)
4 cups evaporated milk
1 can sweetened condensed milk (made my own, recipe to follow)
2 tbsp. vanilla

In ice cream freezer container, combine all ingredients; mix well. Freeze according to manufacturer’s instructions. Freeze leftovers.


So thrilled to have an ice cream maker! It worked really well. Next time I would let it churn a little longer to let the ice cream thicken a bit more. But it turned out so good!

Sweetened Condensed Milk
1 cup powdered milk
2/3 cup sugar
1/3 cup boiling water
3 tbsp. melted margarine

Combine all ingredients in blender container. Process until smooth. Store in refrigerator until ready to use. Yields equivalent of 1 can sweetened condensed milk.

Yeah, I'm a tightwad and proud of it! The ice cream turned out fantastic - delicious and creamy. It was the perfect way for us to break in our ice cream maker, and the perfect accompaniment to our alligator cake. Having used homemade sweetened condensed milk and canned evaporated milk, it of course had a different flavor than regular ice cream. But sometimes I like different, it makes things interesting!


Happy birthday to my little guy! It's been such a fun two years!

Wednesday, October 8, 2008

Our Anniversary recipes, and a blog award!

Happy Fourth Anniversary to Jeff and I!

When Jeff asked what I wanted as an anniversary gift, I quickly replied "A new purse." However, Jeff was less quick when I asked what he wanted. No matter how many times I asked what he would like, he simply couldn't think of anything. So yesterday as we did some quick shopping (had to pick up a prescription for my little broken-legged Thomas), he finally decided that I could get him some eggnog, ice cream, and imitation crab meat - three of his absolute favorite foods - and use them to make him some yummy foods for our anniversary.


With the crab meat, I chose to make a delicious crab salad. This recipe was originally one for coleslaw. But a couple years ago I thought it would be fun to try crab instead of cabbage, and this delicious crab salad was born!


Crab Salad
4 cups shredded imitation crab meat (oh, alright, if you can find real crab for really cheap, you can go ahead and use that instead!)
1/2 cup sliced olives
1/4 cup chopped green pepper
1 or 2 carrots, shredded (I almost always add carrot, but today we were out, so I didn't add them)
3 tbsp. sugar
1/4 tsp. salt
Dash pepper
1/4 cup milk
1/4 cup mayonnaise
2 tsp. white vinegar
1 tbsp. lemon juice

Prep crab meat and vegetables, and set aside.

Combine sugar, salt, pepper, milk, mayonnaise, vinegar, and lemon juice. Whisk until smooth.

Add crab and vegetables and mix well.

Cover and refrigerate at least two hours before serving. This allows all the flavors to blend properly, and really makes this salad delicious!


As the main dish of our anniversary dinner, we made these delicious Sweet and Sour Pineapple Meatballs, using ground turkey instead of ground beef. In the interest of not making this long post too incredibly long, I'm not posting the recipe here, just linking to it. But here's a picture of tonight's sweet and sour goodness!


Next, what to do with the eggnog and ice cream? I thought it would be fun to make a frozen pie that incorporated cream cheese, eggnog, and softened ice cream. Doesn't that sound good? It sure did to me! As I was making this pie, I hoped that it would be good, despite the fact that it was so simple. I needn't have worried - it was incredible!


Incredible Anniversary Freezer Pie
(or Cream Cheese, Eggnog, and Ice Cream Pie;
or The Best Frozen Pie I Have Ever Ever Tasted!)

Filling:
1 package cream cheese, softened
1/3 cup sugar
1/2 cup eggnog
1/2 cup butter pecan ice cream, softened
1 9-inch graham cracker crust

Beat cream cheese and sugar until smooth. Beat in eggnog and ice cream. Pour into crust and freeze until firm. Remove from freezer 10 to 15 minutes before slicing to soften the pie. Return any uneaten portion to the freezer.


Crust:
1 1/2 cups graham cracker crumbs (I used those homemade crackers I made earlier today)
3 tbsp. sugar
3 tbsp. melted margarine

Combine all ingredients and press into bottom and sides of 9-inch pie plate.


In other business, Melissa of Mrs. Sac's Purple Kitchen has given me an award! Yippee!


** Please find at least 10 more blogs, of any kind that you love to read. Write a post about the blogs you picked, linking back to me and to them. Once you’ve posted, return here to let me know your post is done and be sure to let them know too!!! (If you don't come up with 10, that's fine too!)

Okay, here goes! I'm passing this award on to:

Southern Plate - Christy's blog is one of my favorites, and has been ever since I first discovered it. We've already made several recipes from Southern Plate, and so far every single one of them has turned out deliciously!

Megan's Munchies - Megan has been in a pumpkin phase for a while; she's enjoying Autumn as much as I am! Not only is she posting some seriously delicious-looking fall recipes, but she also is rounding up a variety of pumpkin recipes she wants to try, and boy, do they look tasty!

Real Mom Kitchen - Laura specializes in tasty recipes that are good enough to serve a regular family. Her recipes are simple and hearty, and are the kinds of food that can be enjoyed by kids and parents alike.

Mommy's Kitchen - This blog is full of delicious southern recipes that just look fabulous. Also, the little kitchen helpers, or "chefs in training," are just so adorable!

What's Cooking? - Ben's family owned a restaurant in Mexico, and he shares his love and talent for Mexican foods on his drool-inducing blog.

What's for Dinner - Marisa seems to share my love for sweets and simple meals. Her baked goods especially look fantastic.

My Kitchen Cafe - This blog could seriously win this award based solely on her Chocolate Chip Cookie Dough Cheesecake Bars. I have this recipe bookmarked and plan to make it very soon!

Tuesday, September 2, 2008

More Peach Treats


Monday and Tuesday we canned a lot of peaches. Yesterday after doing our canning, my sister and I made some more treats from the peaches that we didn't put up. Janelle chose to make a pie, and I made ice cream.

Peach Glacé Pie
6 cups peaches, peeled and sliced
2/3 cup water
2/3 cup sugar
2 tbsp cornstarch
Baked pastry shell

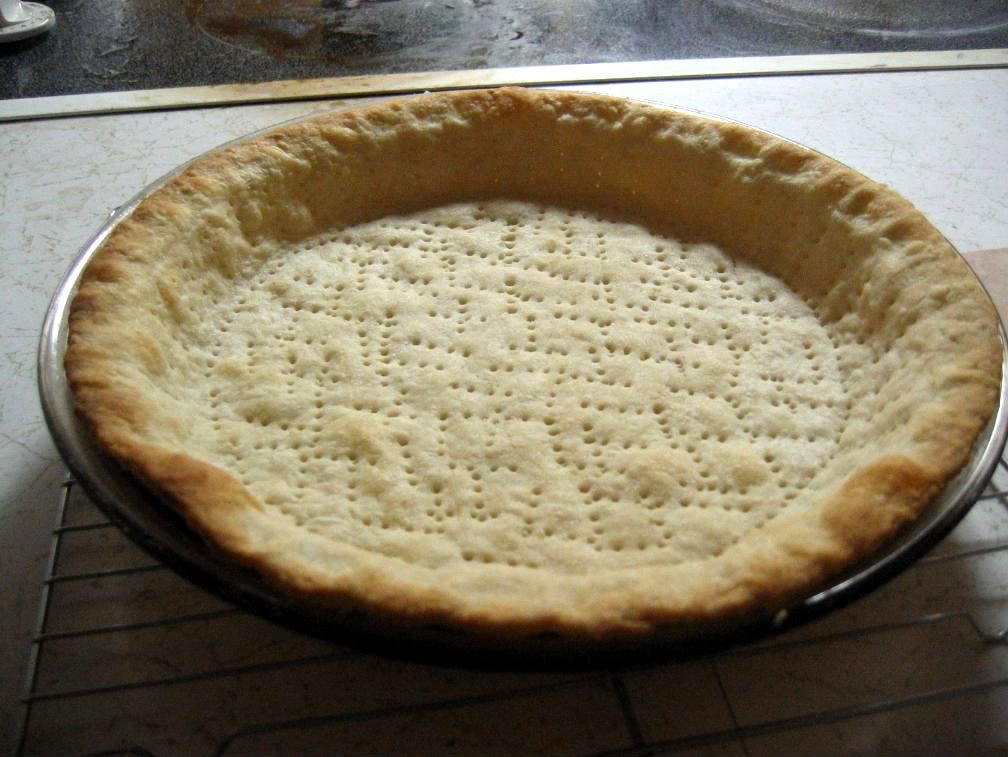
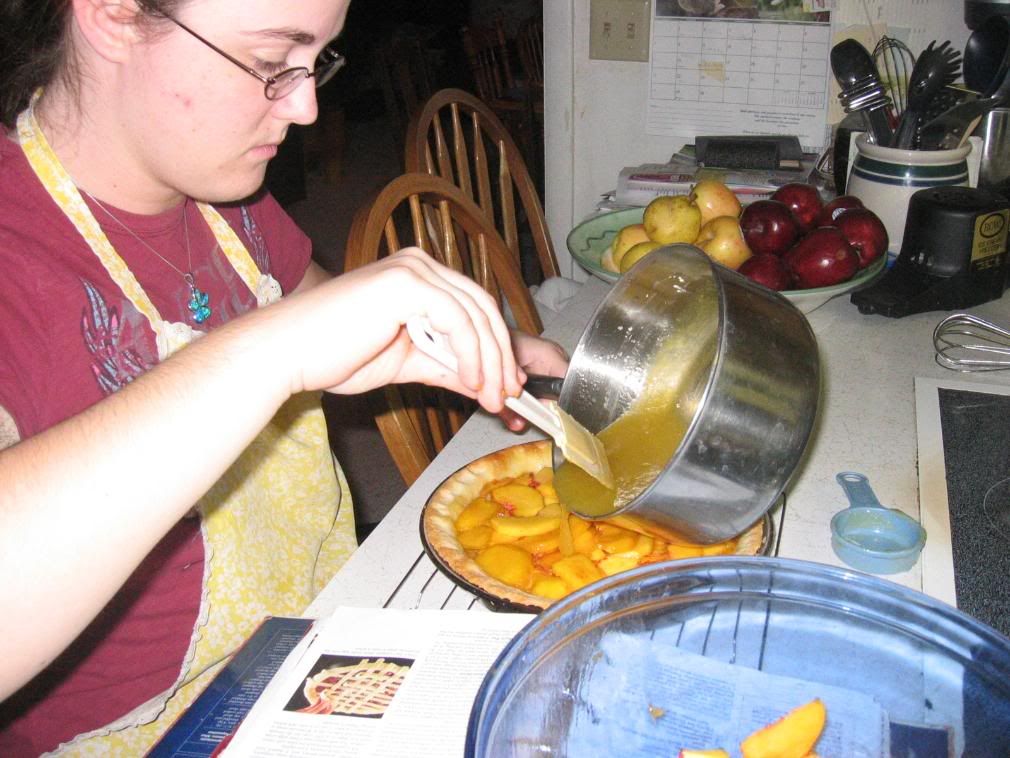
Janelle made her pastry shell from scratch. Here it is, all beautifully pricked and fresh out of the oven. Sometimes Janelle gets quite artistic about her food.


For glaze, in a blender container or food processor, combine 1 cup peaches and the water. Cover and blend or process until smooth. Add enough additional water to equal 1 1/2 cups. In a medium saucepan combine sugar and cornstarch. Stir in blended peach mixture. Cook and stir over medium heat till mixture is thickened and bubbly. Cook and stir for 2 minutes more. Cool for 10 minutes without stirring.

Spread about 1/4 cup of the glaze over bottom and sides of pastry shell. Arrange half of the remaining peaches in pastry shell. Carefully spoon half of the remaining glaze over fruit. Arrange remaining fruit over first layer. Spoon remaining glaze over fruit, covering each piece.


Chill for 1 to 2 hours. Garnish with whipped cream or serve with ice cream.


Unfortunately, the pie wasn't done chilling by the time I had to leave, so I didn't actually get to eat any of it. So if anyone makes this pie, please let me know how it turns out. Rub it in that you get to eat it and I don't.


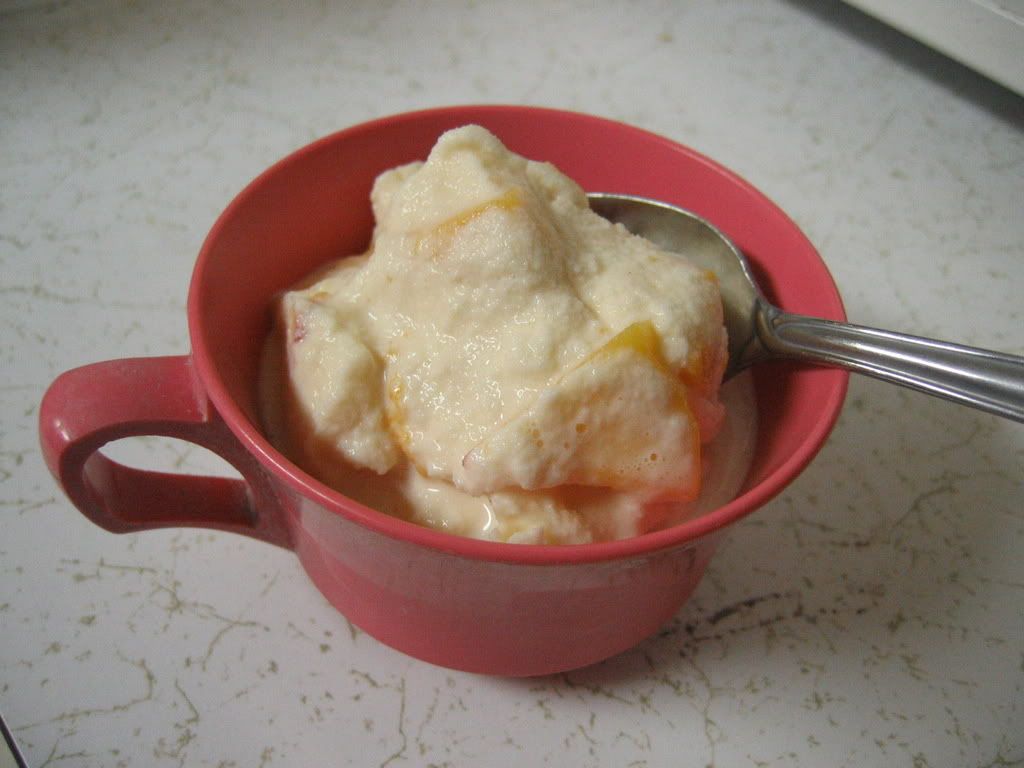
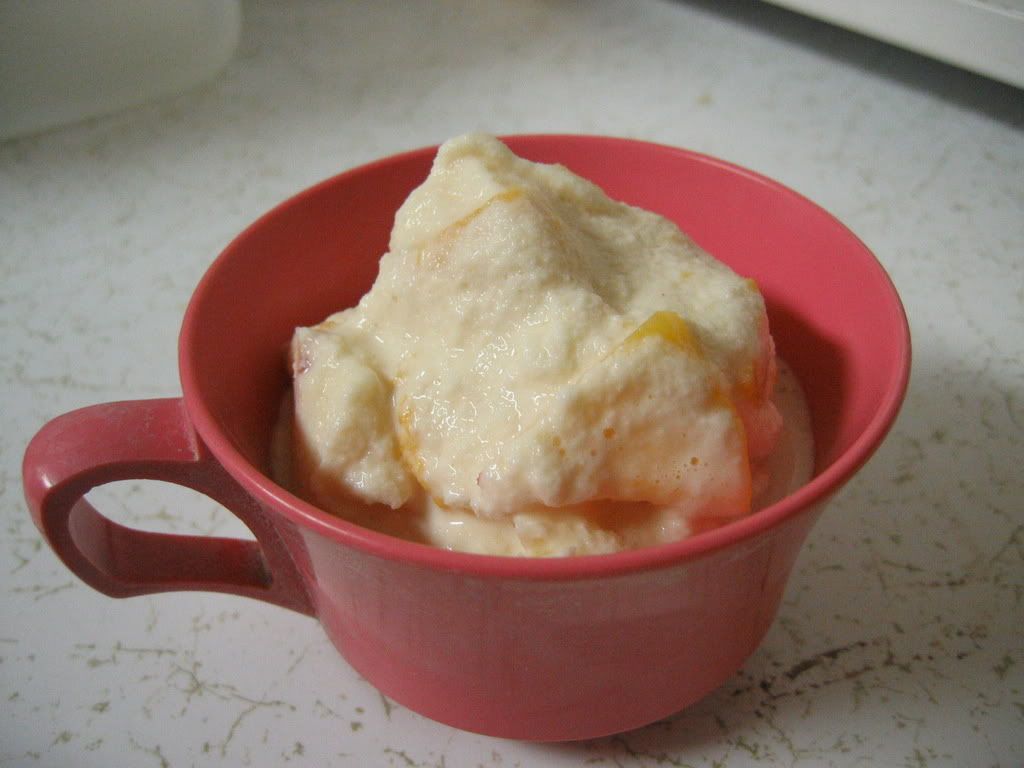
We had a lot of problems getting this ice cream to work. It's not the recipe - the recipe is absolutely delicious! It was the ice cream maker. Mom and Dad have had this ice cream maker for many many years. It's probably about as old as I am. Mom forgot to crush the ice before adding it to the machine, so the canister kept catching on pieces of ice. And as for me, with this machine it works better to add the fruit after the ice cream has frozen properly, or the machine has a hard time turning. And I added nice big chunks of peach right at the beginning with all the other ingredients. So we ended up with a thick ice cream soup. But it was really, really tasty ice cream soup!

Peach Ice Cream
2 (14 oz) cans sweetened condensed milk
5 cups milk
2 cups heavy cream
2 tsp. vanilla extract
1/2 tsp. salt
3 cups chopped peaches (or substitute fruit of choice)

Combine all ingredients in canister of ice cream maker. Freeze according to manufacturer's directions.

Sunday, August 31, 2008

Peanut Butter and Banana Gelato


Here it is, the much awaited surprise banana dish! Took me long enough, I know. But this was worth waiting for, in my opinion!

I found this fantastic recipe on What's Cooking? This gelato was easy to make and didn't require any ingredients that I didn't already have. And it tastes wonderful!


Peanut Butter and Banana Gelato
1 can evaporated milk
1 can sweetened condensed milk
1/3 cup cornstarch
2 ripe bananas
1/3 cup peanut butter
a few drops of lime juice (I was going to substitute lemon juice because I don't have lime. But I forgot. It turned out good anyway)

Mix 1/2 can evaporated and corn starch together until the starch is dissolved and the mixture smooth.

In a medium size saucepan heat the rest of the evaporated milk and condensed milk.

Smash the bananas and add them to the saucepan along with the peanut butter. Whisk constantly until all the ingredients are mixed together.

When the mixture starts to boil stir in the cornstarch and whisk stir constantly for about 3 minutes. Don’t let the mixture thicken (confession - it was hard not to let it thicken! So I settled for not letting it thicken very much. I cooked it less than 3 minutes).

Transfer to a bowl and refrigerate for at least 2 hours, preferably overnight.

Freeze following ice cream maker instructions (I don't have an ice cream maker. If you have one, definitely use it. If not, just freeze this in a large flat container and break it up in the food processor or with a spoon before serving).


This definitely had a strong peanut butter flavor, which made it harder to taste the banana. But we like peanut butter, so none of us minded at all. The cornstarch in this recipe (used instead of eggs) gave this a very silky texture, and we didn't have to worry about food safety like you do with uncooked eggs (not that that ever stops us...). I liked making this, and it will stay on my list of dishes to consider whenever we have brown bananas.

Wednesday, August 6, 2008

Root Beer Float - from scratch!


Today is National Root Beer Float Day. Most people, upon realizing this, would go to the store, buy root beer and ice cream, then go home and make root beer floats. The traditional, boring way.

Jeff and I aren't most people.

We chose to make our root beer floats entirely from scratch. So we dug out our root beer recipe, invented in ice cream-like concoction, and really made Root Beer Floats!

Root Beer
3/4 cup sugar
3/4 cup hot water
1/2 tsp. plus 1/8 tsp. root beer extract
1 liter (just over 4 cups) cold seltzer water

Dissolve sugar in water. Add root beer extract and let cool. Stir mixture into cold seltzer water. Drink immediately or refrigerate in tightly-covered container.

Not Quite Ice Cream
1 cup powdered milk
2/3 cup sugar
1/3 cup boiling water
3 tbsp. melted butter or margarine
2/3 cup milk (not powdered)

This recipe is basically my recipe for sweetened condensed milk, but with additional milk to thin it down.

Combine powdered milk, sugar, water, and butter in blender. Process until smooth. It may take a while for the powdered milk to all get incorporated, so be patient and occasionally turn off the blender to scrape the sides.

When smooth, add the regular milk and blend until incorporated.

Pour mixture into a large, flat container with a tight-fitting lid. Place in freezer for several hours. (You like all my frozen chicken that we bought for 50 cents per pound? Yeah, me too)


We left it in the freezer for 6 hours. I intended to put it through the food processor when I took it out, to make it creamy and more like ice cream. But when I removed it from the freezer, it was already spoon-able, so I didn't worry about it. I don't know if it would require the food processor if left in the freezer longer.

Just a note: This ice cream stuff has a strong powdered milk flavor. If you really can't stand the taste of powdered milk (I kinda like it, but everyone's different), you can just open up a can of sweetened condensed milk, then add the 2/3 cup regular milk and freeze as directed.


Root Beer Floats
Spoon ice cream (or Not Quite Ice Cream) into glasses. Pour root beer over ice cream. Enjoy!


Now, I don't know if this really qualifies as being the most frugal alternative for this treat. Maybe it would cost less to just buy a bottle of root beer and a half-gallon of vanilla ice cream - I didn't add up the cost for this. But you know, sometimes it's okay to sacrifice a tiny bit of tightwaddery for a lot of creativity and fun!

Friday, July 18, 2008

One Good Meal, Two Blogging Events


Today being Friday, it's time for yet another installment of Frugal Fridays. This is also my entry for my first Taste&Create event. A quick description of Taste&Create - those who want to participate e-mail the founder and administrator of Taste&Create. She matches up all the entries so each person has a partner blog. Then you get to select a recipe from your partner's blog to make and post about. They in turn choose something from your blog and do the same thing.

My partner is [eating club] vancouver, a blog created by sisters TS and JS. I had such a difficult time choosing a recipe to make! The blog is full of delicious-looking recipes, but so many call for seafood and other exotic-to-me ingredients. But after a great deal of perusing (and drooling all over my keyboard, might I add), I was able to find several recipes I could actually afford to make. I showed them to Jeff and he helped me to pick the official Taste&Create recipe for this month - Curried (Easter) Egg Salad. There are definitely other recipes I want to try very soon (Cheesecake-Marbled Brownies, anyone?), but the deliciously unique egg salad is my actual entry.

And you have to have something to serve your egg salad on, right? At first I wanted to make pita pockets, but changed my mind when I found a really awesome recipe for Savory Pull-Apart Loaf. This will be one bread I'll make again and again. It was delicious and fun to make. When you see the loaf, you'll groan at what I'm about to say, but I'll say it anyway: It's the best thing since sliced bread.

And for dessert, a simple yet delicious pineapple sorbet.

Ingredient Prices:
Eggs, 4 - $0.52
Celery, 1/2 stalk - $0.10
Mayonnaise, 1/4 cup - $0.11
Milk, 1 cup - $0.27
Butter, 2 tbsp. - $0.13
Flour, 3 1/2 cups - $0.37
Yeast, 2 tsp. - $0.15
Pineapple, 1 20-oz. can - $1.00

Ingredients with negligible price:
Curry powder (this came free, it was given to us)
Dry parsley
Salt and pepper
Sugar
Green onions (from garden)
One tiny little garden tomato, and one cherry, for garnish

Total Price: $2.65


Curried Egg Salad

3 eggs
1 tsp. curry powder
1/2 stalk celery, chopped
1 tbsp. dry parsley (I didn't have the cilantro called for, but that would be delicious!)
1/4 cup mayonnaise
Salt and pepper to taste
I also added some sliced green pepper from our garden

Boil the eggs: set in saucepan and cover with water. Bring to a rolling boil, then shut off the heat and cover the pan. Let sit for about 20 minutes. Then run the eggs under cold water until they're cooled enough to peel.

Coarsely chop eggs, then combine with remaining ingredients, and chill until serving.

Before stirring - beautiful!

After stirring - gooey and delicious!

Served nestled in lettuce atop a slice of homemade bread, this unique and flavorful egg salad completely hit the spot!


Savory Pull-Apart Loaf

1 cup milk
1 tsp. salt
1 egg
2 tbsp. unsalted butter, softened
3 1/4 cups all-purpose flour (I substituted in 3/4 cup whole wheat flour)
1 tbsp. sugar
2 tsp. active dry yeast

About 3 tbsp. Italian seasoning
1 tbsp. olive oil

Place 1st seven ingredients in bread machine in order specified by owner's manual. Program machine to dough cycle (or remove after first rise).

Grease 9x5-inch loaf pan; set aside. Turn out dough onto lightly floured surface. Divide dough into 16 equal pieces. Form each piece into ball. Cover with clean towel; let rest 5 minutes.

Flatten each ball into 4x3-inch oval. Coat both sides of dough with olive oil. Sprinkle one side of each dough oval with rounded 1/2 tsp. Italian seasoning.

Stand loaf pan on short end. Lay one piece of dough, herb-covered side down, in pan. Stack remaining 15 pieces of dough in pan so that herb-covered sides of dough are touching sides of dough not covered with herb mixture. (They look a little like pancakes, don't they?)
You can see that my pieces of dough were rolled a bit too thin - they didn't quite fill the pan.

With a little creative squishing and scooting, I got the dough to fill the pan.

Cover with towel; let rise in warm place 45 minutes.

Preheat oven to 375 degrees. Bake 35 minutes or until top of loaf is golden. Immediately remove bread from pan and cool on wire rack.


These separate into individual pieces easier if you pull them apart while the bread is still fresh and warm. The longer you wait to separate them, the more difficult it is. Also, make sure you coat the pieces of dough really well with oil, all the way to the edges, to keep the pieces from sticking together.

Like I said, the best thing since sliced bread! :-)


Pineapple Sorbet

1 can (about 20 ounces) pineapple chunks (or crushed pineapple) packed in juice

At least a few hours before you want to eat this, open the can of pineapple. Pour into a large, flat freezer-safe container. Freeze until solid.

When you're ready to make your sorbet, take the fruit out of the freezer and let it sit out for 10 minutes to soften a little. Break up into chunks, and put chunks in food processor. Process until it is creamy.

The best part about this entire menu is that it's all make-ahead! This evening when I decided it was time for dinner, all I had to do was set the table and say, "Dinner time!" All the work - baking the bread, preparing the egg salad, and freezing the pineapple - had already been done. That's my kind of meal!
Friday, July 4, 2008

Peach Sorbet


This is the easiest frozen dessert I've ever made. It was so refreshing and perfect for a hot evening. All you have to do is freeze a can of fruit and then process it in the food processor. So easy!

Peach Sorbet
1 large can peaches in heavy syrup
You could also try other fruits, like pineapple or fruit cocktail

Open the can of peaches. Pour into a large, flat freezer-safe container. Freeze until solid.

When you're ready to make your sorbet, take the fruit out of the freezer and let it sit out for 10 minutes to soften a little. Break up into chunks, and put chunks in food processor. Process until it is creamy and looks like this:


All done!

I think next time I might freeze some sugar and a pinch of salt in with the fruit, to enhance the flavors a bit, or maybe some lemon juice to make it more tart. And I definitely want to try this with pineapple!