Everyone knows it's fun to have breakfast for dinner. It's one of my personal favorites, because it's usually easy and cheap, and I just love breakfast foods. Biscuits and gravy especially seem to be delicious and appropriate any time of the day.
This recipe takes those simple biscuits and gravy just a step further - a little fancier and a little funner. But without adding a lot of extra work. This recipe originally called for canned biscuits, which I'm sure are absolutely delicious when used in this dish. I took it a little step toward tightwaddery and used homemade biscuit dough.
These biscuits and gravy turned out so yummy. The bottom layer of biscuits soak up the gravy and take on almost a dumpling texture, while the biscuits on top are browned and fluffy like typical biscuits. The gravy is just a basic sausage gravy that complements both layers of biscuits perfectly.
Biscuits and Gravy Casserole
(adapted from lemon-sugar)
2 cups flour
1 tbsp. baking powder
1 tsp. salt
2/3 cup shortening
3/4 cup milk
1/2 lb. ground sausage
3 tbsp. flour
2 1/2 cups milk
1/2 tsp. salt
1/2 tsp. black pepper
Preheat oven to 400 degrees. Prepare a small casserole dish (7x11) with cooking spray. Set aside.
Combine 2 cups flour, baking powder, and 1 tsp. salt. Cut in shortening. Stir in milk just until combined. Turn out onto floured surface and knead gently 2-3 times. Flatten with hand or rolling pin until 1/2 inch thick. Using a pizza cutter, cut into 1 1/2- or 2-inch squares.
Layer half of the biscuit squares in prepared pan. Bake for 10 minutes.
Meanwhile, prepare gravy: In a heavy skillet, cook ground sausage over medium heat until fully cooked. Sprinkle the sausage with 3 tbsp. flour. Stir flour into sausage until completely absorbed. Lower heat to medium, and cook flour/sausage mixture 3-5 minutes, stirring frequently.
Add milk, salt, and pepper; stir to combine. Stir frequently until mixture comes to a slight boil. Taste, and adjust seasonings as desired.
Pour gravy over cooked biscuits. Layer remaining uncooked biscuit squares over the gravy.
Place casserole on a baking dish, and bake for 25 minutes or until golden brown.
This soda recipe came from a book we got at the library. It's called Grandpa's Cloudy With a Chance of Meatballs Cookbook, based on the original story. It's got recipes for things like Spaghetti Twister with a Tomato Tornado, Foggy Pea Soup, Chewandswallow Chicken Legs, and Jello-O Setting in the West.
Jeff decided to mix up some Milky Maple Soda to go with dinner tonight, "just like they serve in Ralph's Roofless Restaurant."
Milky Maple Soda
Milk
Plain seltzer
1 tbsp. maple syrup
Fill 1/4 of a glass with milk. Fill the rest of the glass with seltzer, leaving a little room at the top. Add about a tablespoon of maple syrup (more or less, to your taste). Stir and slurp!
I think I added about an extra tablespoon of syrup to my glass, I like things to be sweet! Anyway, this was a fun and unique little treat.
Linking:
Link Party Palooza
Strut Your Stuff Saturday
Showing posts with label beverage. Show all posts
Friday, July 25, 2014
Thursday, October 10, 2013
My Kitchen My World - Tonga
I wanted to participate in My Kitchen My World last month - I pinned several recipes from Great Britain that looked fun and yummy. But last month we started renovating our kitchen, and it just didn't happen. Go figure - remove the kitchen sink, counters, cabinets, and any semblance of a working kitchen, and suddenly I don't feel like making fancy foreign foods.
But even though we've been working on this kitchen renovation for about a month now and it still looks awful, I just had to participate this month. Tonga was my choice of country to visit in October. Torn-up kitchen or no, I had to make a delicious Tongan meal to share!
I chose Tonga as this month's MKMW destination because we have a lot of Tongan friends and church acquaintances in our neighborhood. I have grown to love the Polynesian culture, including and especially the food!
In Tonga, a common traditional cooking method is an underground earthen oven, called an umu. A common meal is meat and coconut, and sometimes vegetables, wrapped in taro leaves and baked in the umu. The taro leaves are called lu. The main dish I chose to make is called lu pulu, which is lu with beef.
The recipe I used is from the family of John Groberg. He is sort of famous in the Mormon church for serving a mission in Tonga in the 1950's, and writing about his experiences (a movie was even made about it). This is a simplified, Americanized version of lu pulu, using spinach and aluminum foil in place of taro leaves. The recipe also calls for mayonnaise, but I chose to use cream of coconut instead, as being closer to tradition.
Lu Pulu
3 bunches spinach, washed, drained, and stemmed
1 12-oz can corned beef
1 onion, chopped
1 tomato, chopped (optional)
Salt and pepper to taste
5 tbsp cream of coconut (found in the drink mixer section of grocery stores, use mayonnaise instead if you prefer)
19-inch sheet of aluminum foil
Fold foil in half and lay flat. Lay spinach leaves over it, then top with chopped corned beef, onion, tomato, and salt and pepper. Spread with cream of coconut or mayonnaise. Gather edges of foil up and twist at the top to make a tight package. Place in a baking pan. Bake at 350 for 1 hour.
Open foil, mix the ingredients a little, and serve over sweet potatoes, which can be baked in the same oven.
This stuff is pretty yummy! It was very simple to make. Except for opening the can of corned beef. For some reason, my can didn't come with the little key to open it. I had to grab the tab with a vice grip I had lying around, and try to wrench it open. That worked for about half the can, then it broke off. Then I tried to use my super strong kitchen shears to cut the can open the rest of the way. I'm lucky I still have all my fingers! Eventually I just embraced the half-openness of the can and painstakingly scooped the meat out with a spoon.
Anyway, moving on! A popular drink in Tonga is called something called otai. It is typically made up of watermelon pulp and coconut milk. Other fruits are sometimes added to it. When I went to buy ingredients for this meal, I quickly was reminded that watermelon is not in season! I got a small plastic container of watermelon and supplemented with crushed pineapple. Usually otai should be much more pink than this! This recipe made a very chunky drink - we ate it as much as we drank it. But it was still quite yummy! Next time I would probably pull out the blender and give it a whirl.
Otai
3 cups grated watermelon
1 can crushed pineapple (do not drain)
1/2 cup shredded coconut
1/2 cup cream of coconut (this wasn't in the recipe I used, but I figured I had already opened the can for the lu pulu and I might as well add it to the otai)
1 can evaporated milk
2 cans of water (use the evaporated milk can)
Juice of 1/2 lime
Combine all ingredients in pitcher or large bowl. Process in blender if desired. Chill before serving.
As a little bonus, here is a picture of what my kitchen looked like when I made this meal. Yeah, it's scary.
And if anyone is interested, you can visit my other blog to read about our kitchen remodel.
But even though we've been working on this kitchen renovation for about a month now and it still looks awful, I just had to participate this month. Tonga was my choice of country to visit in October. Torn-up kitchen or no, I had to make a delicious Tongan meal to share!
I chose Tonga as this month's MKMW destination because we have a lot of Tongan friends and church acquaintances in our neighborhood. I have grown to love the Polynesian culture, including and especially the food!
In Tonga, a common traditional cooking method is an underground earthen oven, called an umu. A common meal is meat and coconut, and sometimes vegetables, wrapped in taro leaves and baked in the umu. The taro leaves are called lu. The main dish I chose to make is called lu pulu, which is lu with beef.
The recipe I used is from the family of John Groberg. He is sort of famous in the Mormon church for serving a mission in Tonga in the 1950's, and writing about his experiences (a movie was even made about it). This is a simplified, Americanized version of lu pulu, using spinach and aluminum foil in place of taro leaves. The recipe also calls for mayonnaise, but I chose to use cream of coconut instead, as being closer to tradition.
Lu Pulu
3 bunches spinach, washed, drained, and stemmed
1 12-oz can corned beef
1 onion, chopped
1 tomato, chopped (optional)
Salt and pepper to taste
5 tbsp cream of coconut (found in the drink mixer section of grocery stores, use mayonnaise instead if you prefer)
19-inch sheet of aluminum foil
Fold foil in half and lay flat. Lay spinach leaves over it, then top with chopped corned beef, onion, tomato, and salt and pepper. Spread with cream of coconut or mayonnaise. Gather edges of foil up and twist at the top to make a tight package. Place in a baking pan. Bake at 350 for 1 hour.
Open foil, mix the ingredients a little, and serve over sweet potatoes, which can be baked in the same oven.
This stuff is pretty yummy! It was very simple to make. Except for opening the can of corned beef. For some reason, my can didn't come with the little key to open it. I had to grab the tab with a vice grip I had lying around, and try to wrench it open. That worked for about half the can, then it broke off. Then I tried to use my super strong kitchen shears to cut the can open the rest of the way. I'm lucky I still have all my fingers! Eventually I just embraced the half-openness of the can and painstakingly scooped the meat out with a spoon.
Anyway, moving on! A popular drink in Tonga is called something called otai. It is typically made up of watermelon pulp and coconut milk. Other fruits are sometimes added to it. When I went to buy ingredients for this meal, I quickly was reminded that watermelon is not in season! I got a small plastic container of watermelon and supplemented with crushed pineapple. Usually otai should be much more pink than this! This recipe made a very chunky drink - we ate it as much as we drank it. But it was still quite yummy! Next time I would probably pull out the blender and give it a whirl.
Otai
3 cups grated watermelon
1 can crushed pineapple (do not drain)
1/2 cup shredded coconut
1/2 cup cream of coconut (this wasn't in the recipe I used, but I figured I had already opened the can for the lu pulu and I might as well add it to the otai)
1 can evaporated milk
2 cans of water (use the evaporated milk can)
Juice of 1/2 lime
Combine all ingredients in pitcher or large bowl. Process in blender if desired. Chill before serving.
As a little bonus, here is a picture of what my kitchen looked like when I made this meal. Yeah, it's scary.
And if anyone is interested, you can visit my other blog to read about our kitchen remodel.
Sunday, December 19, 2010
Russian Refresher
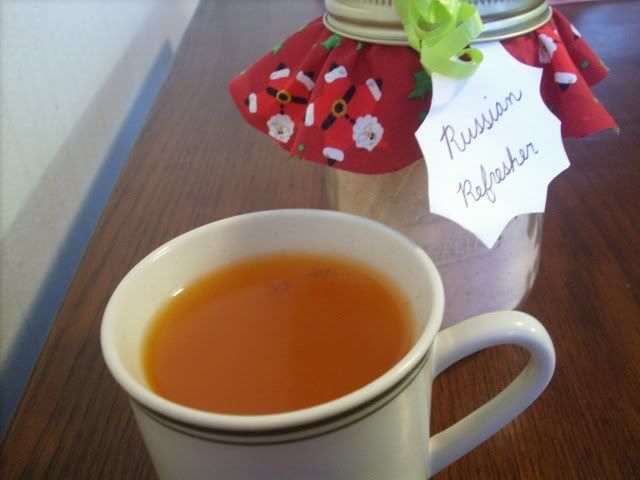
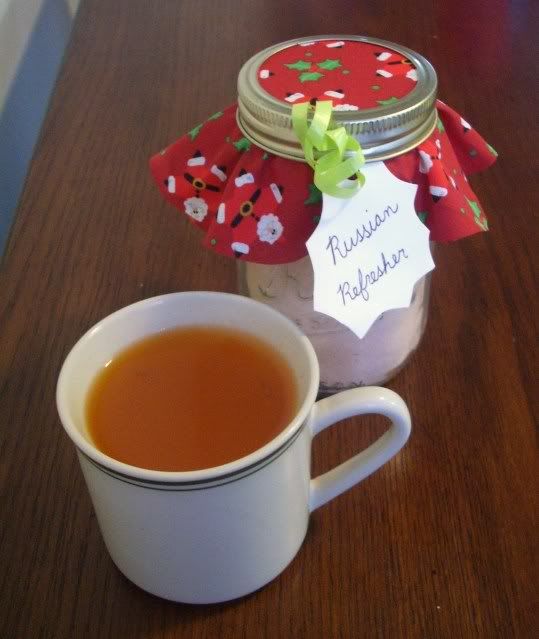
I've had this recipe for quite a while, and we like to make it every winter. It's called Russian Refresher because it's similar to Russian chai, or tea. But this has no tea in it, it's just a spiced citrus punch that is served hot. Jeff and I sometimes like to call it Citrus Cider. This recipe makes about 3 1/2 cups of powdered mix, which you can use to make individual servings of this hot, refreshing drink.

Russian Refresher Mix
2 cups powdered orange drink mix
1 pkg (3 oz) presweetened powdered lemonade mix*
1 1/3 cup sugar
1/2 tsp. ground cloves
1 tsp. ground cinnamon
*I like to buy a larger container of lemonade mix and just measure out 3 ounces, because it ends up cheaper per ounce. Then I still have most of the container left for making plain lemonade.
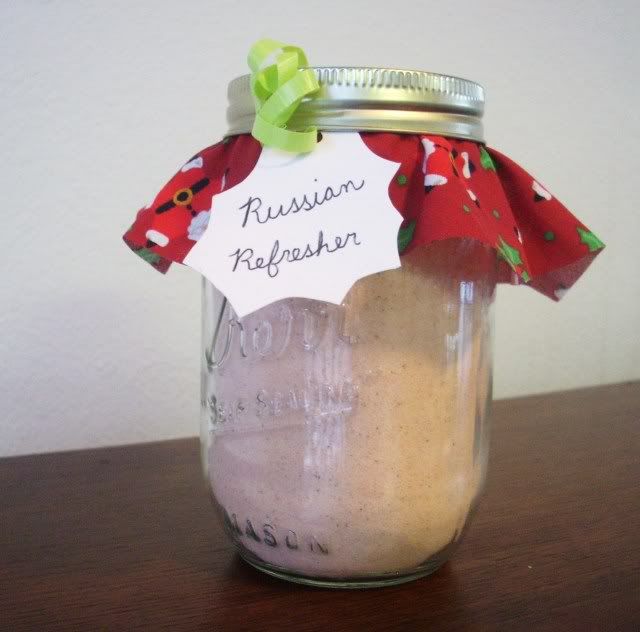
Combine all ingredients in a medium bowl. Mix well. Put in a 1-quart container. Label as Russian Refresher Mix and store in a cool, dry place. Use within 6 months. Makes about 3 1/2 cups of mix.
RUSSIAN REFRESHER: Add 2 to 3 teaspoons of RUSSIAN REFRESHER MIX to 1 cup hot water. Stir to dissolve. Makes 1 serving.

This mix would make a good last-minute Christmas gift for neighbors or family. I also have several other gift mix recipes that make good gifts; they can be found in this post.

Russian Refresher Mix
2 cups powdered orange drink mix
1 pkg (3 oz) presweetened powdered lemonade mix*
1 1/3 cup sugar
1/2 tsp. ground cloves
1 tsp. ground cinnamon
*I like to buy a larger container of lemonade mix and just measure out 3 ounces, because it ends up cheaper per ounce. Then I still have most of the container left for making plain lemonade.
Combine all ingredients in a medium bowl. Mix well. Put in a 1-quart container. Label as Russian Refresher Mix and store in a cool, dry place. Use within 6 months. Makes about 3 1/2 cups of mix.
RUSSIAN REFRESHER: Add 2 to 3 teaspoons of RUSSIAN REFRESHER MIX to 1 cup hot water. Stir to dissolve. Makes 1 serving.

This mix would make a good last-minute Christmas gift for neighbors or family. I also have several other gift mix recipes that make good gifts; they can be found in this post.
Thursday, December 24, 2009
Eggnog
Happy National Eggnog Day, everyone! Oh yeah, and Happy Christmas Eve too. :-)
Eggnog is one of my favorite beverages ever. So rich and creamy, and perfect for holiday sipping. I wanted to buy some the other day when I went shopping, but was appalled to see that a gallon of eggnog cost over $7! However, whole milk was on sale for $1.66/gallon. So I picked up some milk and eggs and determined to make my own eggnog. I found this recipe on allrecipes.com. It was simple to make, and turned out so delicious! I won't go so far as to say I'll never buy eggnog again, but I definitely will make this recipe again.
Eggnog
6 eggs
1 14-oz. can sweetened condensed milk
1 quart milk
1/3 pint heavy whipping cream (I cheated and used whipped topping)
1 pinch ground nutmeg
1 pinch salt
Beat eggs; mix in condensed milk, vanilla, quart of milk and salt.
Beat the whipping cream until soft peaks form. Fold in to egg and milk mixture and sprinkle with nutmeg. Serve chilled.
Eggnog is one of my favorite beverages ever. So rich and creamy, and perfect for holiday sipping. I wanted to buy some the other day when I went shopping, but was appalled to see that a gallon of eggnog cost over $7! However, whole milk was on sale for $1.66/gallon. So I picked up some milk and eggs and determined to make my own eggnog. I found this recipe on allrecipes.com. It was simple to make, and turned out so delicious! I won't go so far as to say I'll never buy eggnog again, but I definitely will make this recipe again.
Eggnog
6 eggs
1 14-oz. can sweetened condensed milk
1 quart milk
1/3 pint heavy whipping cream (I cheated and used whipped topping)
1 pinch ground nutmeg
1 pinch salt
Beat eggs; mix in condensed milk, vanilla, quart of milk and salt.
Beat the whipping cream until soft peaks form. Fold in to egg and milk mixture and sprinkle with nutmeg. Serve chilled.
Monday, September 15, 2008
Cocoa Mix / Chocolate Milk
I have a guest blogger today - my dear hubby Jeff. He made this yummy treat and wrote up this post.
This is Jeff here.
Stephanie recently came home from an enrichment activity where they were shown recipes and uses for powdered milk. One of the recipes was for hot chocolate mix and it mentioned that you could also chill it.
I love chocolate milk and this recipe rules! This is the second time that I made it. The first time I only made a half gallon (big mistake - it was too good to only make a half gallon). This time I made a whole gallon. It's good warm, it's good cold. Try it, enjoy it, love it.

Instant Cocoa Mix
4 cups instant powdered milk
1 cup sugar
1/2 cup cocoa
1 cup non-dairy creamer (optional)
2 tsp vanilla
1/8 tsp salt
To make cocoa mix - Combine ingredients and store until ready to use. Add 1/3 cup mix to 1 1/2 cups hot water.
To make chocolate milk - Mix together 11 cups of water, powdered milk, sugar, cocoa, creamer, vanilla and salt in a medium saucepan with a wire whisk. Heat on medium until warm, just before boiling. Don't let the mixture boil or you'll scald the milk. Pour into a gallon sized container and chill in the refrigerator. Mix before serving each time as the mixture will settle.

Sorry, I just had to include this picture. I just got my Clinical Laboratory Science diploma, and wanted to display it!
This is Jeff here.
Stephanie recently came home from an enrichment activity where they were shown recipes and uses for powdered milk. One of the recipes was for hot chocolate mix and it mentioned that you could also chill it.
I love chocolate milk and this recipe rules! This is the second time that I made it. The first time I only made a half gallon (big mistake - it was too good to only make a half gallon). This time I made a whole gallon. It's good warm, it's good cold. Try it, enjoy it, love it.
Instant Cocoa Mix
4 cups instant powdered milk
1 cup sugar
1/2 cup cocoa
1 cup non-dairy creamer (optional)
2 tsp vanilla
1/8 tsp salt
To make cocoa mix - Combine ingredients and store until ready to use. Add 1/3 cup mix to 1 1/2 cups hot water.
To make chocolate milk - Mix together 11 cups of water, powdered milk, sugar, cocoa, creamer, vanilla and salt in a medium saucepan with a wire whisk. Heat on medium until warm, just before boiling. Don't let the mixture boil or you'll scald the milk. Pour into a gallon sized container and chill in the refrigerator. Mix before serving each time as the mixture will settle.
Sorry, I just had to include this picture. I just got my Clinical Laboratory Science diploma, and wanted to display it!
Wednesday, August 6, 2008
Root Beer Float - from scratch!
Today is National Root Beer Float Day. Most people, upon realizing this, would go to the store, buy root beer and ice cream, then go home and make root beer floats. The traditional, boring way.
Jeff and I aren't most people.
We chose to make our root beer floats entirely from scratch. So we dug out our root beer recipe, invented in ice cream-like concoction, and really made Root Beer Floats!
Root Beer
3/4 cup sugar
3/4 cup hot water
1/2 tsp. plus 1/8 tsp. root beer extract
1 liter (just over 4 cups) cold seltzer water
Dissolve sugar in water. Add root beer extract and let cool. Stir mixture into cold seltzer water. Drink immediately or refrigerate in tightly-covered container.
Not Quite Ice Cream
1 cup powdered milk
2/3 cup sugar
1/3 cup boiling water
3 tbsp. melted butter or margarine
2/3 cup milk (not powdered)
This recipe is basically my recipe for sweetened condensed milk, but with additional milk to thin it down.
Combine powdered milk, sugar, water, and butter in blender. Process until smooth. It may take a while for the powdered milk to all get incorporated, so be patient and occasionally turn off the blender to scrape the sides.
When smooth, add the regular milk and blend until incorporated.
Pour mixture into a large, flat container with a tight-fitting lid. Place in freezer for several hours. (You like all my frozen chicken that we bought for 50 cents per pound? Yeah, me too)
We left it in the freezer for 6 hours. I intended to put it through the food processor when I took it out, to make it creamy and more like ice cream. But when I removed it from the freezer, it was already spoon-able, so I didn't worry about it. I don't know if it would require the food processor if left in the freezer longer.
Just a note: This ice cream stuff has a strong powdered milk flavor. If you really can't stand the taste of powdered milk (I kinda like it, but everyone's different), you can just open up a can of sweetened condensed milk, then add the 2/3 cup regular milk and freeze as directed.
Root Beer Floats
Spoon ice cream (or Not Quite Ice Cream) into glasses. Pour root beer over ice cream. Enjoy!
Now, I don't know if this really qualifies as being the most frugal alternative for this treat. Maybe it would cost less to just buy a bottle of root beer and a half-gallon of vanilla ice cream - I didn't add up the cost for this. But you know, sometimes it's okay to sacrifice a tiny bit of tightwaddery for a lot of creativity and fun!
Tuesday, July 8, 2008
Peanut Butter 'n' Jelly Shakes
This is a Taste of Home recipe I came across a few days ago. It looked really tasty and fun, so I decided I'd give it a go. I'm glad I did. This was a yummy, frothy, smooth drink that both Zaylee and I really enjoyed. She's still slurping hers up right now, actually - savoring every little dribble!
I substituted the milk called for with dry milk. We have a lot of powdered milk right now, and are running low on regular milk. A shake is the perfect use for powdered milk if you don't care for the taste - especially a shake like this, where the peanut butter and banana flavors totally mask the flavor of the milk.
Peanut Butter 'n' Jelly Shakes
2 cups milk (or 2/3 cup dry milk and 1 3/4 cup water)
1 ripe banana, sliced
2 tbsp. peanut butter
2 tbsp. jam, jelly, or preserves, any flavor
1/2 tsp. vanilla
*Cheap tip: We never use real vanilla extract - vanilla flavoring is much cheaper and tastes exactly the same.*
In a blender, place all ingredients; cover and process for 3 minutes or until smooth. Pour into chilled glasses; serve immediately.
If you want your shake extra frothy and cold, toss in some ice cubes as well.
Tuesday, June 3, 2008
Citric Acid Lemonade
As per request, here is the recipe that my family uses to make this special-occasion lemonade. It's really simple, and really good!
2 cups sugar
1 tbsp. citric acid
1 tbsp. lemon extract
1 gallon water
Mix it all together and serve!
2 cups sugar
1 tbsp. citric acid
1 tbsp. lemon extract
1 gallon water
Mix it all together and serve!
Subscribe to:
Posts (Atom)