It seems that all I'm posting lately is my monthly submission for My Kitchen My World. I need to get on the ball and post other things! Especially since MKMW is going to be taking a break for a while. Participation has not been very high for the past several months. My family and I have really been enjoying the opportunity/excuse to make something fun from a different country each month, we've tried a lot of things we otherwise wouldn't have.
Israel was originally assigned for April, but due to lack of participation it was moved to June to give everyone a chance to try again. The funny thing is, I actually made this meal back in April, but never got around to blogging it. Now here it is all the way into July, and I'm finally putting these delicious recipes up onto the blog. I might be a little bit of a procrastinator...
I chose to make falafel, a popular Israeli street food. We served it with pita bread, yogurt sauce, and fresh tomatoes, cucumber, and lettuce. Super yummy! The whole family liked the little fried balls of seasoned chickpeas, the pita bread was soft and delicious, the yogurt sauce brought it all together. All in all a great meal.
Falafel
(from This American Bite)
2 1/2 cups cooked chickpeas
1 onion, chopped
1/2 cup parsley (used 2 tbsp. dried parsley)
6 cloves garlic (used equivalent in bottled minced garlic)
4 tsp. cumin
2 tsp. coriander
2 tsp. za'atar (substituted thyme)
1 tsp. black pepper
1 tsp. salt
Juice of 1 lemon
1/4 cup whole wheat flour
1 egg
With the exception of the flour and egg, put all of the ingredients into the food processor. Rather than running the food processor continuously, pulse the ingredients three or four times until the ingredients are minced, but not pureed.
Transfer the falafel mixture into a non-metallic bowl and add 1/4 cup of flour and one egg to bind the mixture. Mix the flour and egg well so you don’t get any flour pockets.
Using a teaspoon, scoop 1.5 tsp of the falafel mix into your hands then use the spoon to mold them into a ball shape. Press the mixture so that it is firm – this will prevent them from disintegrating when you fry them.
Using any pot or dutch oven, fill it with a neutral oil, like canola, vegetable or grapeseed oil and use a chef basket. If you have a candy thermometer, wait until the oil reaches 350 degrees before frying putting the falafel balls into the hot oil to fry. If you do not have a candy thermometer, you can put one of your falafel balls into the oil, if it’s not hot enough it won’t cook and it may start to disintegrate.
When you are sure the oil is hot enough, gently place the falafel balls into the hot oil. Don’t crowd the falafel, let them swim in the oil for two minutes, until golden brown. If the top of the falafel float above the oil, turn them with a spoon then fry for another minute. The falafel will cook quickly at this size, so be ready with a plate covered with a sheet of paper kitchen towel to soak up excess oil once cooked.
Best served fresh from the oil, but you can reheat them in a warm oven (no hotter than 250 degrees).
Pita Bread
(from Annie's Eats)
3 cups flour, plus 1/2-3/4 cup more as needed
1 ½ tsp. salt
1 tbsp. sugar or honey
1 packet instant yeast
1 ¼ to 1 ½ cups water, roughly at room temperature
2 tbsp. olive oil, vegetable oil, butter or shortening
Mix the yeast in with the flour, salt, and sugar. Add the olive oil and 1 ¼ cup water and stir together with a wooden spoon. All of the ingredients should form a ball. If some of the flour will not stick to the ball, add more water.
Once all of the ingredients form a ball, place the ball on a work surface, and knead the dough for approximately 10 minutes. If you are using an electric mixer, mix it at low speed for 10 minutes.
As the dough is mixing, continue to add flour, a tablespoon or two at a time, until the dough clears the sides of the bowl and is tacky but not sticky.
When you are done kneading the dough, place it in a bowl that has been lightly coated with oil. Form a ball out of the dough and place it into the bowl, rolling the dough around so that it has a light coat of oil on all sides. Cover the bowl with plastic wrap or a damp towel and set aside to rise until it has doubled in size, approximately 90 minutes.
When it has doubled in size, punch the dough down to release some of the trapped gases and divide it into 8 equal pieces. Roll each piece into a ball, cover the balls with a damp kitchen towel, and let them rest for 20 minutes. This step allows the dough to relax so that it will be easier to shape.
After the dough has relaxed for 20 minutes, spread a light coating of flour on a work surface and place one of the balls of dough there. Sprinkle a little bit of flour on top of the dough and use a rolling pin or your hands to stretch and flatten the dough. You should be able to roll it out to between ¼ – 1/8” thick – 6 inches in diameter. If the dough does not stretch sufficiently, you can cover it with the damp towel and let it rest 5-10 minutes before trying again.
Place discs on a lightly greased baking sheet or parchment paper and let rise, uncovered, until barely doubled in thickness, about 30-45 minutes.
While the discs are rising, preheat the oven to 450°. If you have a
baking stone, put it in the oven to preheat as well. If you do not have a
baking stone, turn a cookie sheet upside down and
place it on the middle rack of the oven while it is preheating. This
will be the surface on which you bake your pitas.
Open the oven and place as many pitas as you can fit on the hot baking surface. They should be baked through and puffy after 3 minutes. You may need to let the baking surface reheat for a minute or two
between batches - if the surface isn't hot enough a pocket will not
form. If you want your pitas to be crispy and brown you can bake them for an additional 3 to 5 minutes, but it isn’t necessary.
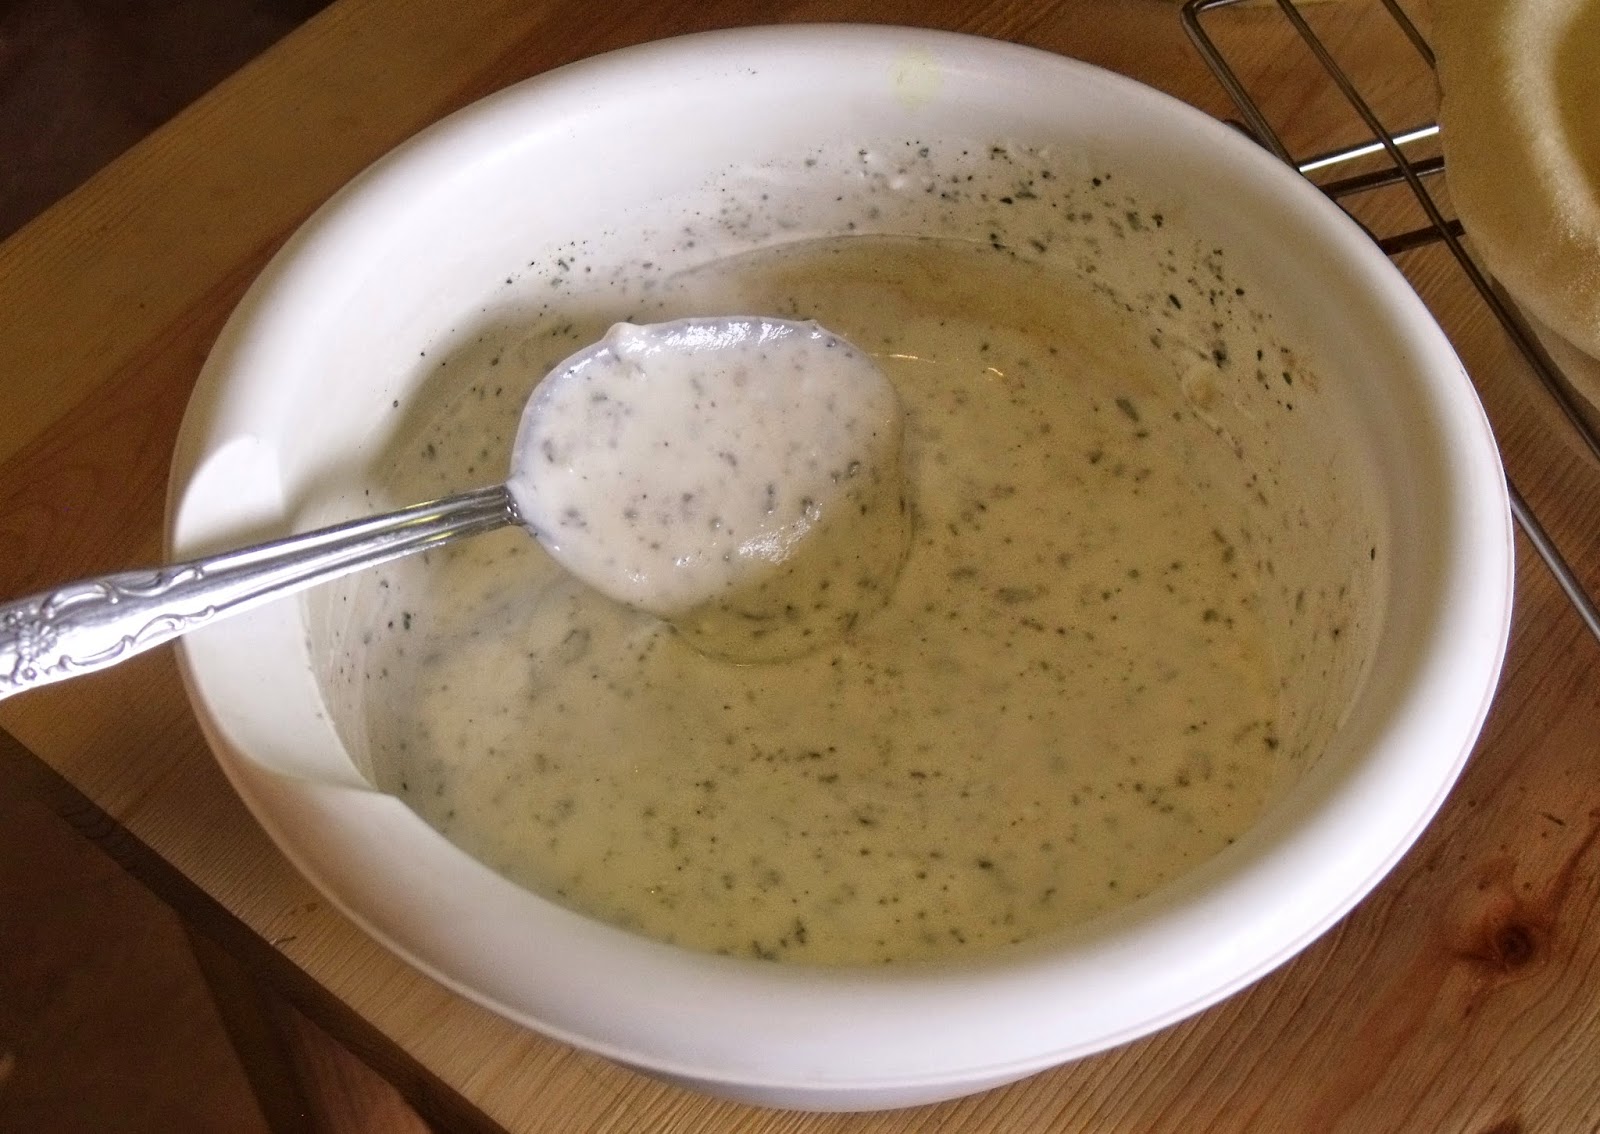
For the yogurt sauce, I remember that I used elements from various recipes to create it, but it was two months ago and I don't remember exactly how I made it! So this is sort of a guess about the general ingredients and quantities...
Yogurt Sauce
1 cup plain yogurt
1 tsp. onion powder
1 tsp. minced garlic
2 tsp. dried mint, crushed
1 tsp. dried oregano
Salt and pepper to taste
Combine in a small bowl. Chill for at least a couple of hours.
Serve falafel inside pita pockets with yogurt sauce, sliced tomatoes and cucumbers, and shredded lettuce. Enjoy!
Linking to Tatertots and Jello
Showing posts with label dry beans. Show all posts
Tuesday, July 1, 2014
Tuesday, April 1, 2014
My Kitchen My World - Belize
Belize was the MKMW country for March. I know that I'm posting in April, but since we made and ate this meal yesterday, technically it still counts for March.
Belize is a small country in Central America, between Mexico, Guatemala, and the Caribbean Sea. The food is similar to both Mexican and Jamaican/Anglo-Caribbean cuisine.
One of the basic staples of Belizean cuisine is stewed chicken served with beans and rice. The recipe I found for the chicken does not use recado (a Mayan spice blend), and the beans and rice use coconut milk. This was a delicious meal. My favorite part was the sauce made from the pan drippings. The onions just melted into the chicken drippings, and it all came together to make a very flavorful gravy that I really enjoyed.
Belizean Stewed Chicken
(from Belize News Post)
4 lbs of chicken cut into pieces, drumsticks and thighs seem to work best, bone in (I used two leg quarters)
1 tsp salt, or to taste
1 tsp pepper, or to taste
1 1/2 tablespoons dried thyme
2 cloves garlic, finely chopped
2 tablespoons oil, or enough to just cover the bottom of the pot
1 small yellow or Spanish onion, chopped
2 tablespoons flour, mixed with 2 tablespoons water (I used extra water, it was too thick at first)
Mix salt, pepper, thyme, and garlic (garlic powder can be substituted) creating a rub. Season chicken with salt, pepper, thyme and garlic mixture.
Heat two tablespoons (or enough to fully cover the bottom of the pan) of oil in large dutch oven or stewing pot over moderately high heat.
Place the chicken in the pan starting skin down. Brown chicken, turning pieces once, about 5 minutes per side.
As chicken browns, add onions, cover pan and simmer on low heat for 10 to 15 minutes so chicken will stew. Recipes vary on the amount of time, many call for 1-2 hours of stewing. Make sure your chicken is fully cooked before enjoying! (Mine stewed for about half an hour before the chicken was done).
After the chicken has finished cooking add a few teaspoons of water to skillet and the flour to thicken the gravy.
Belizean Beans and Rice
(adapted from Belize News Post)
1 large can beans (I used a combination of several types, including black, navy, and pinto)
1/2 tsp pepper
1/2 tsp thyme
1 tsp salt
2 cloves garlic, chopped
1 medium onion, sliced
1 cup coconut milk
2 lbs. rice (I only used 1 1/2 cups, whatever that ends up weighing)
Season beans with black pepper, thyme, and salt. Add coconut milk and 3 cups water. Stir and taste. Let boil.
Add rice to seasoned beans. Stir, then cover. Cook until water is absorbed or rice is tender. If necessary, add more water gradually until rice is tender.
Belize is a small country in Central America, between Mexico, Guatemala, and the Caribbean Sea. The food is similar to both Mexican and Jamaican/Anglo-Caribbean cuisine.
One of the basic staples of Belizean cuisine is stewed chicken served with beans and rice. The recipe I found for the chicken does not use recado (a Mayan spice blend), and the beans and rice use coconut milk. This was a delicious meal. My favorite part was the sauce made from the pan drippings. The onions just melted into the chicken drippings, and it all came together to make a very flavorful gravy that I really enjoyed.
Belizean Stewed Chicken
(from Belize News Post)
4 lbs of chicken cut into pieces, drumsticks and thighs seem to work best, bone in (I used two leg quarters)
1 tsp salt, or to taste
1 tsp pepper, or to taste
1 1/2 tablespoons dried thyme
2 cloves garlic, finely chopped
2 tablespoons oil, or enough to just cover the bottom of the pot
1 small yellow or Spanish onion, chopped
2 tablespoons flour, mixed with 2 tablespoons water (I used extra water, it was too thick at first)
Mix salt, pepper, thyme, and garlic (garlic powder can be substituted) creating a rub. Season chicken with salt, pepper, thyme and garlic mixture.
Heat two tablespoons (or enough to fully cover the bottom of the pan) of oil in large dutch oven or stewing pot over moderately high heat.
Place the chicken in the pan starting skin down. Brown chicken, turning pieces once, about 5 minutes per side.
As chicken browns, add onions, cover pan and simmer on low heat for 10 to 15 minutes so chicken will stew. Recipes vary on the amount of time, many call for 1-2 hours of stewing. Make sure your chicken is fully cooked before enjoying! (Mine stewed for about half an hour before the chicken was done).
After the chicken has finished cooking add a few teaspoons of water to skillet and the flour to thicken the gravy.
Belizean Beans and Rice
(adapted from Belize News Post)
1 large can beans (I used a combination of several types, including black, navy, and pinto)
1/2 tsp pepper
1/2 tsp thyme
1 tsp salt
2 cloves garlic, chopped
1 medium onion, sliced
1 cup coconut milk
2 lbs. rice (I only used 1 1/2 cups, whatever that ends up weighing)
Season beans with black pepper, thyme, and salt. Add coconut milk and 3 cups water. Stir and taste. Let boil.
Add rice to seasoned beans. Stir, then cover. Cook until water is absorbed or rice is tender. If necessary, add more water gradually until rice is tender.
Labels:
dry beans,
My Kitchen My World,
poultry,
rice and other grains
Monday, May 20, 2013
Turkey Chili
A while back, Jeff bought three huge turkeys, because they were super cheap. Thank goodness we have a large freezer downstairs! Anyway, several days ago we cooked one of the turkeys, and of course we boiled up the carcass into some fantastic turkey broth. This dish was a great way to use some of the broth and leftover turkey. It also takes advantage of the fact that fresh cilantro is really inexpensive this time of year. This chili has a delicious flavor and, being a bit lighter than traditional chili, is a great meal for a spring evening.
I may or may not have eaten three bowls in one sitting.
Turkey Chili
1 onion, chopped
1 green pepper, chopped
2 tsp minced garlic
1 tbsp oil
3 cups turkey broth
2 cans beans, drained, or equivalent beans cooked from dry (I used black beans and soy beans)
1 can corn, drained
1/4 cup fresh cilantro, chopped
1/2 tsp salt
1 tsp cumin
1 tsp dried oregano
2 tbsp lemon juice
3 cups chopped turkey
Cook onion, green pepper, and garlic in oil until tender. Add remaining ingredients. Bring to a boil, then reduce heat and simmer about 20 minutes.
If you like your chili spicy, you can add some canned chilies, or some hot sauce.
Linked to:
Weekend Wrap-Up Party at tatertots & jello
Think Tank Thursday at Joyful Homemaking
I may or may not have eaten three bowls in one sitting.
Turkey Chili
1 onion, chopped
1 green pepper, chopped
2 tsp minced garlic
1 tbsp oil
3 cups turkey broth
2 cans beans, drained, or equivalent beans cooked from dry (I used black beans and soy beans)
1 can corn, drained
1/4 cup fresh cilantro, chopped
1/2 tsp salt
1 tsp cumin
1 tsp dried oregano
2 tbsp lemon juice
3 cups chopped turkey
Cook onion, green pepper, and garlic in oil until tender. Add remaining ingredients. Bring to a boil, then reduce heat and simmer about 20 minutes.
If you like your chili spicy, you can add some canned chilies, or some hot sauce.
Linked to:
Weekend Wrap-Up Party at tatertots & jello
Think Tank Thursday at Joyful Homemaking
Labels:
dry beans,
low calorie,
main dishes,
poultry,
soups or stews,
Using leftovers
Monday, February 22, 2010
2 Years Old!
Today is Fun Foods' 2-year blogoversary. To celebrate, here is a deliciously dark and dense recipe for flourless chocolate cake. If you like bittersweet chocolate, this is the perfect cake for you! If you prefer your chocolate to be a bit sweeter, you can substitute semisweet chocolate instead of unsweetened.

A great thing about this recipe is that it uses pureed beans instead of fat or flour. It adds lots of protein and nutrients, and keep the cake deliciously dense and tasting fresh. Yummy! And no one will know there's beans in the cake unless you tell them. ;-)

Secret Ingredient Flourless Chocolate Cake
8 oz. unsweetened chocolate
2 cups pinto beans, cooked drained and rinsed
4 eggs
1 cup sugar
1/2 tsp. baking powder
Optional: sliced almonds, powdered sugar, melted white chocolate
Preheat the oven to 350 degrees F. Grease a 9 inch round cake pan, dust with cocoa powder.
Place the chocolate into a microwave-safe bowl. Cook in the microwave for about 2 minutes, stirring every 20 seconds after the first minute, until chocolate is melted and smooth.
Combine the beans and eggs in the bowl of a food processor. Process until smooth. Add the sugar and the baking powder, and pulse to blend. Pour in the melted chocolate and blend until smooth, scraping down the corners to make sure chocolate is completely mixed. Transfer the batter to the prepared cake pan. If desired, sprinkle with sliced almonds.
Bake for 40 minutes in the preheated oven, or until a knife inserted into the center of the cake comes out clean. Cool in the pan on a wire rack for 10 to 15 minutes before inverting onto a serving plate. If desired, dust with confectioners' sugar and/or drizzle liberally with melted white chocolate just before serving.

I might admit to adding more white chocolate on top of the cake after taking these pictures...
A great thing about this recipe is that it uses pureed beans instead of fat or flour. It adds lots of protein and nutrients, and keep the cake deliciously dense and tasting fresh. Yummy! And no one will know there's beans in the cake unless you tell them. ;-)
Secret Ingredient Flourless Chocolate Cake
8 oz. unsweetened chocolate
2 cups pinto beans, cooked drained and rinsed
4 eggs
1 cup sugar
1/2 tsp. baking powder
Optional: sliced almonds, powdered sugar, melted white chocolate
Preheat the oven to 350 degrees F. Grease a 9 inch round cake pan, dust with cocoa powder.
Place the chocolate into a microwave-safe bowl. Cook in the microwave for about 2 minutes, stirring every 20 seconds after the first minute, until chocolate is melted and smooth.
Combine the beans and eggs in the bowl of a food processor. Process until smooth. Add the sugar and the baking powder, and pulse to blend. Pour in the melted chocolate and blend until smooth, scraping down the corners to make sure chocolate is completely mixed. Transfer the batter to the prepared cake pan. If desired, sprinkle with sliced almonds.
Bake for 40 minutes in the preheated oven, or until a knife inserted into the center of the cake comes out clean. Cool in the pan on a wire rack for 10 to 15 minutes before inverting onto a serving plate. If desired, dust with confectioners' sugar and/or drizzle liberally with melted white chocolate just before serving.
I might admit to adding more white chocolate on top of the cake after taking these pictures...
Wednesday, July 22, 2009
Baked Beans with Hot Dogs - Freezer Meal
Just a basic Baked Bean recipe that I added hot dogs to. Beans freeze really well, so they make an ideal freezer meal no matter how you cook them! Like with the bean soup, I used half black beans and half black-eyed peas. Other beans or bean combinations can be used; the actual recipe suggests navy beans.
At this point I'm running low on room in the freezer, and bemoaning the fact that I have no room or money for a chest freezer! I may or may not have to go on a freezer meal hiatus after these beans, until I can use up some of the stuff we've got in the freezer and make more room for meals. :-) We'll see how it goes. But I sure am having fun stocking my freezer with all these meals! With these baked beans, there is now a total of twelve meals and twenty burritos in my freezer. Awesome.

Baked Beans with Hot Dogs
1 lb. dry beans
2 quarts water
1/2 cup molasses (wasn't sweet enough for me, I also added 1/2 cup brown sugar)
1/4 cup ketchup
1 tsp. dry mustard powder
2 tsp. salt
1/4 tsp. pepper
1 onion, chopped
1 package hot dogs, sliced
Soak beans in water overnight or by quick method. In same liquid, bring beans to a boil and simmer until tender, about 1 1/2 hours. Drain, reserving liquid.
Combine beans with remaining ingredients in a 2 quart casserole. Add bean liquid to cover. Bake 4-8 hours at 275, adding liquid occasionally if necessary. Cover during first half of baking time, then uncover.
Or you can do it in the crock pot - I chose to because I didn't want the added heat of running the oven for four hours! Combine beans with remaining ingredients in crock pot. Add bean liquid to barely cover. You won't need as much liquid as if you were doing it in the oven, because the liquid won't cook off. Cook on low overnight.
Freezer Meal: By now you should know the drill - let the beans cool, then spoon into freezer containers, canning jars, or freezer bags. Freeze. To use, thaw in refrigerator and reheat in a saucepan over medium heat.
At this point I'm running low on room in the freezer, and bemoaning the fact that I have no room or money for a chest freezer! I may or may not have to go on a freezer meal hiatus after these beans, until I can use up some of the stuff we've got in the freezer and make more room for meals. :-) We'll see how it goes. But I sure am having fun stocking my freezer with all these meals! With these baked beans, there is now a total of twelve meals and twenty burritos in my freezer. Awesome.
Ick, yucky picture. Lighting is all weird lately. Too bright for the bowl, too dark for the beans. Sigh.
Baked Beans with Hot Dogs
1 lb. dry beans
2 quarts water
1/2 cup molasses (wasn't sweet enough for me, I also added 1/2 cup brown sugar)
1/4 cup ketchup
1 tsp. dry mustard powder
2 tsp. salt
1/4 tsp. pepper
1 onion, chopped
1 package hot dogs, sliced
Soak beans in water overnight or by quick method. In same liquid, bring beans to a boil and simmer until tender, about 1 1/2 hours. Drain, reserving liquid.
Combine beans with remaining ingredients in a 2 quart casserole. Add bean liquid to cover. Bake 4-8 hours at 275, adding liquid occasionally if necessary. Cover during first half of baking time, then uncover.
Or you can do it in the crock pot - I chose to because I didn't want the added heat of running the oven for four hours! Combine beans with remaining ingredients in crock pot. Add bean liquid to barely cover. You won't need as much liquid as if you were doing it in the oven, because the liquid won't cook off. Cook on low overnight.
Freezer Meal: By now you should know the drill - let the beans cool, then spoon into freezer containers, canning jars, or freezer bags. Freeze. To use, thaw in refrigerator and reheat in a saucepan over medium heat.
Labels:
dry beans,
freezer meals,
low calorie,
slow cooker,
soups or stews
Tuesday, July 21, 2009
Bean Soup - Freezer Meal
Here's the next installment in my freezer meal saga! Going through all my dry beans, I realized that I'm running really low; there was only enough for the refried beans, the chili, and these next couple of bean meals. So this soup and the baked beans (soon to come) had to be made with the only beans I had left - one pound each of black beans and black-eyed peas. I soaked them all together, then used half of that combination to make the soup and will use the rest for the baked beans. And yes, we bought several more pounds of beans when we did our weekly shopping yesterday!

I will take this moment to remind you (or rather, remind myself...) that when you decide to do several large freezer meals in a short period of time, make sure you have all the ingredients necessary. I took it for granted that we would have basics like carrots and onions, because we always have those! But I forgot to take into account that I've been using them in large amounts for the other meals I've done. So when I went to start chopping veggies for the soup, I realized I had only two small carrots and was out of onions. Jeff volunteered to walk to the nearby grocery store and pick up onions (I just can't live without onions), and I added a chopped green bell pepper in place of the third carrot. I could have avoided the need for an extra trip to the store had I made sure that we had all necessary ingredients before we did our shopping yesterday - even the ones that I take for granted!
Bean Soup
2 cups (1 lb) dry beans
2 quarts water
1 ham bone or several polish sausages, sliced (optional, I didn't include this)
1 onion, chopped
3 stalks celery with leaves, chopped
3 carrots, sliced
1 quart tomato juice or stewed tomatoes
Salt and pepper to taste
Soak beans overnight or by quick method. Drain and add fresh water, 6-8 cups. Add remaining ingredients. Simmer 2 hours or more until beans are tender. Add more liquid if necessary. If you used a ham bone, remove meat from bones, chop, and return to soup.
Freezer Meal: Let soup cool, then spoon into freezer containers or canning jars in meal-sized portions. I don't recommend putting the soup in freezer bags, just because it's so liquidy. Freeze. To use, thaw in refrigerator, empty into a saucepan, and heat over medium heat. Should be good served with a loaf of fresh bread or some corn bread!

I'll probably cook the rest of the beans this evening and do the baked beans in the crock pot overnight tonight. That way I won't heat the apartment too much, which is very important. ;-)
Just a note to myself: I really need to start using more of what's already in the freezer - I'm running out of room to put all these freezer meals! I still have a few more planned and am just hoping that there will be room to squeeze them all in. Fingers crossed!
I will take this moment to remind you (or rather, remind myself...) that when you decide to do several large freezer meals in a short period of time, make sure you have all the ingredients necessary. I took it for granted that we would have basics like carrots and onions, because we always have those! But I forgot to take into account that I've been using them in large amounts for the other meals I've done. So when I went to start chopping veggies for the soup, I realized I had only two small carrots and was out of onions. Jeff volunteered to walk to the nearby grocery store and pick up onions (I just can't live without onions), and I added a chopped green bell pepper in place of the third carrot. I could have avoided the need for an extra trip to the store had I made sure that we had all necessary ingredients before we did our shopping yesterday - even the ones that I take for granted!
Bean Soup
2 cups (1 lb) dry beans
2 quarts water
1 ham bone or several polish sausages, sliced (optional, I didn't include this)
1 onion, chopped
3 stalks celery with leaves, chopped
3 carrots, sliced
1 quart tomato juice or stewed tomatoes
Salt and pepper to taste
Soak beans overnight or by quick method. Drain and add fresh water, 6-8 cups. Add remaining ingredients. Simmer 2 hours or more until beans are tender. Add more liquid if necessary. If you used a ham bone, remove meat from bones, chop, and return to soup.
Freezer Meal: Let soup cool, then spoon into freezer containers or canning jars in meal-sized portions. I don't recommend putting the soup in freezer bags, just because it's so liquidy. Freeze. To use, thaw in refrigerator, empty into a saucepan, and heat over medium heat. Should be good served with a loaf of fresh bread or some corn bread!
I'll probably cook the rest of the beans this evening and do the baked beans in the crock pot overnight tonight. That way I won't heat the apartment too much, which is very important. ;-)
Just a note to myself: I really need to start using more of what's already in the freezer - I'm running out of room to put all these freezer meals! I still have a few more planned and am just hoping that there will be room to squeeze them all in. Fingers crossed!
Labels:
dry beans,
freezer meals,
ham and pork,
low calorie,
soups or stews
Monday, July 20, 2009
Bean and Cheese Burritos - Freezer Meal
I finally got around to assembling the burritos I've been planning on for days. I made those refried beans several days ago, and was totally planning on making my own flour tortillas to wrap the beans in. But I never got around to it, and really needed to assemble these burritos before the beans started going weird... So storebought tortillas it was!
These were super simple, and I think they'll be really good to have around - frozen burritos can be so convenient!
Bean and Cheese Frozen Burritos
Flour tortillas
Refried beans (can be canned or homemade)
Shredded cheddar cheese
Start by heating the tortillas, a few at a time, to make them malleable. Spoon 3-4 tablespoons beans on a tortilla, and top with about a tablespoon of cheese.

Fold in ends of tortilla, and roll up. Place seam-side down in a baking pan.

Repeat with remaining ingredients. When pan is full, cover with foil or plastic wrap and place in freezer. I made two pans of burritos, and have some beans leftover. When the burritos are frozen, remove from pan and place them in a large freezer bag. Be sure to squeeze as much air out of the bag as possible to prevent freezer burn. You can also choose to individually wrap the burritos before bagging them to further protect against freezer burn.
If you want, you could do beef and bean burritos instead. Just substitute taco meat for the shredded cheese.
To heat, I'm not really sure. I would guess you just stick one on a plate and microwave for a couple minutes or until it's heated through. To do several at once, heat in the oven until heated through. Since I've never made these before, that's about as detailed as I can get right now! Maybe the next time we go shopping, I'll peek at the directions on a package of frozen burritos to see what that says. :-)
Next up on my list of things to make and freeze are baked beans with hot dogs, and bean soup. I'll be soaking the beans tonight, so stay tuned for those recipes!
These were super simple, and I think they'll be really good to have around - frozen burritos can be so convenient!
Bean and Cheese Frozen Burritos
Flour tortillas
Refried beans (can be canned or homemade)
Shredded cheddar cheese
Start by heating the tortillas, a few at a time, to make them malleable. Spoon 3-4 tablespoons beans on a tortilla, and top with about a tablespoon of cheese.
Fold in ends of tortilla, and roll up. Place seam-side down in a baking pan.
Repeat with remaining ingredients. When pan is full, cover with foil or plastic wrap and place in freezer. I made two pans of burritos, and have some beans leftover. When the burritos are frozen, remove from pan and place them in a large freezer bag. Be sure to squeeze as much air out of the bag as possible to prevent freezer burn. You can also choose to individually wrap the burritos before bagging them to further protect against freezer burn.
If you want, you could do beef and bean burritos instead. Just substitute taco meat for the shredded cheese.
To heat, I'm not really sure. I would guess you just stick one on a plate and microwave for a couple minutes or until it's heated through. To do several at once, heat in the oven until heated through. Since I've never made these before, that's about as detailed as I can get right now! Maybe the next time we go shopping, I'll peek at the directions on a package of frozen burritos to see what that says. :-)
Next up on my list of things to make and freeze are baked beans with hot dogs, and bean soup. I'll be soaking the beans tonight, so stay tuned for those recipes!
Friday, July 17, 2009
Home-Style Chili - Freezer Meal
I love this picture - makes me think of hard life on the trail, eating whatever foods you brought or could hunt up. Foods like chili and other simple one-pot meals topped the menu. This picture is found in the chili section of the book "Where's Dad Now That I Need Him?" The book is a lot more than recipes, but there is a sizable recipe section, including an entire chapter on chili.
This is the first recipe in that chili chapter, and it's super good! Simmering for a really long time, it starts very watery but over the hours it thickens and the flavors blend so deliciously. This is a chili that just gets better the longer it sits! That's also what makes it a great freezer meal.
For this recipe, since it already makes so much, I didn't have to double it or anything. Just made it as-is, and it made enough for 3 freezer meals for my family, plus enough for dinner tonight.
Home-Style Chili
3 cups dry kidney beans plus soaking water
1 1/2 lbs. ground beef
1 large onion, chopped
4 tsp. salt
1 cup chopped celery (I skipped this, as I used up all my celery for the curry)
1 tsp. pepper
4 tsp. chili powder
6 cups water
1 #2 1/2 can tomatoes, pureed in blender (about 2 14-oz. cans)
2 cans tomato sauce
1/2 cup ketchup
1 tsp. celery salt
I also added about a cup of squash puree from my freezer, a couple sliced carrots, a seeded jalapeno, and a can of olives, sliced. I like lots of stuff in my chili! I also used TVP in place of some of the ground beef.
Wash beans; cover with water and soak overnight. In a skillet, cook meat and onions until meat is browned and onions are tender. Add to beans in a heavy kettle. Stir in remaining ingredients except celery. Bring to a boil, reduce heat, and simmer for 4 to 6 hours, stirring occasionally. Add more water if necessary to keep chili from scorching. Add celery and simmer 30 minutes more.
This could probably be done in a slow cooker - just toss everything in once you've browned the meat and onion, and cook for several hours.
Mmm, look at that big ole' pot of thick, chunky chili! Yum!
Freezer Meal: Same as with the curry - once chili is finished cooking, let cool and separate into meal-sized portions, into freezer containers, ziploc-style freezer bags, or canning jars. Freeze. To use, thaw completely in refrigerator, and heat in a saucepan over medium heat until heated through. Again, if you use freezer bags, freeze it flat to make best use of freezer space, and to allow for faster thawing.
I did the curry in gallon-sized bags, and the chili in quart-sized. With a fairly small family like mine, either size works fine.
Thursday, July 16, 2009
Refried Beans
I've got a series of posts that I'm working on right now. I've decided to delve into the world of freezer meals - who doesn't love the idea of having dinner all ready in the freezer, and all you have to do is take it out to thaw in the morning and it's ready to heat for dinner! So I sorted through all the stuff in my freezer, taking inventory and deciding what to use and how to make room for dinners. Next I planned several meals that I will be making over the next many days. Freezer meals usually mean big batches and lots of cooking. You can either do one or two huge marathon cooking sessions and get it all done at once, or spread it out over several days and/or cooking sessions. I'll be spreading it out, doing one or two meals or parts of a meal per day.
One of my planned meals is frozen burritos. These appeal to me because you can take out and heat as many as you need, plus I just really love burritos. But one of my criteria for the meals I planned was that they should use as many things that I already have as possible - no going out and buying a can or two of refried beans when I had a bag of pintos waiting in the cupboard! So I made a big ole' batch of refried beans from scratch. It was easier than I expected, though it took a long time.

Refried Beans
1 lb. dried pinto, pink, or kidney beans plus soaking water
6 cups water
2 onions, chopped (optional)
1/2 cup hot bacon drippings, margarine, or lard
Salt to taste
Soak beans overnight or by quick method. Add water and onions. Bring to a boil, cover, and simmer slowly until beans are tender, about 3 hours. Mash beans with potato masher.
Add fat and salt. Mix well; continue cooking, stirring frequently until beans are thickened and fat is absorbed. Serve at once or refrigerate for later use.
This is the first time I've made real refried beans. I've made a quick facsimile using bean powder, but never actually cooked the beans, mashed them, and "refried" them. I was pleased that they turned out so good - thick and flavorful. They also thickened up quite a bit in the fridge. These pictures were taken after chilling overnight - I made the beans last night when there was no good lighting. But don't they look good now?

Stay tuned for the next post in my freezer meal adventure - I've got to assemble and freeze the burritos!
One of my planned meals is frozen burritos. These appeal to me because you can take out and heat as many as you need, plus I just really love burritos. But one of my criteria for the meals I planned was that they should use as many things that I already have as possible - no going out and buying a can or two of refried beans when I had a bag of pintos waiting in the cupboard! So I made a big ole' batch of refried beans from scratch. It was easier than I expected, though it took a long time.
Refried Beans
1 lb. dried pinto, pink, or kidney beans plus soaking water
6 cups water
2 onions, chopped (optional)
1/2 cup hot bacon drippings, margarine, or lard
Salt to taste
Soak beans overnight or by quick method. Add water and onions. Bring to a boil, cover, and simmer slowly until beans are tender, about 3 hours. Mash beans with potato masher.
Add fat and salt. Mix well; continue cooking, stirring frequently until beans are thickened and fat is absorbed. Serve at once or refrigerate for later use.
This is the first time I've made real refried beans. I've made a quick facsimile using bean powder, but never actually cooked the beans, mashed them, and "refried" them. I was pleased that they turned out so good - thick and flavorful. They also thickened up quite a bit in the fridge. These pictures were taken after chilling overnight - I made the beans last night when there was no good lighting. But don't they look good now?
Stay tuned for the next post in my freezer meal adventure - I've got to assemble and freeze the burritos!
Labels:
dry beans,
freezer meals,
International cuisine,
side dishes
Wednesday, April 1, 2009
Taste & Create - Barbecue Beans
I almost forgot about Taste & Create this month - luckily I looked on the the website soon enough to realize that the post is due today! So here is my submission to this fun blog event.
I was paired with a blog called Caviar and Codfish. I knew right away that this month would be ... interesting. Such a title told me in no uncertain terms that the author, Robin, is by no means a foodie tightwad, and that many of her recipes would call for ingredients that I do not have on hand and will not go out and buy. Everything looked incredibly delicious - and incredibly pricey! But I gamely went about searching her blog for something that I could cook without going over budget.
And I found it in this recipe for barbecue beans - one of Robin's favorite recipes. I know, I did a bean dish for the last Taste & Create I participated in too. What can I say? I love beans!

Barbecue Beans
1 teaspoon oil
1 onion, diced
2-4 cloves garlic, depending on their size, minced
1 can (15 oz.) Navy beans, drained (I used a bag of frozen pinto beans I cooked earlier this week)
1/3 cup BBQ sauce
1/4 cup mustard
3 tablespoons maple syrup
1 tablespoon cider vinegar
a few drops of hot sauce, or more to taste
Heat oil in medium saucepan over medium heat. Add onion and cook 3-4 minutes (I took the liberty of adding some diced carrot here for extra nutrition). Add garlic and cook until tender and onions are translucent. Add beans, BBQ sauce, mustard, and maple syrup (I added sliced olives too; I love olives!). Cover and cook over low heat for 30 minutes. Uncover, add cider vinegar and hot sauce. Taste and adjust seasonings if you want. Serve with white or brown rice (I served it with some of the sourdough I just made).
The beans turned out deliciously flavorful. I loved the sharp and tangy bite, and the maple was a wonderful touch.
I was paired with a blog called Caviar and Codfish. I knew right away that this month would be ... interesting. Such a title told me in no uncertain terms that the author, Robin, is by no means a foodie tightwad, and that many of her recipes would call for ingredients that I do not have on hand and will not go out and buy. Everything looked incredibly delicious - and incredibly pricey! But I gamely went about searching her blog for something that I could cook without going over budget.
And I found it in this recipe for barbecue beans - one of Robin's favorite recipes. I know, I did a bean dish for the last Taste & Create I participated in too. What can I say? I love beans!

Barbecue Beans
1 teaspoon oil
1 onion, diced
2-4 cloves garlic, depending on their size, minced
1 can (15 oz.) Navy beans, drained (I used a bag of frozen pinto beans I cooked earlier this week)
1/3 cup BBQ sauce
1/4 cup mustard
3 tablespoons maple syrup
1 tablespoon cider vinegar
a few drops of hot sauce, or more to taste
Heat oil in medium saucepan over medium heat. Add onion and cook 3-4 minutes (I took the liberty of adding some diced carrot here for extra nutrition). Add garlic and cook until tender and onions are translucent. Add beans, BBQ sauce, mustard, and maple syrup (I added sliced olives too; I love olives!). Cover and cook over low heat for 30 minutes. Uncover, add cider vinegar and hot sauce. Taste and adjust seasonings if you want. Serve with white or brown rice (I served it with some of the sourdough I just made).
The beans turned out deliciously flavorful. I loved the sharp and tangy bite, and the maple was a wonderful touch.
Saturday, March 14, 2009
Middle Eastern Rice and Lentils
Wow, it's been a while since I posted here. Oops. Today I bring you a healthy recipe, to make up for the sugary, unhealthy brownies and pie and other such dishes as I've been posting. This yummy meal was full of protein and fiber, and completely meat-free. We do meatless meals pretty often here because meat costs more than beans and rice. :-)

Middle Eastern Rice and Lentils
1 cup lentils, uncooked
1 cup canned tomatoes, crushed
1 bay leaf
1/2 tsp. cumin
1 1/2 cups vegetable stock (or broth of your choice)
1/4 tsp. black pepper
1 tsp. salt
1 cup white rice (I used brown rice)
1/2 tbsp. oil
1 onion, sliced
Bring the lentils, tomatoes, bay leaf, cumin, stock or broth, and pepper to a simmer over high heat in a 4-quart saucepan. Stir, cover, turn the heat to low, and simmer until the lentils are cooked through and have absorbed the liquid, 45 minutes to 1 hour. Add salt during the last 5 minutes of cooking. Remove the bay leaf.
Cook the rice according to package directions.
Meanwhile, in a skillet, saute the onion in the oil over medium heat until golden, about 5 minutes.
Place the rice on a plate; put the lentils on top of the rice and the onion on top of the lentils. Serve hot or at room temperature.

Middle Eastern Rice and Lentils
1 cup lentils, uncooked
1 cup canned tomatoes, crushed
1 bay leaf
1/2 tsp. cumin
1 1/2 cups vegetable stock (or broth of your choice)
1/4 tsp. black pepper
1 tsp. salt
1 cup white rice (I used brown rice)
1/2 tbsp. oil
1 onion, sliced
Bring the lentils, tomatoes, bay leaf, cumin, stock or broth, and pepper to a simmer over high heat in a 4-quart saucepan. Stir, cover, turn the heat to low, and simmer until the lentils are cooked through and have absorbed the liquid, 45 minutes to 1 hour. Add salt during the last 5 minutes of cooking. Remove the bay leaf.
Cook the rice according to package directions.
Meanwhile, in a skillet, saute the onion in the oil over medium heat until golden, about 5 minutes.
Place the rice on a plate; put the lentils on top of the rice and the onion on top of the lentils. Serve hot or at room temperature.
Wednesday, March 4, 2009
Homemade Black Bean Veggie Burgers

I set some black beans to soak yesterday and cooked them up today. Finally I could try the black bean veggie burgers that I've been wanting to try for weeks! The cool part is that this recipe only used about a fifth of the beans that I cooked (I did one pound of dry beans), so I still have about four cans' worth of beans to freeze and use in later meals. I love batch cooking, when I get around to it!
This is the third veggie burger that I've tried making. I'm enjoying having burgers without the cost of ground beef. Not only do I like the price, but I'm finding that I really like the flavor and texture, even though it's different from regular hamburgers. The first veggie burger we tried, pumpkin chickpea burgers, was my definite favorite, though the lentil burgers were good too. Now I have these black bean burgers to add to our repertoire. They taste good, and look a little more like hamburger than the other ones.
Homemade Black Bean Veggie Burgers
1 (16 ounce) can black beans, drained and rinsed (or equivalent amount cooked from dry)
1/2 green bell pepper, cut into 2 inch pieces (omitted and added extra onion)
1/2 onion, cut into wedges
3 cloves garlic, peeled
1 egg
1 tablespoon chili powder
1 tablespoon cumin
1 teaspoon Thai chili sauce or hot sauce
1/2 cup bread crumbs (substituted wheat bran)
If grilling, preheat an outdoor grill for high heat, and lightly oil a sheet of aluminum foil. If baking, preheat oven to 375, and lightly oil a baking sheet (I baked mine).
In a medium bowl, mash black beans with a fork until thick and pasty. In a food processor, finely chop bell pepper, onion, and garlic (I minced mine by hand to save myself the work of washing the food processor. Next time I'll use the food processor to save myself the work of mincing the vegetables by hand!). Then stir into mashed beans.
In a small bowl, stir together egg, chili powder, cumin, and chili sauce. Stir the egg mixture into the mashed beans.
Mix in bread crumbs until the mixture is sticky and holds together. Divide mixture into four patties.
If grilling, place patties on foil, and grill about 8 minutes on each side. If baking, place patties on baking sheet, and bake about 10 minutes on each side.

Veggie burgers are fun!
Tuesday, February 24, 2009
National Tortilla Chip Day
Did you know that Feb. 24 is National Tortilla Chip Day? It's also National Pancake Day but we had to pick and choose which to celebrate and tortilla chips won out.

What better way to celebrate National Tortilla Chip Day than to build up some super delicious nachos!!!! And we did it the only way we know how - cheap!
We started with the tortilla chips - purchase on sale for $0.89/16 oz. bag at Rancho Market (a local Hispanic market/store with incredible sales prices on stuff like chips and produce)

On top of the chips went the delicious cheesy sauce. We made this by heating up a jar of pasteurized process cheese sauce (we usually use a slab of generic Velveeta-like stuff, but they were out, so the jarred generic stuff it was). We added a can of tomatoes and green chilies (commonly called Ro-Tel, of course we used generic) and some bean flour (dried beans ground up in a wheat grinder), as well as chili powder and cumin for a hearty and flavorful cheese sauce.

Next up was some homemade guacamole, made from avocados that were purchased on sale at Rancho Market for $0.33 each. I mashed three avocados and added some lemon juice, parsley, minced onion, garlic, hot sauce, and salt.

After the guacamole came leaf lettuce, purchased at Ream's for $0.69 per bunch, and tomato - 4 lbs for $0.99 at Rancho.

Lastly came the cheese, $2.50 per pound on sale. Now, I know that somehow, somewhere I can get cheese for cheaper than that, but I'm having trouble finding it. Meanwhile, this was the cheapest we could get, and believe me, it's cheaper than we could get at Wal-Mart.

This fun, delicious meal cost us under $3, plus we have plenty of cheap ingredients left for other great foods later!
Don't forget to enter my giveaway for homemade chocolate truffles here. Giveaway ends Friday evening. :-)

What better way to celebrate National Tortilla Chip Day than to build up some super delicious nachos!!!! And we did it the only way we know how - cheap!
We started with the tortilla chips - purchase on sale for $0.89/16 oz. bag at Rancho Market (a local Hispanic market/store with incredible sales prices on stuff like chips and produce)

On top of the chips went the delicious cheesy sauce. We made this by heating up a jar of pasteurized process cheese sauce (we usually use a slab of generic Velveeta-like stuff, but they were out, so the jarred generic stuff it was). We added a can of tomatoes and green chilies (commonly called Ro-Tel, of course we used generic) and some bean flour (dried beans ground up in a wheat grinder), as well as chili powder and cumin for a hearty and flavorful cheese sauce.

Next up was some homemade guacamole, made from avocados that were purchased on sale at Rancho Market for $0.33 each. I mashed three avocados and added some lemon juice, parsley, minced onion, garlic, hot sauce, and salt.

After the guacamole came leaf lettuce, purchased at Ream's for $0.69 per bunch, and tomato - 4 lbs for $0.99 at Rancho.

Lastly came the cheese, $2.50 per pound on sale. Now, I know that somehow, somewhere I can get cheese for cheaper than that, but I'm having trouble finding it. Meanwhile, this was the cheapest we could get, and believe me, it's cheaper than we could get at Wal-Mart.

This fun, delicious meal cost us under $3, plus we have plenty of cheap ingredients left for other great foods later!
Don't forget to enter my giveaway for homemade chocolate truffles here. Giveaway ends Friday evening. :-)
Monday, January 19, 2009
A Simple Cheesecake and Bonus Lentil Burgers
I wanted to have something sweet and not low-calorie for dessert tonight - when you're dieting it's good to splurge every now and then or you'll feel deprived. I had some cream cheese in the refrigerator, and decided on a cheesecake. This recipe is from a Mennonite cookbook I have, called the More-With-Less Cookbook - it's very simple, nothing fancy, but it satisfied my sweet tooth wonderfully!

Cheesecake
2 eggs
8 oz. cream cheese
1/3 cup sugar
1/4 cup dry milk solids (powdered milk)
2 tsp. vanilla
1-2 tbsp. lemon juice
1 8" graham cracker crust (I used a 9" crust, and my cheesecake came out rather thin, so I suggest using the 8" crust)
Preheat oven to 375, and prepare your graham cracker crust.
Combine eggs, cream cheese, sugar, dry milk, vanilla, and lemon juice. Mix well with electric mixer, scraping bowl with rubber spatula often. Pour into crust and bake 30 minutes. Cool for 1 hour. Add topping, if desired, and chill.
I left mine topping-less, but here are the topping options given:
-Combine 1 cup yogurt or sour cream, 2 tbsp. sugar, 1 tbsp. vanilla, 1 tsp. cinnamon, and 1/4 tsp. nutmeg.
-Add drained strawberries, pineapple, peaches, cherries, blueberries, or nuts to yogurt or sour cream topping.
-Thicken any of above fruits with cornstarch and use as a topping.
As a bonus, here's the recipe we used for dinner tonight, from the same cookbook. This one is healthy and low-calorie.

Lentil Burgers
2 cups cooked, cooled lentils, drained
1 egg
1/2 cup cracker crumbs
1 small onion, minced
Tomato juice (I didn't have tomato juice, so I smushed up some canned diced tomatoes instead)
Salt and pepper to taste
Mix all ingredients together using just enough tomato juice to hold mixture in shape when pattied. Fry like hamburgers in small amount hot oil, shortening, or bacon fat.
That's the exact wording in the book. Mine never really would hold its shape if I tried to form it into patties with my hands, so I just spooned it into pattie shapes onto the skillet. They held their shapes if I turned them very carefully, but they were fairly crumbly. That said, they had a very good taste, and I wouldn't be opposed to making them again. Still, I think I prefered the pumpkin chickpea burgers I made a while back. While I love real hamburgers, I also like making meatless burgers - there are so many varieties that you can make! There's a recipe for black bean burgers that I've got my eye on, it actually looks almost like real ground beef.

Cheesecake
2 eggs
8 oz. cream cheese
1/3 cup sugar
1/4 cup dry milk solids (powdered milk)
2 tsp. vanilla
1-2 tbsp. lemon juice
1 8" graham cracker crust (I used a 9" crust, and my cheesecake came out rather thin, so I suggest using the 8" crust)
Preheat oven to 375, and prepare your graham cracker crust.
Combine eggs, cream cheese, sugar, dry milk, vanilla, and lemon juice. Mix well with electric mixer, scraping bowl with rubber spatula often. Pour into crust and bake 30 minutes. Cool for 1 hour. Add topping, if desired, and chill.
I left mine topping-less, but here are the topping options given:
-Combine 1 cup yogurt or sour cream, 2 tbsp. sugar, 1 tbsp. vanilla, 1 tsp. cinnamon, and 1/4 tsp. nutmeg.
-Add drained strawberries, pineapple, peaches, cherries, blueberries, or nuts to yogurt or sour cream topping.
-Thicken any of above fruits with cornstarch and use as a topping.
As a bonus, here's the recipe we used for dinner tonight, from the same cookbook. This one is healthy and low-calorie.

Lentil Burgers
2 cups cooked, cooled lentils, drained
1 egg
1/2 cup cracker crumbs
1 small onion, minced
Tomato juice (I didn't have tomato juice, so I smushed up some canned diced tomatoes instead)
Salt and pepper to taste
Mix all ingredients together using just enough tomato juice to hold mixture in shape when pattied. Fry like hamburgers in small amount hot oil, shortening, or bacon fat.
That's the exact wording in the book. Mine never really would hold its shape if I tried to form it into patties with my hands, so I just spooned it into pattie shapes onto the skillet. They held their shapes if I turned them very carefully, but they were fairly crumbly. That said, they had a very good taste, and I wouldn't be opposed to making them again. Still, I think I prefered the pumpkin chickpea burgers I made a while back. While I love real hamburgers, I also like making meatless burgers - there are so many varieties that you can make! There's a recipe for black bean burgers that I've got my eye on, it actually looks almost like real ground beef.
Labels:
cheesecake,
dessert,
dry beans,
low calorie,
pies and tarts
Thursday, January 8, 2009
Taste & Create - Canberra's Baked Beans
I haven't participated in Taste & Create for what seems to me like a long time. But I'm back in the saddle, paired up with Cath, The Canberra Cook. She already posted in December about her experience with my pumpkin pie from homemade puree, here. She had some trouble with her oven, so the pie suffered a bit, but the mini pies she made turned out great!Meanwhile, having looked through Cath's extensive list of recipes, I chose one that fit wonderfully with my budget and my family's tastes. Here is her recipe for baked beans. These aren't the Boston-style baked beans, they include tomatoes and are less sweet. But they were delicious. The whole family enjoyed these hearty beans.

Baked Beans
1 cup haricot or navy beans (I didn't have either of these, so I used pinto beans)
1 can diced tomatoes
1 onion (I substituted dry minced onion)
1 tablespoon molasses
1 tablespoon cider vinegar
1 teaspoon dry mustard
100g lean ham (I just used about half a can of DAK ham)
water
brown sugar, salt, pepper to taste
Soak the beans overnight in plenty of water. Drain, and dump beans into slow cooker. Chop the onion finely, and the ham into small cubes. Mix in with beans, add canned tomatoes, molasses, vinegar and mustard. Add about another tomato can of water to make sure beans are well covered. Do NOT add salt.
Cook on slow setting for 6-8 hours (here I had some problems - I think there was something wrong with my beans because after 13 hours, they were still kind of hard. Maybe I should have soaked them longer). Stir occasionally if you're around, and add a little water if it seems to be drying out. When beans are soft enough for your taste, add salt, pepper and brown sugar to taste.
I doubled the recipe, because I figure why cook half a pound of beans when you can do the whole pound. Hmm, maybe that's part of why mine took so long - my poor old slow cooker had twice as many beans to cook. Hmmm... Besides the cooking time, this recipe doubles very easily. Anyway, this made a whole big pot full of beans, and I plan on freezing the leftovers to enjoy later. The flavor was good, especially after adding the salt and brown sugar. I think this is a recipe I would be glad to make again.
Tuesday, October 28, 2008
Upside Down Skillet Chili Pie
Here's one that I just made up tonight. I was bored with our normal dinner fare - pasta, leftovers, soup, etc. - and wanted something a little different. I thought it would be fun to create some sort of savory version of Southern Plate's Skillet Apple Cake, something with a saucy bottom and battery top that gets cooked up on the stove and turned out onto a platter. Somewhere along the line it occurred to me to try a sort of chili-and-corn-bread kind of thing, so that's what I did.
Upside Down Skillet Chili Pie
2 tomatoes, sliced
1 can kidney beans (I used a bag of cooked beans from the freezer)
Chili powder and salt to taste
Corn bread
1 cup flour
3/4 cup corn meal
2-3 tbsp. sugar
2 1/2 tsp. baking powder
3/4 tsp. salt
2 eggs, lightly beaten
1 cup milk
1/4 cup oil or melted butter
First I heated some oil in a large skillet and arranged the sliced tomatoes in the pan. I was thinking that it would make a pretty top for the pie. More about that later...
Then I thawed my beans and seasoned them with chili powder and salt. I should have drained them first. More about that later...
Then I poured the beans over the tomato slices and cooked this over medium heat, without stirring, until the liquid from the beans had reduced down; though next time since I'll drain the beans, I won't be doing this cooking step. More about that later...
Mix up the corn bread batter by combining all the dry ingredients in one bowl and all the wet ingredients in another bowl. Add the wet to the dry, and mix until moistened. Pour over the beans and tomatoes and cover. Cook on low heat for 20-25 minutes until the corn bread is firm.
Then gently invert the pie onto a large plate or platter. Isn't it pretty?
But wait - didn't I say that I had tomatoes on it? Yes I did. And because I cooked them for so long, they stuck to the bottom of the pan. That's okay, I realized that I didn't want them on the pie anyway - they were burnt to a crisp! So next time I won't precook the tomatoes and beans. Next time I'll drain most of the liquid off the beans before seasoning them, and pour the batter over them right away, so that maybe the stuff on the bottom won't burn to the pan.
I served this with sour cream and shredded cheese. It was not exactly a perfect recipe, but it was definitely good enough for me to want to try again to work out the kinks. I love inventing recipes!
Wednesday, October 22, 2008
Be It Ever So Humble
When you're on a tight budget, you learn to accept the fact that sometimes you have to cook and eat things that are not exactly restaurant-worthy. This can be especially true when you decide that you're just not motivated to make a big fancy meal, or spend a lot of time in the kitchen. Sometimes you just gotta make something fast, cheap, and effortless. This was one of those dinners.
I started by making Southern Hoe Cake, substituting whole wheat flour for 1/2 cup of the white. As it finished baking, I realized I needed something to go with it, so I thawed out a bag of cooked garbanzo beans (1 1/2 cups, plus about 1/2 cup broth) I had in the freezer. I heated the beans and broth on the stove, and seasoned them with cumin and House Seasoning. When they were hot, I thought that the broth was a bit too watery, so I used a spoon to smoosh the beans a bit so they would soak in more broth.
The result was a very humble, but very delicious meal. It was fast and easy, and without having to resort to packaged convenience foods so it was budget-friendly. It was enough for my two little kids and I. To feed more, I would use two bags of cooked beans instead of one.
Wednesday, October 15, 2008
Pumpkin Chickpea Burgers
This recipe was inpspired by Megan's Munchies' delicious-looking Pumpkin White Bean Burgers. I wanted to cook something unique last night for dinner, something that I could prepare ahead of time and then not worry about until dinner time. I also was really in the mood for an Autumn recipe - something that tastes like fall. I knew that Megan has been on a major roll with all her pumpkin recipes, and was sure that I could find some sort of delicious savory pumpkin meal that would taste just like fall - and this recipe didn't disappoint at all!
Megan's recipe calls for great northern beans, but I happened to have some cooked chickpeas (garbanzo beans) in the freezer, so I thawed some of those to use instead.
Pumpkin Chickpea Burgers
1 medium onion, chopped
2 garlic cloves, minced
1 tsp oil (I skipped these first three ingredients, and just used dried minced onions and garlic to save myself a bit of effort)
1 cup great northern beans (I used chickpeas, aka garbanzos)
1/2 cup canned pure pumpkin
1/3 cup quick cooking oats (equal to one packet instant oatmeal)
1/4 tsp sage
1/4 tsp cinnamon
1/8 tsp nutmeg
Salt and pepper to taste
In a large skillet, saute onion and garlic in oil for about 5 minutes or until soft, then set aside. In a large bowl, mash beans with a fork. Be sure to mash most of the beans until a paste forms, leaving some whole beans are okay (at the end of this step my arm was very tired! I used beans cooked from dry, so they were a lot more firm than the canned variety. Just a fair warning). Add pumpkin, oats and seasonings to beans. Add onions and garlic to mixture. Mix until well combined. Allow mixture to rest in refrigerator for at least 30 minutes, the mixture can be left overnight or up to 3 days. Divide bean mixture into 4 equal balls. With hands, shape mixture into patties about 3 inches around and 1/2 inch thick. To cook patties, bake in 350 degree oven for 20-30 minutes, turning once. Or, place 1 tsp oil in large skillet over medium heat. Place patties into pan and cook for about 5 minutes. Turn patties and cook an additional 5 minutes, or until patties are browned on both sides.
I served these like regular burgers, on some homemade bread with tomatoes, lettuce, cheese, and a special sauce!
Special Burger Sauce (tastes similar to Thousand Island, but better :-)
2 tbsp. mayonnaise
1 1/2 tsp. ketchup
1 tsp. chili sauce
1 tsp. sweet relish
These amounts are approximate. I didn't really measure; I just made it up as I went along, squirting stuff here and there until it looked right!
Combine all ingredients, and spread on bread or buns for burgers. This tangy-sweet sauce went so well with these uniquely flavored, spiced burgers!
Inadvertently, I realized that without the cheese, this is a completely vegetarian meal. We don't usually care about that kind of stuff - we're not at all opposed to eating meat and other animal-based products. But I have noticed that plant-based foods are much more inexpensive than animal-based ones, so we're totally fine with eating vegetarian meals once in a while. It's economical, and tasty!
I'm submitting this to the October I Love Baking event.
Labels:
autumn,
dry beans,
low calorie,
main dishes,
pumpkin and winter squash
Saturday, October 11, 2008
My Kitchen My World - Morocco
Judy of Judy's Gross Eats has chosen Morocco for this week's tour for My Kitchen My World. In Morocco, the main meal is eaten at midday, and is comprised of several courses - hot and cold salads, then stews called tagines, followed by a main course of lamb or chicken, then heaping plates of couscous with meats and vegetables. Lastly, meals are finished with sweet mint tea, which is like a dessert in itself. Bread is served at every meal, and is used, along with the fingers, as an eating utensil.Being on a budget, as we are, I chose not to do a full Moroccan meal! Instead, I found a delicious tagine recipe that was hearty enough to fill us even without all the additional courses. I forgot about using bread with the meal until the meal was over, or I would have included a special Moroccan bread. As it is, here is the tagine upon which we feasted!
Moroccan Tagine
1 tablespoon olive oil (I used vegetable oil)
2 skinless, boneless chicken breast halves, cut into chunks
1/2 onion, chopped
3 cloves garlic, minced (I used bottled)
1 small butternut squash, peeled and chopped (I substituted 2 yams)
1 (15.5 ounce) can garbanzo beans, drained and rinsed (I cooked mine from dried *see note*)
1 carrot, peeled and chopped
1 (14.5 ounce) can diced tomatoes with juice
1 (14 ounce) can vegetable broth (I used water and bouillon)
1 tablespoon sugar
1 tablespoon lemon juice
1 teaspoon salt
1 teaspoon ground coriander (don't have any - substituted curry powder)
1 dash cayenne pepper
Heat the olive oil in a large skillet over medium heat, and cook the chicken, onion, and garlic about 15 minutes, until browned.
Mix the squash, garbanzo beans, carrot, tomatoes with juice, broth, sugar, and lemon juice into the skillet. Season with salt, coriander, and cayenne pepper. Bring the mixture to a boil, and continue cooking 30 minutes, until vegetables are tender.
Serve over couscous.
Couscous
1 1/4 cups water
2 tbsp. butter
1/2 tsp. salt
1 cup couscous
Combine water, butter, and salt in saucepan. Bring to a boil. Stir in couscous, reduce heat, cover, and cook for 3-5 minutes, or until all water is dissolved. Fluff and serve.
*Note* I often cook up one pound of dried beans at a time. Once they are cooked, I separate them into 2-cup servings and freeze them in freezer bags. One pound makes 3 or 4 bags. Once thawed, they are as convenient to use as canned, but are cheaper and less mushy, and you have the satisfaction of knowing you cooked them yourself!
The Moroccan tea that usually follows a meal is a special green tea that is laced with sugar and spearmint after being steeped. We don't drink real tea in our family, but the occasional cup of herbal tea is okay. So we just bought some packets of mint tea from WinCo (9 cents per packet!) and served it with plenty of sugar! :-)
I am really enjoying this My Kitchen My World experience. I love to experiment with new recipes and new cuisines. I am finding that I love the exotic flavors and ingredient combinations that are eaten in other parts of the world. I have been adding cinnamon and other spices to my food a lot more often, now that I know how delicious it is! If you've gotten into a cooking rut, and want to break out, just look up recipes from other countries, and have a ball trying them! I think you'll enjoy it - I know I do!
Check out what the other members of My Kitchen My World made this week.
Subscribe to:
Posts (Atom)