It seems that all I'm posting lately is my monthly submission for My Kitchen My World. I need to get on the ball and post other things! Especially since MKMW is going to be taking a break for a while. Participation has not been very high for the past several months. My family and I have really been enjoying the opportunity/excuse to make something fun from a different country each month, we've tried a lot of things we otherwise wouldn't have.
Israel was originally assigned for April, but due to lack of participation it was moved to June to give everyone a chance to try again. The funny thing is, I actually made this meal back in April, but never got around to blogging it. Now here it is all the way into July, and I'm finally putting these delicious recipes up onto the blog. I might be a little bit of a procrastinator...
I chose to make falafel, a popular Israeli street food. We served it with pita bread, yogurt sauce, and fresh tomatoes, cucumber, and lettuce. Super yummy! The whole family liked the little fried balls of seasoned chickpeas, the pita bread was soft and delicious, the yogurt sauce brought it all together. All in all a great meal.
Falafel
(from This American Bite)
2 1/2 cups cooked chickpeas
1 onion, chopped
1/2 cup parsley (used 2 tbsp. dried parsley)
6 cloves garlic (used equivalent in bottled minced garlic)
4 tsp. cumin
2 tsp. coriander
2 tsp. za'atar (substituted thyme)
1 tsp. black pepper
1 tsp. salt
Juice of 1 lemon
1/4 cup whole wheat flour
1 egg
With the exception of the flour and egg, put all of the ingredients into the food processor. Rather than running the food processor continuously, pulse the ingredients three or four times until the ingredients are minced, but not pureed.
Transfer the falafel mixture into a non-metallic bowl and add 1/4 cup of flour and one egg to bind the mixture. Mix the flour and egg well so you don’t get any flour pockets.
Using a teaspoon, scoop 1.5 tsp of the falafel mix into your hands then use the spoon to mold them into a ball shape. Press the mixture so that it is firm – this will prevent them from disintegrating when you fry them.
Using any pot or dutch oven, fill it with a neutral oil, like canola, vegetable or grapeseed oil and use a chef basket. If you have a candy thermometer, wait until the oil reaches 350 degrees before frying putting the falafel balls into the hot oil to fry. If you do not have a candy thermometer, you can put one of your falafel balls into the oil, if it’s not hot enough it won’t cook and it may start to disintegrate.
When you are sure the oil is hot enough, gently place the falafel balls into the hot oil. Don’t crowd the falafel, let them swim in the oil for two minutes, until golden brown. If the top of the falafel float above the oil, turn them with a spoon then fry for another minute. The falafel will cook quickly at this size, so be ready with a plate covered with a sheet of paper kitchen towel to soak up excess oil once cooked.
Best served fresh from the oil, but you can reheat them in a warm oven (no hotter than 250 degrees).
Pita Bread
(from Annie's Eats)
3 cups flour, plus 1/2-3/4 cup more as needed
1 ½ tsp. salt
1 tbsp. sugar or honey
1 packet instant yeast
1 ¼ to 1 ½ cups water, roughly at room temperature
2 tbsp. olive oil, vegetable oil, butter or shortening
Mix the yeast in with the flour, salt, and sugar. Add the olive oil and 1 ¼ cup water and stir together with a wooden spoon. All of the ingredients should form a ball. If some of the flour will not stick to the ball, add more water.
Once all of the ingredients form a ball, place the ball on a work surface, and knead the dough for approximately 10 minutes. If you are using an electric mixer, mix it at low speed for 10 minutes.
As the dough is mixing, continue to add flour, a tablespoon or two at a time, until the dough clears the sides of the bowl and is tacky but not sticky.
When you are done kneading the dough, place it in a bowl that has been lightly coated with oil. Form a ball out of the dough and place it into the bowl, rolling the dough around so that it has a light coat of oil on all sides. Cover the bowl with plastic wrap or a damp towel and set aside to rise until it has doubled in size, approximately 90 minutes.
When it has doubled in size, punch the dough down to release some of the trapped gases and divide it into 8 equal pieces. Roll each piece into a ball, cover the balls with a damp kitchen towel, and let them rest for 20 minutes. This step allows the dough to relax so that it will be easier to shape.
After the dough has relaxed for 20 minutes, spread a light coating of flour on a work surface and place one of the balls of dough there. Sprinkle a little bit of flour on top of the dough and use a rolling pin or your hands to stretch and flatten the dough. You should be able to roll it out to between ¼ – 1/8” thick – 6 inches in diameter. If the dough does not stretch sufficiently, you can cover it with the damp towel and let it rest 5-10 minutes before trying again.
Place discs on a lightly greased baking sheet or parchment paper and let rise, uncovered, until barely doubled in thickness, about 30-45 minutes.
While the discs are rising, preheat the oven to 450°. If you have a
baking stone, put it in the oven to preheat as well. If you do not have a
baking stone, turn a cookie sheet upside down and
place it on the middle rack of the oven while it is preheating. This
will be the surface on which you bake your pitas.
Open the oven and place as many pitas as you can fit on the hot baking surface. They should be baked through and puffy after 3 minutes. You may need to let the baking surface reheat for a minute or two
between batches - if the surface isn't hot enough a pocket will not
form. If you want your pitas to be crispy and brown you can bake them for an additional 3 to 5 minutes, but it isn’t necessary.
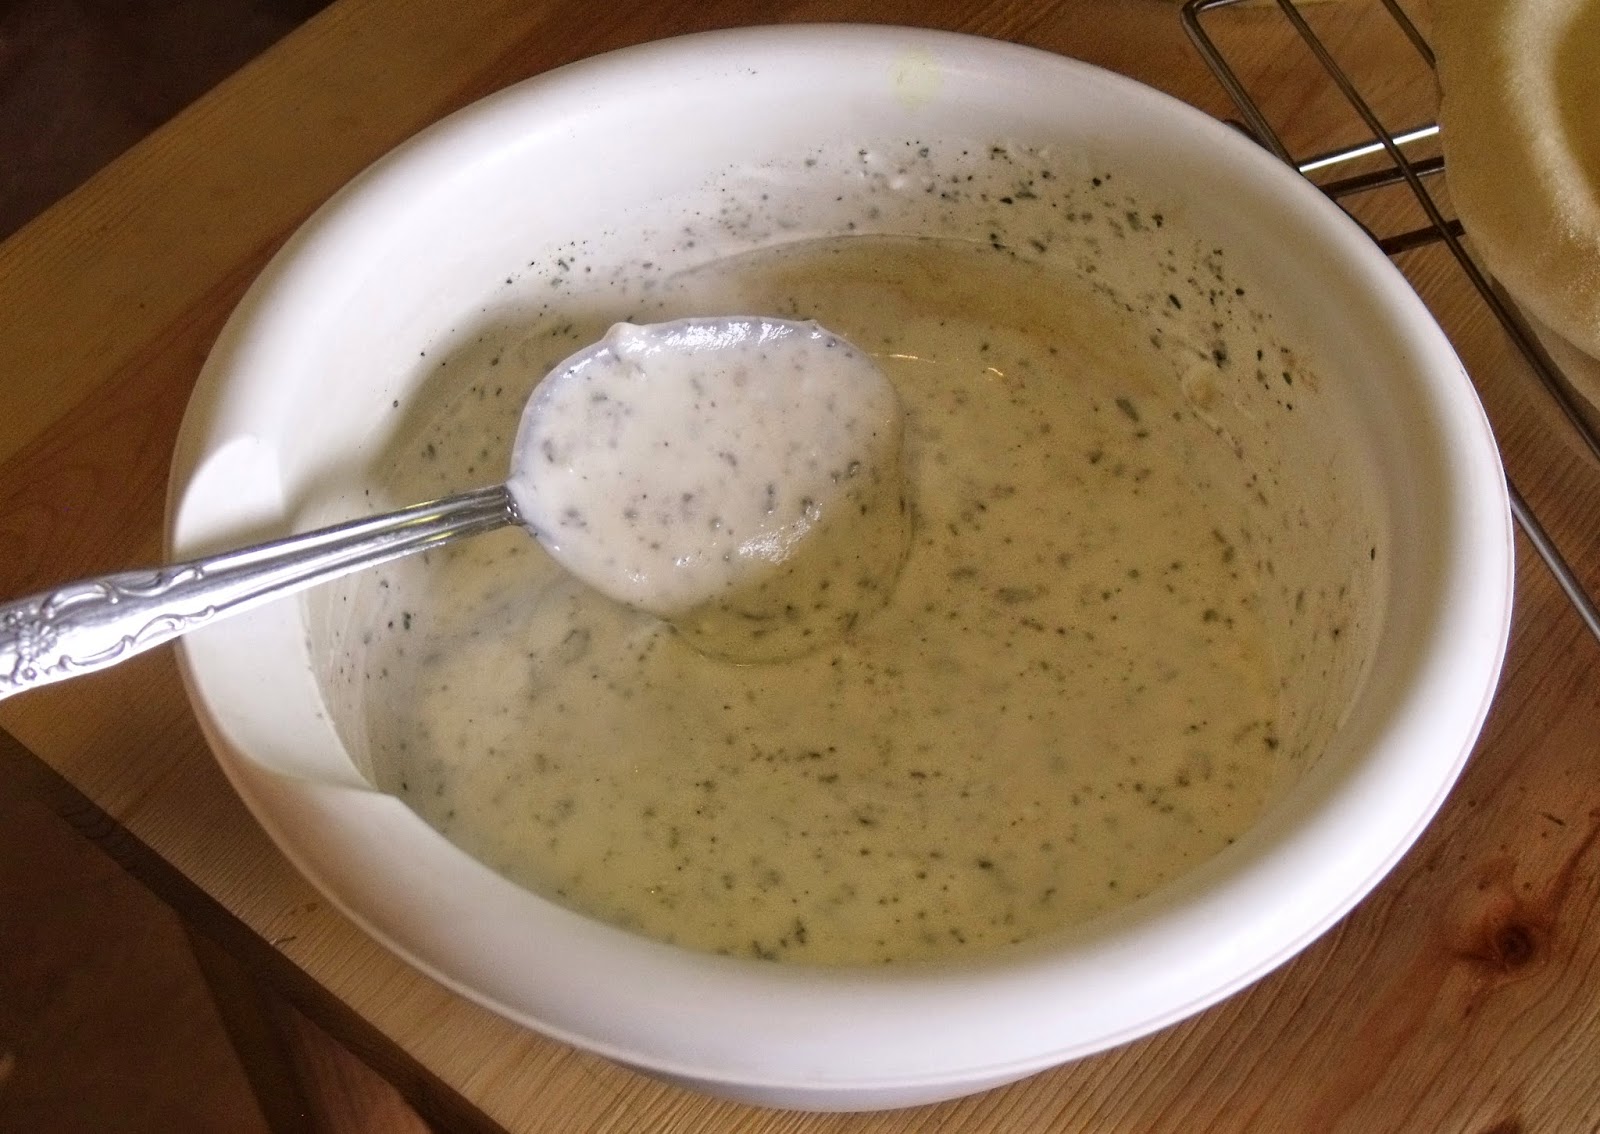
For the yogurt sauce, I remember that I used elements from various recipes to create it, but it was two months ago and I don't remember exactly how I made it! So this is sort of a guess about the general ingredients and quantities...
Yogurt Sauce
1 cup plain yogurt
1 tsp. onion powder
1 tsp. minced garlic
2 tsp. dried mint, crushed
1 tsp. dried oregano
Salt and pepper to taste
Combine in a small bowl. Chill for at least a couple of hours.
Serve falafel inside pita pockets with yogurt sauce, sliced tomatoes and cucumbers, and shredded lettuce. Enjoy!
Linking to Tatertots and Jello
Showing posts with label My Kitchen My World. Show all posts
Tuesday, July 1, 2014
Monday, May 26, 2014
My Kitchen My World - Saudi Arabia
I know that the last time I did a dish for My Kitchen My World I did chicken and rice, but I couldn't resist doing it again this month. It's interesting how so many different countries can do a similar dish, but do it so differently!
Saudi Arabian chicken and rice, called Kabsa, was different from other versions of chicken and rice I've done, thanks to the exotic blend of spices, and the delicious topping of fried nuts and raisins. The whole family very much enjoyed this culinary trip to Saudi Arabia.
Kabsa (Saudi Chicken and Rice)
(adapted from Saji's)
2 chicken breasts
6 cups water
1/2 cup chopped onion
2 bay leaves
1 tsp ground cinnamon
1 tsp salt
2 tbsp olive oil
6 tbsp butter, divided
1 1/2 cup chopped ripe tomato
2 cups chopped onion
2 cups long grain rice
salt to taste
1 tsp ground cardamom (at $10 a bottle, this is too expensive for me - I substituted an additional 1/4 tsp nutmeg, 1/2 tsp allspice, and 1/2 tsp ginger)
1 tsp ground coriander
10 cloves
1/2 tsp nutmeg
1/4 tsp cinnamon
1/4 tsp ground black pepper
1/2 cup raisins soaked in 1/3 cup water
1/2 cup sliced almonds
1/2 cup pistachios
1/2 cup pine nuts
In a large pot place chicken, water, onion, bay leaves, cinnamon, and 1 tsp salt and let cook covered on low heat for about 1 1/2 hour.
In another large pot add olive oil and 1 tbsp butter, then add chopped onions and chopped tomatoes and cook for 10 minutes on medium heat. Next add rice and seasonings. Mix and then add 4 cups of chicken broth from the cooked chicken. Stir and then add 3 tbsp butter. Let come to a boil and then turn down to low heat, cover and let cook for 45 minutes.
In a small pan, add 2 tbsp butter and stir in nuts and raisins, let cook until all are evenly brown, set aside for garnish. In the mean time, pull apart cooked chicken and remove any bones.
After 45 minutes, fluff rice with a fork and let sit another 10 minutes.
Pour out the rice into a large serving dish, place pieces of chicken on top and then put the nut and raisin mixture on top of that. Serve.
Linking to:
My Kitchen My World
Think Tank Thursday (Joyful Homemaking)
Tuesday, April 1, 2014
My Kitchen My World - Belize
Belize was the MKMW country for March. I know that I'm posting in April, but since we made and ate this meal yesterday, technically it still counts for March.
Belize is a small country in Central America, between Mexico, Guatemala, and the Caribbean Sea. The food is similar to both Mexican and Jamaican/Anglo-Caribbean cuisine.
One of the basic staples of Belizean cuisine is stewed chicken served with beans and rice. The recipe I found for the chicken does not use recado (a Mayan spice blend), and the beans and rice use coconut milk. This was a delicious meal. My favorite part was the sauce made from the pan drippings. The onions just melted into the chicken drippings, and it all came together to make a very flavorful gravy that I really enjoyed.
Belizean Stewed Chicken
(from Belize News Post)
4 lbs of chicken cut into pieces, drumsticks and thighs seem to work best, bone in (I used two leg quarters)
1 tsp salt, or to taste
1 tsp pepper, or to taste
1 1/2 tablespoons dried thyme
2 cloves garlic, finely chopped
2 tablespoons oil, or enough to just cover the bottom of the pot
1 small yellow or Spanish onion, chopped
2 tablespoons flour, mixed with 2 tablespoons water (I used extra water, it was too thick at first)
Mix salt, pepper, thyme, and garlic (garlic powder can be substituted) creating a rub. Season chicken with salt, pepper, thyme and garlic mixture.
Heat two tablespoons (or enough to fully cover the bottom of the pan) of oil in large dutch oven or stewing pot over moderately high heat.
Place the chicken in the pan starting skin down. Brown chicken, turning pieces once, about 5 minutes per side.
As chicken browns, add onions, cover pan and simmer on low heat for 10 to 15 minutes so chicken will stew. Recipes vary on the amount of time, many call for 1-2 hours of stewing. Make sure your chicken is fully cooked before enjoying! (Mine stewed for about half an hour before the chicken was done).
After the chicken has finished cooking add a few teaspoons of water to skillet and the flour to thicken the gravy.
Belizean Beans and Rice
(adapted from Belize News Post)
1 large can beans (I used a combination of several types, including black, navy, and pinto)
1/2 tsp pepper
1/2 tsp thyme
1 tsp salt
2 cloves garlic, chopped
1 medium onion, sliced
1 cup coconut milk
2 lbs. rice (I only used 1 1/2 cups, whatever that ends up weighing)
Season beans with black pepper, thyme, and salt. Add coconut milk and 3 cups water. Stir and taste. Let boil.
Add rice to seasoned beans. Stir, then cover. Cook until water is absorbed or rice is tender. If necessary, add more water gradually until rice is tender.
Belize is a small country in Central America, between Mexico, Guatemala, and the Caribbean Sea. The food is similar to both Mexican and Jamaican/Anglo-Caribbean cuisine.
One of the basic staples of Belizean cuisine is stewed chicken served with beans and rice. The recipe I found for the chicken does not use recado (a Mayan spice blend), and the beans and rice use coconut milk. This was a delicious meal. My favorite part was the sauce made from the pan drippings. The onions just melted into the chicken drippings, and it all came together to make a very flavorful gravy that I really enjoyed.
Belizean Stewed Chicken
(from Belize News Post)
4 lbs of chicken cut into pieces, drumsticks and thighs seem to work best, bone in (I used two leg quarters)
1 tsp salt, or to taste
1 tsp pepper, or to taste
1 1/2 tablespoons dried thyme
2 cloves garlic, finely chopped
2 tablespoons oil, or enough to just cover the bottom of the pot
1 small yellow or Spanish onion, chopped
2 tablespoons flour, mixed with 2 tablespoons water (I used extra water, it was too thick at first)
Mix salt, pepper, thyme, and garlic (garlic powder can be substituted) creating a rub. Season chicken with salt, pepper, thyme and garlic mixture.
Heat two tablespoons (or enough to fully cover the bottom of the pan) of oil in large dutch oven or stewing pot over moderately high heat.
Place the chicken in the pan starting skin down. Brown chicken, turning pieces once, about 5 minutes per side.
As chicken browns, add onions, cover pan and simmer on low heat for 10 to 15 minutes so chicken will stew. Recipes vary on the amount of time, many call for 1-2 hours of stewing. Make sure your chicken is fully cooked before enjoying! (Mine stewed for about half an hour before the chicken was done).
After the chicken has finished cooking add a few teaspoons of water to skillet and the flour to thicken the gravy.
Belizean Beans and Rice
(adapted from Belize News Post)
1 large can beans (I used a combination of several types, including black, navy, and pinto)
1/2 tsp pepper
1/2 tsp thyme
1 tsp salt
2 cloves garlic, chopped
1 medium onion, sliced
1 cup coconut milk
2 lbs. rice (I only used 1 1/2 cups, whatever that ends up weighing)
Season beans with black pepper, thyme, and salt. Add coconut milk and 3 cups water. Stir and taste. Let boil.
Add rice to seasoned beans. Stir, then cover. Cook until water is absorbed or rice is tender. If necessary, add more water gradually until rice is tender.
Labels:
dry beans,
My Kitchen My World,
poultry,
rice and other grains
Saturday, February 22, 2014
My Kitchen My World - Czech Republic
Our MKMW destination for February was the Czech Republic. I found a few recipes that intrigued me, but finally decided on these lovely deli sandwiches called Obložené Chlebíčky. I have no idea how that is actually pronounced! But basically these are open-faced sandwiches with flavorful and artfully-arranged toppings. So pretty, and so yummy.
My daughter recently asked if we could do a "sandwich meal" - different kinds of breads and spreads and sandwich fillings, and everyone makes their own special sandwiches just the way they want them. I thought that was a great idea, and the perfect time to do the Czech sandwiches.
We set this all up using some ingredients typical of the Czech deli sandwiches, and some typical of regular old American sandwiches, so everyone would have a good variety to choose from.
So here is my kitchen island, covered in the breads and some spreads and toppings:
And here is the counter with all the meats, cheeses, veggies, and a couple other spreads:
I was really the only one to make Obložené Chlebíčky sandwiches. But wow, I'm glad I did!
The first sandwich is a slice of french bread spread with potato salad, and topped with hard salami, provolone cheese, sweet pickle, a slice of tomato, and a slice of boiled egg.
The second sandwich also started with french bread and potato salad, then was topped with ham, muenster cheese, sweet red pepper, a slice of boiled egg, and a dash of paprika.
Honestly, I have never before thought to put potato salad on a sandwich. It never even crossed my mind. But it was so delicious on these sandwiches! Also, I don't really even care for sweet pickles. But again, together with the other sandwich toppings, they somehow worked.
It would have been fun to experiment with some of the more fun and unique toppings typical of the
Obložené Chlebíčky, but our budget doesn't quite cover stuff like lobster spread, anchovy paste, caviar, capers, or camembert. Maybe someday. :)
My daughter recently asked if we could do a "sandwich meal" - different kinds of breads and spreads and sandwich fillings, and everyone makes their own special sandwiches just the way they want them. I thought that was a great idea, and the perfect time to do the Czech sandwiches.
We set this all up using some ingredients typical of the Czech deli sandwiches, and some typical of regular old American sandwiches, so everyone would have a good variety to choose from.
So here is my kitchen island, covered in the breads and some spreads and toppings:
| Homemade french bread, hoagie rolls, and flat bread, all made using my favorite universal bread formula; mayo, mustard, oil and vinegar, sriracha, and relish |
And here is the counter with all the meats, cheeses, veggies, and a couple other spreads:
| Ham, turkey, salami, and pepperoni; provolone, swiss, muenster, and colby jack; tomatoes, red pepper, pickles, eggs, lettuce, and cucumber; potato salad and guacamole |
I was really the only one to make Obložené Chlebíčky sandwiches. But wow, I'm glad I did!
| So beautiful! I do, however, admit to having to use toothpicks to keep my salami rolled like that... |
The first sandwich is a slice of french bread spread with potato salad, and topped with hard salami, provolone cheese, sweet pickle, a slice of tomato, and a slice of boiled egg.
The second sandwich also started with french bread and potato salad, then was topped with ham, muenster cheese, sweet red pepper, a slice of boiled egg, and a dash of paprika.
Honestly, I have never before thought to put potato salad on a sandwich. It never even crossed my mind. But it was so delicious on these sandwiches! Also, I don't really even care for sweet pickles. But again, together with the other sandwich toppings, they somehow worked.
It would have been fun to experiment with some of the more fun and unique toppings typical of the
Obložené Chlebíčky, but our budget doesn't quite cover stuff like lobster spread, anchovy paste, caviar, capers, or camembert. Maybe someday. :)
Saturday, February 1, 2014
My Kitchen My World - Poland
January's country for My Kitchen My World was Poland. I enjoy cooking foods from European countries, they're almost familiar but different enough to make it fun.
Halushki is a Polish dish made of noodles, cabbage, and pork. This recipe makes a LOT - we were eating leftovers for quite a while. No complaints though, it tasted really good. But until our family has added a couple kids (not for a while!), I'll probably make this recipe in a smaller batch next time.
Halushki
(from allrecipes.com)
1 1/2 lb. pork chops
garlic powder to taste
salt and pepper to taste
1 onion, chopped
1 large head cabbage, cut into squares
1 lb. large egg noodles
1 tbsp. butter
Sprinkle pork chops with garlic powder, salt and pepper and place in a large greased sauce pan or deep skillet with chopped onion and fry until very brown and well cooked. It is ok if they stick a little, as the drippings are essential in this dish. When done, remove chops and set aside.
Add a little water to the saucepan or skillet and mix up the drippings a bit. Place cabbage into the pot, and allow to cook down completely.
In a separate large saucepan, boil the egg noodles in water until cooked. Drain noodles and mix in butter.
Cut up the pork chops to bite size pieces and set aside. When the cabbage has cooked down, add pork and cooked noodles and mix completely.
Halushki is a Polish dish made of noodles, cabbage, and pork. This recipe makes a LOT - we were eating leftovers for quite a while. No complaints though, it tasted really good. But until our family has added a couple kids (not for a while!), I'll probably make this recipe in a smaller batch next time.
Halushki
(from allrecipes.com)
1 1/2 lb. pork chops
garlic powder to taste
salt and pepper to taste
1 onion, chopped
1 large head cabbage, cut into squares
1 lb. large egg noodles
1 tbsp. butter
Sprinkle pork chops with garlic powder, salt and pepper and place in a large greased sauce pan or deep skillet with chopped onion and fry until very brown and well cooked. It is ok if they stick a little, as the drippings are essential in this dish. When done, remove chops and set aside.
Add a little water to the saucepan or skillet and mix up the drippings a bit. Place cabbage into the pot, and allow to cook down completely.
In a separate large saucepan, boil the egg noodles in water until cooked. Drain noodles and mix in butter.
Cut up the pork chops to bite size pieces and set aside. When the cabbage has cooked down, add pork and cooked noodles and mix completely.
Labels:
International cuisine,
main dishes,
My Kitchen My World,
pasta
Tuesday, December 31, 2013
My Kitchen My World - Dessert
December's assignment on My Kitchen My World was a little different than usual. Normally we make a dish from a specific country each month. This month though, we could choose any holiday dessert from any country.
I chose to make a Jewish dish that is common in many European countries, called Noodle Kugel. It is a traditional dish for Sabbath and for festive holidays. This particular version is from Russia, I found it under the title of Russian Noodle Pudding.
Kugel isn't as sweet as I usually prefer for desserts. That's understandable considering that it's commonly used as a side dish as well as a dessert. It has a tartness from the cottage cheese and sour cream that melds nicely with the small amount of sugar and vanilla. My kids would definitely have enjoyed this more if it were topped with some maple syrup and whipped cream, but I actually liked it as is.
Noodle Kugel
16 oz. pasta, cooked and drained
24 oz. cottage cheese
2 cups sour cream
2 eggs
7 tbsp. sugar
1 tsp. vanilla
2 graham cracker sheets
2 tbsp. brown sugar
dash cinnamon
dash nutmeg
3 tbsp. butter
Heat oven to 350, butter a large baking dish.
Combine cottage cheese, sour cream, eggs, sugar, and vanilla. Mix well. Stir in pasta. Spread into buttered baking dish.
Crush graham crackers, add brown sugar and spices. Sprinkle over pasta mixture. Dot with butter.
Bake at 350 for 30 minutes. Serve warm or chilled.
I do wish I hadn't made such a large pan of this. It's yummy, but since the kids aren't huge fans I'm worried we might not eat it all fast enough. I wonder if it freezes well?
And here's an update on the kitchen. The last time I posted, it was an absolute mess of renovation horror. Well, here is what it looks like now. Much better! We're putting the renovation on hold for the winter, and will eventually put in the final touches like back splash, base boards, and the remaining cabinet doors in a few months. In the meantime, it's so nice to have it functioning and looking decent!
Linking:
Project Inspire{d} at Dukes and Duchesses
Think Tank Thursday at Joyful Homemaking
Wowza Weekend Link Party at My Love 2 Create
Link Party Palooza at tatertots & jello
Strut Your Stuff Saturday Link Party at Six Sisters' Stuff
I chose to make a Jewish dish that is common in many European countries, called Noodle Kugel. It is a traditional dish for Sabbath and for festive holidays. This particular version is from Russia, I found it under the title of Russian Noodle Pudding.
Kugel isn't as sweet as I usually prefer for desserts. That's understandable considering that it's commonly used as a side dish as well as a dessert. It has a tartness from the cottage cheese and sour cream that melds nicely with the small amount of sugar and vanilla. My kids would definitely have enjoyed this more if it were topped with some maple syrup and whipped cream, but I actually liked it as is.
Noodle Kugel
16 oz. pasta, cooked and drained
24 oz. cottage cheese
2 cups sour cream
2 eggs
7 tbsp. sugar
1 tsp. vanilla
2 graham cracker sheets
2 tbsp. brown sugar
dash cinnamon
dash nutmeg
3 tbsp. butter
Heat oven to 350, butter a large baking dish.
Combine cottage cheese, sour cream, eggs, sugar, and vanilla. Mix well. Stir in pasta. Spread into buttered baking dish.
Crush graham crackers, add brown sugar and spices. Sprinkle over pasta mixture. Dot with butter.
Bake at 350 for 30 minutes. Serve warm or chilled.
I do wish I hadn't made such a large pan of this. It's yummy, but since the kids aren't huge fans I'm worried we might not eat it all fast enough. I wonder if it freezes well?
And here's an update on the kitchen. The last time I posted, it was an absolute mess of renovation horror. Well, here is what it looks like now. Much better! We're putting the renovation on hold for the winter, and will eventually put in the final touches like back splash, base boards, and the remaining cabinet doors in a few months. In the meantime, it's so nice to have it functioning and looking decent!
Linking:
Project Inspire{d} at Dukes and Duchesses
Think Tank Thursday at Joyful Homemaking
Wowza Weekend Link Party at My Love 2 Create
Link Party Palooza at tatertots & jello
Strut Your Stuff Saturday Link Party at Six Sisters' Stuff
Labels:
dessert,
International cuisine,
My Kitchen My World,
pasta,
side dishes
Thursday, October 10, 2013
My Kitchen My World - Tonga
I wanted to participate in My Kitchen My World last month - I pinned several recipes from Great Britain that looked fun and yummy. But last month we started renovating our kitchen, and it just didn't happen. Go figure - remove the kitchen sink, counters, cabinets, and any semblance of a working kitchen, and suddenly I don't feel like making fancy foreign foods.
But even though we've been working on this kitchen renovation for about a month now and it still looks awful, I just had to participate this month. Tonga was my choice of country to visit in October. Torn-up kitchen or no, I had to make a delicious Tongan meal to share!
I chose Tonga as this month's MKMW destination because we have a lot of Tongan friends and church acquaintances in our neighborhood. I have grown to love the Polynesian culture, including and especially the food!
In Tonga, a common traditional cooking method is an underground earthen oven, called an umu. A common meal is meat and coconut, and sometimes vegetables, wrapped in taro leaves and baked in the umu. The taro leaves are called lu. The main dish I chose to make is called lu pulu, which is lu with beef.
The recipe I used is from the family of John Groberg. He is sort of famous in the Mormon church for serving a mission in Tonga in the 1950's, and writing about his experiences (a movie was even made about it). This is a simplified, Americanized version of lu pulu, using spinach and aluminum foil in place of taro leaves. The recipe also calls for mayonnaise, but I chose to use cream of coconut instead, as being closer to tradition.
Lu Pulu
3 bunches spinach, washed, drained, and stemmed
1 12-oz can corned beef
1 onion, chopped
1 tomato, chopped (optional)
Salt and pepper to taste
5 tbsp cream of coconut (found in the drink mixer section of grocery stores, use mayonnaise instead if you prefer)
19-inch sheet of aluminum foil
Fold foil in half and lay flat. Lay spinach leaves over it, then top with chopped corned beef, onion, tomato, and salt and pepper. Spread with cream of coconut or mayonnaise. Gather edges of foil up and twist at the top to make a tight package. Place in a baking pan. Bake at 350 for 1 hour.
Open foil, mix the ingredients a little, and serve over sweet potatoes, which can be baked in the same oven.
This stuff is pretty yummy! It was very simple to make. Except for opening the can of corned beef. For some reason, my can didn't come with the little key to open it. I had to grab the tab with a vice grip I had lying around, and try to wrench it open. That worked for about half the can, then it broke off. Then I tried to use my super strong kitchen shears to cut the can open the rest of the way. I'm lucky I still have all my fingers! Eventually I just embraced the half-openness of the can and painstakingly scooped the meat out with a spoon.
Anyway, moving on! A popular drink in Tonga is called something called otai. It is typically made up of watermelon pulp and coconut milk. Other fruits are sometimes added to it. When I went to buy ingredients for this meal, I quickly was reminded that watermelon is not in season! I got a small plastic container of watermelon and supplemented with crushed pineapple. Usually otai should be much more pink than this! This recipe made a very chunky drink - we ate it as much as we drank it. But it was still quite yummy! Next time I would probably pull out the blender and give it a whirl.
Otai
3 cups grated watermelon
1 can crushed pineapple (do not drain)
1/2 cup shredded coconut
1/2 cup cream of coconut (this wasn't in the recipe I used, but I figured I had already opened the can for the lu pulu and I might as well add it to the otai)
1 can evaporated milk
2 cans of water (use the evaporated milk can)
Juice of 1/2 lime
Combine all ingredients in pitcher or large bowl. Process in blender if desired. Chill before serving.
As a little bonus, here is a picture of what my kitchen looked like when I made this meal. Yeah, it's scary.
And if anyone is interested, you can visit my other blog to read about our kitchen remodel.
But even though we've been working on this kitchen renovation for about a month now and it still looks awful, I just had to participate this month. Tonga was my choice of country to visit in October. Torn-up kitchen or no, I had to make a delicious Tongan meal to share!
I chose Tonga as this month's MKMW destination because we have a lot of Tongan friends and church acquaintances in our neighborhood. I have grown to love the Polynesian culture, including and especially the food!
In Tonga, a common traditional cooking method is an underground earthen oven, called an umu. A common meal is meat and coconut, and sometimes vegetables, wrapped in taro leaves and baked in the umu. The taro leaves are called lu. The main dish I chose to make is called lu pulu, which is lu with beef.
The recipe I used is from the family of John Groberg. He is sort of famous in the Mormon church for serving a mission in Tonga in the 1950's, and writing about his experiences (a movie was even made about it). This is a simplified, Americanized version of lu pulu, using spinach and aluminum foil in place of taro leaves. The recipe also calls for mayonnaise, but I chose to use cream of coconut instead, as being closer to tradition.
Lu Pulu
3 bunches spinach, washed, drained, and stemmed
1 12-oz can corned beef
1 onion, chopped
1 tomato, chopped (optional)
Salt and pepper to taste
5 tbsp cream of coconut (found in the drink mixer section of grocery stores, use mayonnaise instead if you prefer)
19-inch sheet of aluminum foil
Fold foil in half and lay flat. Lay spinach leaves over it, then top with chopped corned beef, onion, tomato, and salt and pepper. Spread with cream of coconut or mayonnaise. Gather edges of foil up and twist at the top to make a tight package. Place in a baking pan. Bake at 350 for 1 hour.
Open foil, mix the ingredients a little, and serve over sweet potatoes, which can be baked in the same oven.
This stuff is pretty yummy! It was very simple to make. Except for opening the can of corned beef. For some reason, my can didn't come with the little key to open it. I had to grab the tab with a vice grip I had lying around, and try to wrench it open. That worked for about half the can, then it broke off. Then I tried to use my super strong kitchen shears to cut the can open the rest of the way. I'm lucky I still have all my fingers! Eventually I just embraced the half-openness of the can and painstakingly scooped the meat out with a spoon.
Anyway, moving on! A popular drink in Tonga is called something called otai. It is typically made up of watermelon pulp and coconut milk. Other fruits are sometimes added to it. When I went to buy ingredients for this meal, I quickly was reminded that watermelon is not in season! I got a small plastic container of watermelon and supplemented with crushed pineapple. Usually otai should be much more pink than this! This recipe made a very chunky drink - we ate it as much as we drank it. But it was still quite yummy! Next time I would probably pull out the blender and give it a whirl.
Otai
3 cups grated watermelon
1 can crushed pineapple (do not drain)
1/2 cup shredded coconut
1/2 cup cream of coconut (this wasn't in the recipe I used, but I figured I had already opened the can for the lu pulu and I might as well add it to the otai)
1 can evaporated milk
2 cans of water (use the evaporated milk can)
Juice of 1/2 lime
Combine all ingredients in pitcher or large bowl. Process in blender if desired. Chill before serving.
As a little bonus, here is a picture of what my kitchen looked like when I made this meal. Yeah, it's scary.
And if anyone is interested, you can visit my other blog to read about our kitchen remodel.
Saturday, August 31, 2013
My Kitchen My World - Sweden
Cutting it close this month! But the last day of August still counts. :)
This month for My Kitchen My World we visited the cuisine of Sweden. I didn't want to do Swedish meatballs, they're too well-known around here to be considered a challenge. Instead, I found a dish called Kroppkakor, or potato dumplings. They turned out so delicious. I don't think I added nearly enough flour to the dough, which made it extremely messy to work with, but at least it tasted good!
Swedish Kroppkakor
10 medium potatoes, peeled, boiled, and cooled
1 egg
1 1/4 cup flour, or enough to make a soft dough
8 oz. bacon, diced
1 small onion, diced
1 tsp. ground allspice
Mash potatoes. Mix in egg and flour to make soft dough, set aside.
Fry bacon and onion until bacon is crispy and onion is soft. Add allspice. I just want to note that this mixture smells absolutely incredible!
Flatten pieces of dough into rounds. Top with 1-2 tsp. bacon mixture, then close the dough around the filling and form a ball.
Drop dumplings into simmering salted water, 4 or 5 at a time. Cook for about 5 minutes (another recipe said 15 minutes, we did somewhere in between).
Serve with bechamel sauce (basic white sauce) or melted butter, and lingonsylt (lingonberry jam). We didn't have lingonberry jam, so I had Jeff make some cranberry sauce instead.
With the potatoes, and the allspice, and the cranberry sauce, this stuff tasted like Thanksgiving! It totally put me in a fall mood. Jeff and I each had several dumplings, my 3-yr-old and 1-yr-old each devoured two, and my two older kids were only able to tolerate one after I put ketchup on it.
One recipe I found says that leftover dumplings are good cut up and fried crispy the next morning. I know what we're having for breakfast tomorrow! :)
*Update: We chopped up the leftovers and fried them in bacon grease. They turned out quite yummy.
This month for My Kitchen My World we visited the cuisine of Sweden. I didn't want to do Swedish meatballs, they're too well-known around here to be considered a challenge. Instead, I found a dish called Kroppkakor, or potato dumplings. They turned out so delicious. I don't think I added nearly enough flour to the dough, which made it extremely messy to work with, but at least it tasted good!
Swedish Kroppkakor
10 medium potatoes, peeled, boiled, and cooled
1 egg
1 1/4 cup flour, or enough to make a soft dough
8 oz. bacon, diced
1 small onion, diced
1 tsp. ground allspice
Mash potatoes. Mix in egg and flour to make soft dough, set aside.
Fry bacon and onion until bacon is crispy and onion is soft. Add allspice. I just want to note that this mixture smells absolutely incredible!
Flatten pieces of dough into rounds. Top with 1-2 tsp. bacon mixture, then close the dough around the filling and form a ball.
Drop dumplings into simmering salted water, 4 or 5 at a time. Cook for about 5 minutes (another recipe said 15 minutes, we did somewhere in between).
Serve with bechamel sauce (basic white sauce) or melted butter, and lingonsylt (lingonberry jam). We didn't have lingonberry jam, so I had Jeff make some cranberry sauce instead.
With the potatoes, and the allspice, and the cranberry sauce, this stuff tasted like Thanksgiving! It totally put me in a fall mood. Jeff and I each had several dumplings, my 3-yr-old and 1-yr-old each devoured two, and my two older kids were only able to tolerate one after I put ketchup on it.
One recipe I found says that leftover dumplings are good cut up and fried crispy the next morning. I know what we're having for breakfast tomorrow! :)
*Update: We chopped up the leftovers and fried them in bacon grease. They turned out quite yummy.
Friday, June 7, 2013
My Kitchen My World - Cuban Pork with Black Beans and Rice
After a very long absence, I am once again contributing my culinary offering to My Kitchen My World. The country for June was Cuba. So I hopped onto Allrecipes.com and found some delicious Cuban recipes.
Cuban Pork
(adapted from Allrecipes.com)
1 1/2 lb. pork loin roast, cut into 5 or 6 thick slices
1 lime, zested and juiced
2 tsp. olive oil
1 tsp. cumin
1/2 tsp. salt
1 pinch crushed red pepper
1 tsp. minced garlic
In a bowl, mix together the lime zest, olive oil, cumin, salt, crushed red pepper, and garlic. Reserve the lime juice. Rub the seasoning mixture onto both sides of the pork slices.
Spray a heavy skillet or ridged grill pan with cooking spray, and place over medium heat. Pan-fry the pork slices until browned on both sides, 6 to 7 minutes per side. After you turn the meat over, pour the reserved lime juice over the meat and continue cooking until no longer pink in the center. Serve hot, topped with pan juices.
This pork is just bursting with lime flavor, and it paired really well with some plain rice and some delicious black beans.
Cuban Black Beans
(Adapted from Allrecipes.com)
2 tbsp. olive oil
1 large onion, chopped
1 medium green bell pepper, chopped
4 tsp. minced garlic
3 cans black beans, not drained
1/2 can tomato sauce
4 oz. roasted red pepper, chopped
1 tbsp. vinegar
2 tsp. salt
1 tsp. sugar
1 tsp. black pepper
Heat oil in a medium saucepan over medium heat, and saute onion, green bell pepper, and garlic until tender.
Into the onion mixture, stir the beans, tomato sauce, red pepper, and vinegar. Season with salt, sugar, and pepper. Bring to a boil. Cover, reduce heat, and simmer 30 minutes, stirring occasionally.
Ahh, feels good to be back. I really am going to try to post recipes more frequently, I've really slacked off the past few...um...years....
Linked to:
Weekend Wrap-Up Party at tatertots&jello
Think Tank Thursday at Joyful Homemaking
Project Inspire{d} at Dukes and Duchesses
Tuesday, July 28, 2009
My Kitchen My World - Ukraine (late...)
This post is several days late, I think. But I wanted to make these dishes anyway because they looked so delicious and I had the ingredients. So here is my late submission to My Kitchen My World, Ukraine!

Cabbage with Tomatoes
1 small head cabbage, shredded
1 medium onion, finely chopped
1/4 cup butter or bacon fat
3 tbsp. water
2 tbsp. butter or bacon fat
2 tbsp. flour
1 cup diced canned tomatoes
1 tbsp. sugar, or to taste
2 tbsp. sour cream
Salt & freshly ground pepper
Sprinkle of red pepper flakes
Saute the onion in a large frying pan until tender. Add the cabbage and water and cook, uncovered, for about 15 minutes or until the cabbage is tender but still slightly crisp.
In another pan, melt the butter or bacon fat. Add the flour, stir to blend, and add the tomatoes and sugar. Cook until the sauce thickens. Add the sour cream and season to taste with salt, pepper, and red pepper flakes
Combine the sauce with the cabbage and bring to a boil. Lower heat and simmer for 5 minutes to blend the flavors.

Sour Cream Cucumber Salad
3 medium cucumbers
1/2 tsp. salt
1/2 cup finely chopped green onions
1/2 cup fresh chopped dill (I cheated and used dry dill)
1 tbsp. white vinegar
Dash white pepper
1/4 cup (add more depending on your taste and size of cucumbers)
Peel cucumbers and slice thinly. Sprinkle with salt. Let stand 15 minutes. Drain liquid. Add green onions, dill, vinegar, and white pepper. Toss lightly with sour cream.

Served with some fresh homemade bread, this was a tasty Ukrainian meal (though I do admit it probably would have been more authentic had I made rye bread. Oh well, no one's perfect). I think these are probably more along the lines of adult taste, as my usually unpicky children wanted nothing to do with anything on their plates except the bread. But Jeff and I really enjoyed the cabbage and the salad.
Both of these delicious recipes came from Nash Holos, "a blog about Ukrainian music, musicians, radio, TV, internet, culture and community in Canada, Ukraine and elsewhere." This blog has lots of yummy looking Ukrainian recipes that I would love to try! Especially the many desserts, mmmmm...
Cabbage with Tomatoes
1 small head cabbage, shredded
1 medium onion, finely chopped
1/4 cup butter or bacon fat
3 tbsp. water
2 tbsp. butter or bacon fat
2 tbsp. flour
1 cup diced canned tomatoes
1 tbsp. sugar, or to taste
2 tbsp. sour cream
Salt & freshly ground pepper
Sprinkle of red pepper flakes
Saute the onion in a large frying pan until tender. Add the cabbage and water and cook, uncovered, for about 15 minutes or until the cabbage is tender but still slightly crisp.
In another pan, melt the butter or bacon fat. Add the flour, stir to blend, and add the tomatoes and sugar. Cook until the sauce thickens. Add the sour cream and season to taste with salt, pepper, and red pepper flakes
Combine the sauce with the cabbage and bring to a boil. Lower heat and simmer for 5 minutes to blend the flavors.
Sour Cream Cucumber Salad
3 medium cucumbers
1/2 tsp. salt
1/2 cup finely chopped green onions
1/2 cup fresh chopped dill (I cheated and used dry dill)
1 tbsp. white vinegar
Dash white pepper
1/4 cup (add more depending on your taste and size of cucumbers)
Peel cucumbers and slice thinly. Sprinkle with salt. Let stand 15 minutes. Drain liquid. Add green onions, dill, vinegar, and white pepper. Toss lightly with sour cream.
Served with some fresh homemade bread, this was a tasty Ukrainian meal (though I do admit it probably would have been more authentic had I made rye bread. Oh well, no one's perfect). I think these are probably more along the lines of adult taste, as my usually unpicky children wanted nothing to do with anything on their plates except the bread. But Jeff and I really enjoyed the cabbage and the salad.
Both of these delicious recipes came from Nash Holos, "a blog about Ukrainian music, musicians, radio, TV, internet, culture and community in Canada, Ukraine and elsewhere." This blog has lots of yummy looking Ukrainian recipes that I would love to try! Especially the many desserts, mmmmm...
Sunday, July 12, 2009
My Kitchen My World - The Bahamas
My Kitchen My World this week takes us to the Bahamas! Calls to mind tropical breezes and sandy beaches to me. Unfortunately, I only remembered about this particular event yesterday, so had to work around my extremely limited foods on hand (we shop on Mondays, so by Saturday/Sunday, we're running low or out of most of the "fun stuff"). Luckily, as I searched Bahamian recipes, Johnny Cake kept popping up, with basic ingredients that I always have on hand. Actually, this particular recipe was my second choice. I had picked one that included cornmeal, but as I started measuring ingredients I realized that I was out of cornmeal! So that's going on the list for tomorrow, and I had to hurry and find a recipe that didn't include it. I found it quite that Bahamian Johnny Cake can be made with or without cornmeal.

Johnny Cake
2 cups flour
2 tbsp. sugar
1 tsp. salt
3 tsp. baking powder
3 tsp. oil
1 cup milk
Mix dry ingredients; add liquids. Mix together and knead for a few minutes. Put into a greased 8x8-inch square pan and place in a 374 degree preheated oven. Bake approximately 20 minutes. Most recipes suggest serving hot with butter.

Johnny Cake is traditionally served as an accompaniment, great for dipping in a nice soup, stew, or souse. I don't tend to be traditional with what gets served when, so because we had a very large lunch, I served this on its own as a simple dinner, topped with butter and jam. It was soft and fluffy, actually pretty similar to biscuits. It was simple enough and good enough that I think it will probably make its way into our regular meal rotations. Yummy!
Johnny Cake
2 cups flour
2 tbsp. sugar
1 tsp. salt
3 tsp. baking powder
3 tsp. oil
1 cup milk
Mix dry ingredients; add liquids. Mix together and knead for a few minutes. Put into a greased 8x8-inch square pan and place in a 374 degree preheated oven. Bake approximately 20 minutes. Most recipes suggest serving hot with butter.
Johnny Cake is traditionally served as an accompaniment, great for dipping in a nice soup, stew, or souse. I don't tend to be traditional with what gets served when, so because we had a very large lunch, I served this on its own as a simple dinner, topped with butter and jam. It was soft and fluffy, actually pretty similar to biscuits. It was simple enough and good enough that I think it will probably make its way into our regular meal rotations. Yummy!
Labels:
bread,
International cuisine,
My Kitchen My World
Friday, June 12, 2009
My Kitchen My World - Switzerland
I chose to do something super healthy for this edition of My Kitchen My World, and you really can't get much healthier than Birchermüesli. This cereal-like apple dish was invented by Dr. Maximilian Oskar Bircher-Benner, a pioneer of biological health medicine in Zürich in the early 1900s. He believed that fruits, vegetables, and grains should be the staples of a healthy diet, which contradicted the popular public opinion of his day that meats were all-important and most healthy. Birchermüesli was born as a recipe to take advantage of what Bircher-Benner called "food of the sunlight."
Plus, at the time fruits and vegetables were considered to be poor people's food, so that fits right in with my blog, don't ya think?

Birchermüesli
4 tablespoons oat flakes (I took this to mean rolled oats?)
8 tablespoons water
4 tablespoons sweet evaporated milk or cream
Honey or sugar according to your own taste (use as little sugar as possible)
Juice of 2 lemons
8 apples
Put oat flakes, water, sweet evaporated milk and juice of lemon in a bowl.
Wash apples, cut in pieces, remove core (do not remove skin). Grind apples into the bowl and mix well (I wasn't sure exactly what this meant; I ended up chopping the apples roughly in the food processor. I probably could have processed them even further and made it into more of a puree).
Add sugar and honey according to your own taste and mix well again. Serve immediately.
We ate this for breakfast. It was actually pretty refreshing, a fun departure from our normal breakfast foods. The kids totally loved it.
Plus, at the time fruits and vegetables were considered to be poor people's food, so that fits right in with my blog, don't ya think?
Birchermüesli
4 tablespoons oat flakes (I took this to mean rolled oats?)
8 tablespoons water
4 tablespoons sweet evaporated milk or cream
Honey or sugar according to your own taste (use as little sugar as possible)
Juice of 2 lemons
8 apples
Put oat flakes, water, sweet evaporated milk and juice of lemon in a bowl.
Wash apples, cut in pieces, remove core (do not remove skin). Grind apples into the bowl and mix well (I wasn't sure exactly what this meant; I ended up chopping the apples roughly in the food processor. I probably could have processed them even further and made it into more of a puree).
Add sugar and honey according to your own taste and mix well again. Serve immediately.
We ate this for breakfast. It was actually pretty refreshing, a fun departure from our normal breakfast foods. The kids totally loved it.
Saturday, May 9, 2009
My Kitchen My World - Mexico

After a long absence from MKMW, I was eager to jump back on the wagon and participate this month. My Kitchen My World has changed around a little bit since the last time I participated. Now there are two countries each month, and recipes are posted on the second and fourth Saturday. The first country for May is Mexico, in honor of Cinco de Mayo - I knew I could do this one, because I love Mexican foods!
I have this great cookbook, the Better Homes and Gardens Mexican Cookbook, published 1977. It was my source for all the recipes in this post.

All I had to do was flip through the book and pick a few delicious-looking recipes. We have a plato mayor (main dish), sopa (soup), and postre (dessert).
Since I'm pregnant, we didn't do this whole menu all at once - we spread out the dishes over several days. If I were to try eating all this in one sitting, I would end up with a very upset tummy that would plague me for hours! Not to mention trying to plan and cook it all at once is just more than I could manage, even with Jeff doing a majority of the work. Doing each dish separately ended up being a great idea because we could enjoy and savor each individual recipe on its own, instead of having one big marathon meal where no one individual dish stood out. Also, it was like we got to celebrate Cinco de Mayo all week long! It worked out great!
The entree for our Mexican menu was an absolutely fabulous dish called Pollo Aguascalientes, or Chicken Aguascalientes-Style. Aguascalientes ("hot waters") is a region of Mexico located northwest of Mexico City. It is so named because of the abundance of hot springs in the area. Based on this dish, I would say that they have a pretty good handle on making good food - this was absolutely fantastic! I loved loved loved! the combination of flavors in this chicken and we will definitely be making this again and again.

Pollo Aguascalientes
2 1/2- to 3-pound broiler-fryer chicken, cut up (instead of buying a whole chicken, we used what we had available - two thighs and three drumsticks)
2 tbsp. cooking oil
1 small onion, thinly sliced
1 clove garlic, minced
3 medium tomatoes, peeled, seeded, and chopped (I skipped the peeling and seeding and it worked fine)
1 tbsp. lemon juice
1 tsp. sugar
1 tsp. salt
1 tsp. dried oregano, crushed
1/8 tsp. ground cinnamon
1/8 tsp. ground cloves
2 tsp. cornstarch
Sprinkle chicken with salt and pepper. In 12-inch skillet brown chicken in cooking oil about 15 minutes. Add onion and garlic, cook 5 minutes more. Add tomatoes, lemon juice, sugar, salt, oregano, cinnamon, cloves, and 1/2 cup water. Cover; simmer 30-35 minutes or till chicken is tender and cooked through.
Remove chicken to platter; keep warm. Measure pan juices; add water to make 2 cups. Return to skillet. Combine cornstarch and 2 tbsp. cold water; add to skillet. Cook and stir till thickened and bubbly.
Spoon some sauce over chicken; pass remainder. Traditionally served with shredded lettuce, jalapeno peppers, fried potatoes (slice a potato or two, and fry in butter), and chorizo (we skipped the chorizo). Makes 4 servings.
This chicken dish, though supremely delicious, was a lot of work, so next time I really want to try cooking it in the slow cooker. I think the recipe will convert to slow cooker really easily. Just add the ingredients into the cooker all at once, then cook until the chicken is done. When we do it that way, I'll post how it goes.
The soup we chose to make was a deliciously simple Sopa Ranchera, or Ranch-Style Soup. With basic ingredients and easy instructions, the soup was quick and easy to make, and very delicious. This is another one that I wouldn't hesitate to make again.

Sopa Ranchera
1/4 cup chopped onion
1 tbsp. cooking oil
4 cups chicken broth (we used turkey broth from a turkey we roasted up a while ago)
1/4 cup long grain rice
1/4 cup tomato puree
1/4 tsp. salt
Dash pepper
1 cup frozen peas
In saucepan cook onion in hot oil till tender but not brown. Stir in chicken broth, rice, tomato puree, salt, and pepper. Bring to boiling. Reduce heat; cover and simmer for 25 minutes. Stir in frozen peas; simmer, covered, 5 minutes longer. Makes 4 servings.
Dessert was absolutely delicious. I decided to make the same thing that we did for Cinco de Mayo last year - Leche Quemada, or Caramel Milk Pudding. It's basically sweetened condensed milk that's baked until it's browned and set - super rich and super delicious, it ends up similar to caramel. Last time I baked this in individual ramekins, but this time I poured it all in one pan, and we served it with fresh fruit and whipped topping.
My bowl, nice and pretty

Leche Quemada con Frutas
1 14-oz can sweetened condensed milk
1 mango, sliced
1 banana, sliced
1 apple, sliced
Frozen whipped topping, thawed (or I guess you could do real whipped cream if you wanted)
Pour milk into an 8-inch square baking dish; cover with foil. Place in shallow pan; pour boiling water around it to a depth of 3/4 inch. Bake in 425-degree oven for 1 hour. Serve warm or cold over sliced fruit, top with whipped topping. Serves 4 to 5. We did one serving over mango and banana, then wanted more so did another serving over apple. It tasted like caramel apple! But we only took pictures of the mango/banana bowls.
Jeff's bowl, lots more whipped topping!

There will be a round-up of all the other Mexican menus at My Kitchen My World. I'm excited to see what everyone else made! Buen provecho!
Saturday, January 24, 2009
My Kitchen My World - Azerbaijan
I was a bit flummoxed when I saw that this week's My Kitchen My World country would be Azerbaijan. I had no idea what I was going to make - I didn't even know where Azerbaijan was, let alone what kind of food they ate there! But I got right to work looking for ideas when I came across this wonderful blog - Farida's Azerbaijani Cookbook. I fell in love with the first recipe I saw, it looked simple to make and very delicious. From there I found a bread to go with it and a dessert as well. I cooked this all up on Tuesday, and spent the rest of the week impatiently anticipating when I could post it!So I present our Azeri menu for this week: Toyug Chighirtmasi (Chicken with Eggs), Tendir Choreyi (Tandir or Tandoori Bread), and Tenbel Pakhlava (Easy Baklava).

Toyug Chighirtmasi (Chicken with Eggs)
3 spoons vegetable oil
2 spoons butter (or margarine)
1 large onion, peeled and thinly sliced
2 pounds boneless or bone-in chicken parts, cut into about 10 serving pieces (I used boneless skinless chicken breast - we rarely buy this, but do on occasion for a special treat)
1 teaspoon salt
1/4 teaspoon, or more, to taste, ground black pepper
4 medium ripe tomatoes, finely chopped, with their juices
3 eggs, lightly beaten ( the bread and dessert each use an egg yolk for brushing, so I used the two egg whites in place of one of the eggs here)
chopped cilantro (coriander) or parsley, to garnish (I forgot to garnish mine...)
In a medium frying pan, heat 2 tablespoons of oil over medium heat. Add the onion and saute, stirring frequently, for about 10 minutes, or until it is light brown. Transfer the onion to a bowl and put aside.
Add the remaining oil and the butter to the same frying pan and heat over medium heat (Note: butter alone tends to brown when you melt it. Adding some fluid oil to the pan along with butter will prevent that). Add the chicken pieces and fry for about 20 minutes, or until they are brown, turning them once to cook on both sides.
Season the chicken with salt and pepper. Add the cooked onions and chopped tomatoes with juices to the pan. Cover and turning only occasionally, simmer over medium heat for about 25 minutes, or until the chicken is tender.
Pour the beaten eggs over the chicken, slightly tilting the pan to distribute the eggs evenly. Cover the pan and let cook for about 5-7 minutes (do not stir!) or until the eggs are set. Serve immediatley, garnished with fresh chopped cilantro or parsley. Chicken with Eggs is delicious with bread or rice.

And speaking of bread, here's the bread that I made to go with the Chicken and Eggs.

Tendir Choreyi (Tandir or Tandoori Bread)
1 package dry yeast (2 1/4 tsp)
1 1/2 cups warm water
1 teaspoon salt
3 cups bread flour, plus extra for kneading
1 egg yolk, for brushing
1 teaspoon poppy or sesame seeds
In a small bowl, mix yeast with water until the yeast is dissolved.
Sift flour into a large bowl. Add salt and mix well. Gradually add the yeast-water mixture and stir in using your hand until a rough ball forms (This is such a fun step!).
Scrape the dough onto a lightly floured surface. Press any loose dough pieces into the ball and knead the dough, punching it down with your fists, folding it over and turning. Knead for about 8-10 minutes, or until smooth and elastic.
Shape the dough into a ball and put it back into the large bowl. Cover the bowl with a kitchen towel or a plastic wrap. Leave the dough to rise in a warm spot for about 1 ½ hours, or until doubled in bulk. The dough should look puffy and be soft when poked with a finger (This is one of the only doughs I've made that really did rise well. I'm not very good at kneading so my dough doesn't always rise very prettily - but this one did!).
Punch down the dough, then transfer it onto a lightly floured surface. Shape the dough into a ball, and with your hands flatten slightly and stretch it lengthwise. Using a rolling pin, start rolling the dough beginning at one end until you obtain a long flat bread about 1/2 inch thick, 14 inches long and 8 inches wide.
Carefully transfer the bread onto a non-stick baking sheet, fixing the shape as necessary. Leave the dough to rest on the sheet for another 15 minutes before baking.
Preheat the oven to 400 degrees.
Using a knife, make shallow crosshatching slashes on the bread, 4 from right to left and 4 the opposite way, each at a slight angle. Brush the bread evenly with the egg yolk and sprinkle with seeds.
Place the baking sheet on the middle rack of the oven and bake the bread for 20-25 minutes, or until it is golden on top and sounds hollow when tapped on the bottom (At this point, I realized that maybe my bread was rising too well; it turned out much fluffier as a finished product than Farida's, but it was still delicious).
While the main dish and the bread were delicious, the star of the meal was the dessert - Baklava!

Tenbel Pakhlava (Easy Baklava)
Dough:
3 cups flour
8 oz (2 sticks) butter or margarine, cut into small pieces
1 cup sour cream mixed with 1 teaspoon baking soda
2 egg yolks
Filling:
2 cups sugar
2 egg whites
2 1/2 cups (10 oz) walnuts, finely chopped (they should be somewhat crunchy in the pie, so do not grind finely - I chopped mine by hand, I was so proud of myself!)
To Brush:
1 egg yolk
Prepare the dough. In a large bowl, combine flour and butter. Using a fork, or a knife (or pastry blender, if available), cut in the butter until the mixture forms large crumbs the size of large peas.
Add sour cream/baking soda mixture and egg yolks and continue tossing until the dough comes together in a mass. It should be gentle to touch.
Divide the dough into 3 equal parts, forming each one into disks. Wrap each disk in a plastic wrap and chill in refrigerator for 1 hour.
In the meantime, prepare the filling. In a mixing bowl, combine sugar and egg whites. Using a balloon whisk or electric mixer, whip vigorously until well blended. Add chopped walnuts and mix well with a spoon.
Lightly grease the baking pan with oil or butter. Preheat the oven to 350 degrees.
Remove the dough from the refrigerator. Lightly dust your work surface with flour. Using a rolling pin, press firmly to roll the dough from the center in all directions until you obtain a rectangular (or round, if you are going to use a round baking pan) about 8 inches in diameter and about 1/8 inch thick, or just the size to fit your pan (Farida mentions that this dough is very easy to work with and rolled out quickly - I have to agree, it was very nice).
Carefully transfer the round into the pan, pressing it against the bottom and the sides. Baklava releases juices when baking, so slightly stretching the dough to the sides and sealing them tightly will keep the juices inside. If there is any tear in the dough, repair by pressing a small piece of dough over it. Spread half the filling over the layer.
Roll the second disk in the same way and place it in the pan on top of the walnut filling. Spread the remaining filling over the second layer.
Roll the third dough disk and place it on top of the walnut filling. Brush this layer with egg yolk. Using a sharp knife or a pizza cutter, carefully cut the baklava in cross-hatching diagonals to make diamond shapes, cutting through the filling all the way to the bottom. Place a whole or half a walnut in the middle of each baklava piece.
Bake in the oven for about 35 minutes or until golden on top. Times may vary, so take extra care not to overbake - baklavas will harden and will not be that juicy if baked for too long. Remove the pan from the oven. When cool enough to handle, remove the baklava diamonds from the pan and serve. Store in a covered container - the baklava gets even more moist and delectable when it has been stored for a while.
The baklava before storing overnight - delicious!

Traditional baklava is made with many layers of very thin dough, phyllo dough. This baklava is much easier, and is literally translated to mean "Lazy Baklava." It isn't quite as flaky as traditional baklava, but it was so delicious nonetheless! Again, store covered at least overnight to get it really moist and syrupy - and heavenly!
The baklava after storing overnight - absolutely incredible! See how much more moist it is? Sticky, syrupy ... perfect.

Farida gives step by step photos for these recipes on her blog - they were very helpful in making sure I did things properly. I'm so glad I found her blog. This was my first experience with Azerbaijani cuisine, but I'm sure it won't be the last! Nush Olsun!
To see what the other MKMW-ers made this week, check out our blogroll.
Subscribe to:
Posts (Atom)