These are the cookies we're leaving out for Santa tonight. The kids had fun helping me measure and stir (and taste, of course) these yummy cookie bars. Crushed candy canes add a barely-there peppermint flavor to the bars themselves, and the frosting puts that minty flavor over the top!
Christmas Cookie Bars
1/2 cup (1 stick) butter or margarine
3/4 cup sugar
3/4 cup brown sugar
1 tsp. vanilla
2 large eggs
2 1/4 cups flour
1 tsp. salt
1 tsp. baking soda
2-3 candy canes, crushed
1 package mini semisweet chocolate chips
Frosting:
1/3 cup butter or margarine
3 cups powdered sugar
3 tbsp. milk
1 tsp. vanilla
1 tsp. mint extract
Sprinkles, if desired
Cream butter and sugars in a bowl. Beat in vanilla and eggs. Combine flour, salt and baking soda, and beat slowly into creamed mixture. Stir in candy canes and chocolate chips.
Grease a 10x15 jelly roll pan. Spread cookie dough evenly in pan. Bake in a preheated 375 oven for 20-25 minutes. Let cool in pan before cutting into bars.
For frosting: Melt butter or margarine. Beat in powdered sugar, milk, and extracts. Spread on cookie bars. I cut the bars and then spread each one individually, or they could be frosted before being cut. If desired, top with sprinkles. Serve with a big glass of milk or eggnog, and enjoy!
Friday, December 24, 2010
Sunday, December 19, 2010
Russian Refresher
I've had this recipe for quite a while, and we like to make it every winter. It's called Russian Refresher because it's similar to Russian chai, or tea. But this has no tea in it, it's just a spiced citrus punch that is served hot. Jeff and I sometimes like to call it Citrus Cider. This recipe makes about 3 1/2 cups of powdered mix, which you can use to make individual servings of this hot, refreshing drink.
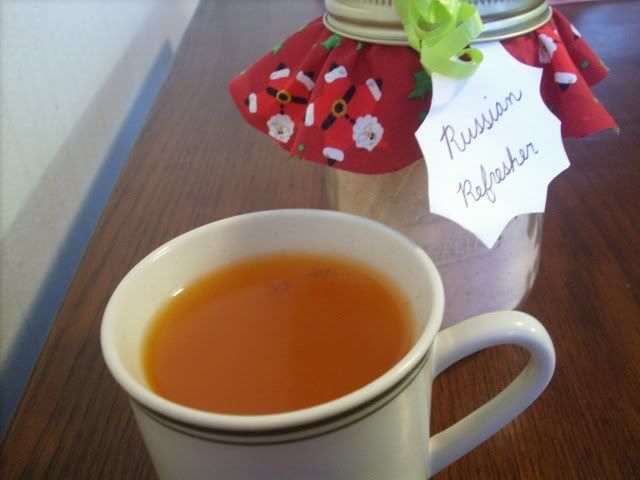
Russian Refresher Mix
2 cups powdered orange drink mix
1 pkg (3 oz) presweetened powdered lemonade mix*
1 1/3 cup sugar
1/2 tsp. ground cloves
1 tsp. ground cinnamon
*I like to buy a larger container of lemonade mix and just measure out 3 ounces, because it ends up cheaper per ounce. Then I still have most of the container left for making plain lemonade.
Combine all ingredients in a medium bowl. Mix well. Put in a 1-quart container. Label as Russian Refresher Mix and store in a cool, dry place. Use within 6 months. Makes about 3 1/2 cups of mix.
RUSSIAN REFRESHER: Add 2 to 3 teaspoons of RUSSIAN REFRESHER MIX to 1 cup hot water. Stir to dissolve. Makes 1 serving.
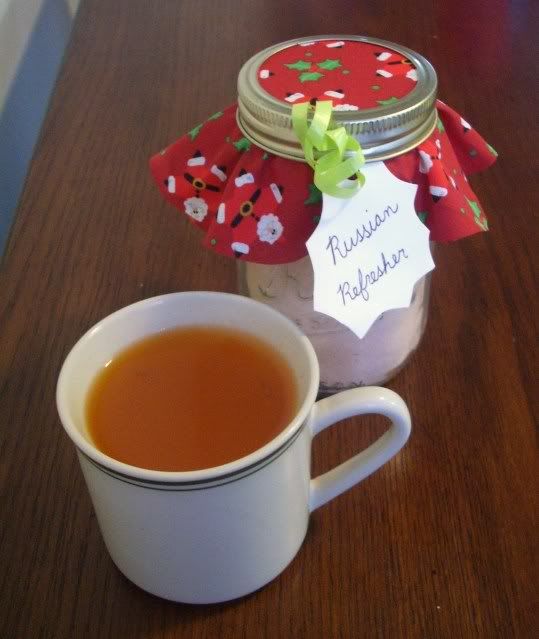
This mix would make a good last-minute Christmas gift for neighbors or family. I also have several other gift mix recipes that make good gifts; they can be found in this post.
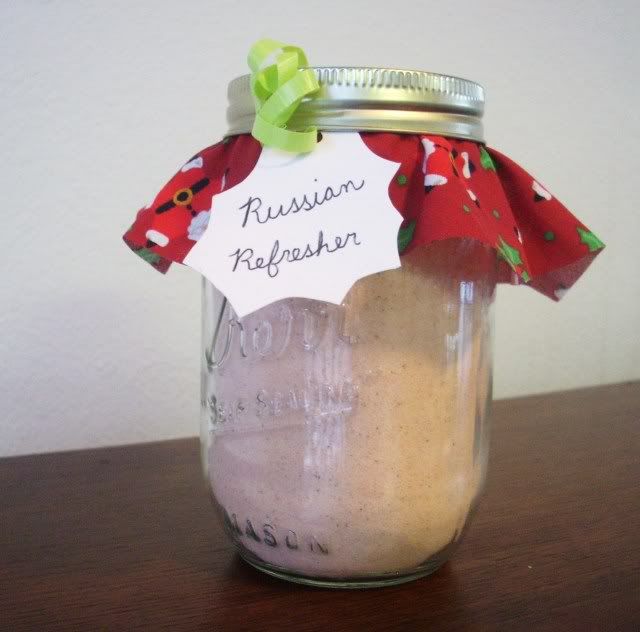

Russian Refresher Mix
2 cups powdered orange drink mix
1 pkg (3 oz) presweetened powdered lemonade mix*
1 1/3 cup sugar
1/2 tsp. ground cloves
1 tsp. ground cinnamon
*I like to buy a larger container of lemonade mix and just measure out 3 ounces, because it ends up cheaper per ounce. Then I still have most of the container left for making plain lemonade.
Combine all ingredients in a medium bowl. Mix well. Put in a 1-quart container. Label as Russian Refresher Mix and store in a cool, dry place. Use within 6 months. Makes about 3 1/2 cups of mix.
RUSSIAN REFRESHER: Add 2 to 3 teaspoons of RUSSIAN REFRESHER MIX to 1 cup hot water. Stir to dissolve. Makes 1 serving.

This mix would make a good last-minute Christmas gift for neighbors or family. I also have several other gift mix recipes that make good gifts; they can be found in this post.

Sunday, December 12, 2010
Buckeye Bars
I love buckeyes - peanut butter balls with chocolate coating. My favorite kind are the ones with graham cracker crumbs, because they add a wonderful texture and richer flavor than the ones loaded with butter and tons of powdered sugar.
However, I don't love quite so much the amount of time it takes to roll all those little balls and dip each one into chocolate. So when I found a recipe for Buckeye Bars, I was excited to see that I could just press my peanut butter filling into a pan and top it with chocolate. Quick and easy! So I used the instructions for that recipe, and the filling from my regular buckeye recipe, and made my own delicious buckeye bars.
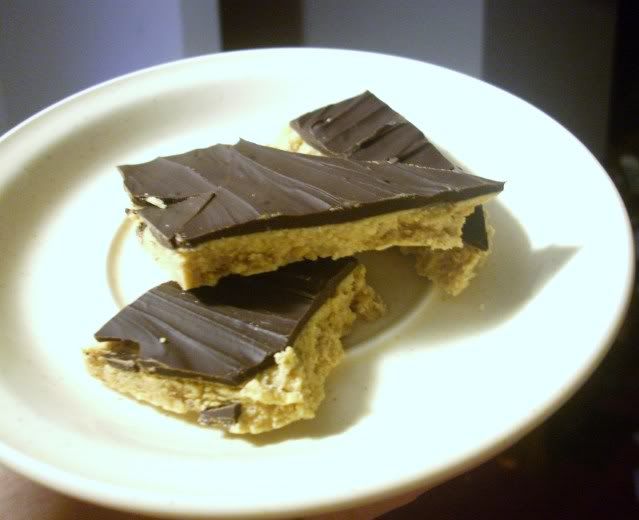
Buckeye Bars
1 cup creamy peanut butter
1/2 cup finely ground graham cracker crumbs
1 cup powdered sugar
1 cup chocolate chips
Combine peanut butter, graham cracker crumbs, and confectioners' sugar in a bowl or a food processor until smooth. It starts out really crumbly, but keep at it. I like to use my hand and squish it like play dough. It takes quite a while, but it's fun.
Line an 8-inch square pan with foil, with ends of foil extending over sides.
Press peanut butter mixture into pan evenly. Microwave chocolate chips on high for 1 minute; stir. Microwave 15 to 30 seconds or until chocolate is melted; stir until smooth. Spread over peanut butter layer.
Refrigerate 2 hours. Use foil handles to lift bars from pan before cutting to serve.
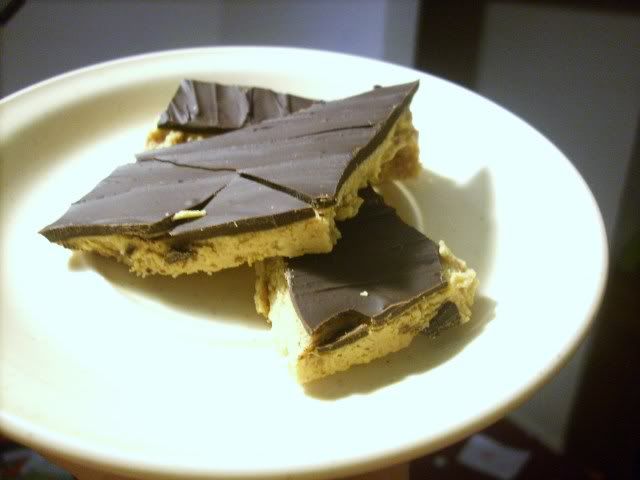
My chocolate actually hardened too much to cut. So I just broke off pieces. To make the chocolate softer so you can cut nice little squares, I would stir in some sweetened condensed milk. But it's fun to just eat big chunks!
However, I don't love quite so much the amount of time it takes to roll all those little balls and dip each one into chocolate. So when I found a recipe for Buckeye Bars, I was excited to see that I could just press my peanut butter filling into a pan and top it with chocolate. Quick and easy! So I used the instructions for that recipe, and the filling from my regular buckeye recipe, and made my own delicious buckeye bars.

Buckeye Bars
1 cup creamy peanut butter
1/2 cup finely ground graham cracker crumbs
1 cup powdered sugar
1 cup chocolate chips
Combine peanut butter, graham cracker crumbs, and confectioners' sugar in a bowl or a food processor until smooth. It starts out really crumbly, but keep at it. I like to use my hand and squish it like play dough. It takes quite a while, but it's fun.
Line an 8-inch square pan with foil, with ends of foil extending over sides.
Press peanut butter mixture into pan evenly. Microwave chocolate chips on high for 1 minute; stir. Microwave 15 to 30 seconds or until chocolate is melted; stir until smooth. Spread over peanut butter layer.
Refrigerate 2 hours. Use foil handles to lift bars from pan before cutting to serve.

My chocolate actually hardened too much to cut. So I just broke off pieces. To make the chocolate softer so you can cut nice little squares, I would stir in some sweetened condensed milk. But it's fun to just eat big chunks!
Friday, December 3, 2010
Chocolate Covered Shortbread
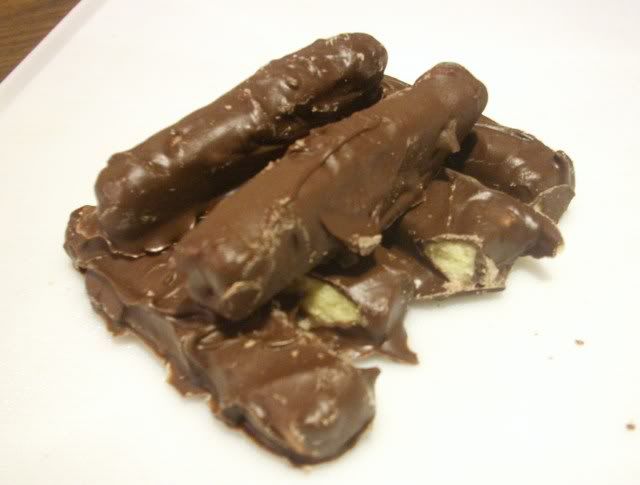
Jeff wanted to make something similar to Twix just for fun, so he came up with these yummy cookie bars. They don't have caramel like Twix, and the cookies aren't quite as crispy, but they are delicious and are being eaten up rather quickly! I don't think these will last long.

Chocolate Covered Shortbread
3/4 cup butter or margarine
1/4 cup sugar
2 cups flour
chocolate candy coating (almond bark)
Heat oven to 350.
Mix butter and sugar in large bowl. Stir in flour. (If dough is crumbly, mix in 1 to 2 tablespoons butter or margarine, softened.)
Roll dough 1/2 inch thick on lightly floured surface. Cut into small rectangles, about 1/2 inch by 3-4 inch. Place 1/2 inch apart on ungreased cookie sheet.
Bake about 20 minutes or until set. Immediately remove from cookie sheet to wire rack.
Melt chocolate coating according to package directions. Dip cookies in chocolate. Let harden, and enjoy!

Saturday, October 30, 2010
Green Tomato Pickles
Yet another green tomato recipe. I made these a few days ago. Normally I don't care for sweet-style pickles very much, I prefer dill. But these turned out quite good. I used this recipe, cutting it in half because I accidentally cut my finger while slicing tomatoes, and didn't feel like doing any more slicing that night. :-} So remember to be careful when you're slicing the tomatoes, don't get lazy and start chopping up your extremities.

Green Tomato Pickles
1 peck (40 small) green tomatoes, thinly sliced
4 cups onions, thinly sliced
Salt
4 cups sugar
4 cups white vinegar
2 tbsp. celery seed
1 bay leaf
1 1/2 tsp. ground mustard
3/4 oz. mustard seed
12 whole cloves
8 whole allspice seeds
Alternate layers of tomatoes and onions on a large platter. Shake salt on each layer like you’re salting a meal. Cover platter with plastic wrap and store overnight in refrigerator. Salt will draw moisture from the tomatoes and onions, so place platter on a rimmed baking sheet to catch any water that may spill.
The next day, drain tomatoes and onions in a colander. In a large pot, add the tomatoes, onions, sugar, white vinegar, celery seed, bay leaf, ground mustard, and mustard seed. Place cloves and allspice in a cloth bag, and add to the pot. Bring to a boil. Reduce heat and simmer for 1 hour.
Spoon into sterilized canning jars and seal (I did 5 minutes in a boiling-water bath).
Tuesday, October 26, 2010
Green Tomato Relish
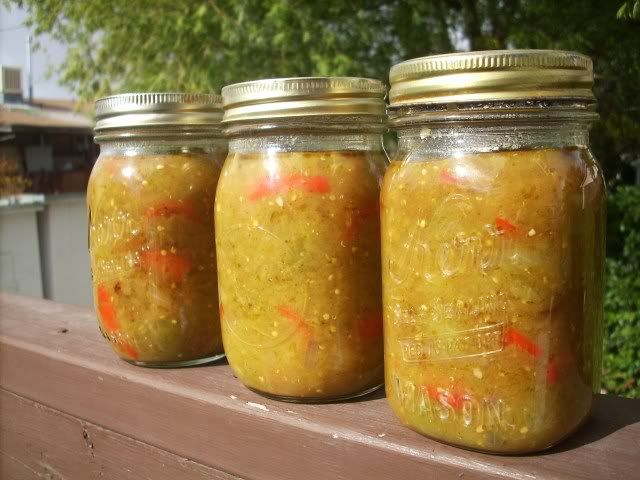
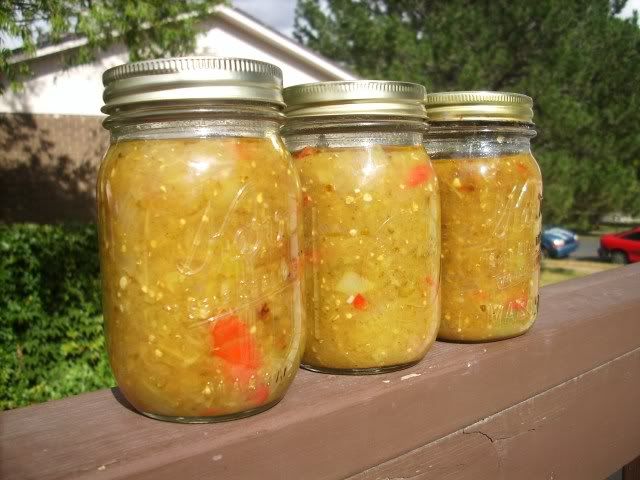
Next in my series of green tomato recipes is this deliciously tangy relish. After cooking this up this morning, I was left smelling strongly of cider vinegar, but I think it was worth it. The relish has a really wonderful flavor, and will be a great accompaniment to lots of future meals! I used this recipe, but instead of refrigerating and then serving right away, we put it in jars to freeze.
Green Tomato Relish
1/3 c. salad oil
3 lg. onions, diced
1 lg. garlic clove, minced
8 lg. green tomatoes (about 4 lbs.), cut into bite-sized chunks
4 med. green peppers, cut into 1/4-inch wide strips
4 med. red peppers, cut into 1/4-inch wide strips
3 c. cider vinegar
1 1/2 c. packed light brown sugar
1 tbsp. salt
1 tsp. ground cinnamon
1 tsp. ground ginger
About 4 hours before serving or up to 1 week ahead: In 8-quart Dutch oven or heavy saucepan over medium heat, in hot salad oil, cook onions and garlic until tender, stirring occasionally. Add green tomatoes and remaining ingredients; over high heat, heat to boiling. Reduce heat to medium-low; cook, uncovered, 2 hours, stirring occasionally, until mixture thickens.
Ladle into jars or freezer containers, cool to room temperature, then freeze. Or ladle into sterilized jars and process in a boiling-water bath for 30 minutes.

Monday, October 25, 2010
Green Tomato ... Jam?
Hello, autumn weather! We had a stormy, windy, frosty night last night, which means it's time to bring in the green tomatoes. Do you have any idea how many green tomatoes you get from 19 tomato plants? A lot more than I currently know what to do with! So far we've brought in three large bowls brimming over with green tomatoes - at least 16 quarts. And that's just from three or four plants.
Anticipating a large green tomato crop, I've been looking up recipes for green tomatoes. This is one I found particularly interesting. Mixing green tomatoes, sugar, and jello to make jam definitely isn't something I would have thought to do, but the recipe had pretty good reviews, so I decided to give it a go.

Green Tomato Jam
4 cups shredded green tomatoes (I just tossed the tomatoes in the food processor)
4 cups white sugar
1 6-oz. box flavored gelatin mix (original recipe calls for raspberry)
Combine tomatoes and sugar in a large saucepan and bring to a boil over medium heat. Stir and cook about 10 minutes. Add the gelatin, reduce heat to low, and simmer for 20 minutes.
Spoon into hot, sterilized jars and seal; or, pour into freezer containers and freeze.
This turned out similar to the orange pear jam I made last year, which is also made using jello. And it was easy to make; the hardest part was standing there stirring it. I made three batches, using lime jello, strawberry jello, and then orange jello. I ended up with about 8 1/2 pints.

I'm sure I'll be posting a few more green tomato recipes in the near future, I still have a lot of tomatoes to use!
And another picture, just because I think this jam is so pretty!

Anticipating a large green tomato crop, I've been looking up recipes for green tomatoes. This is one I found particularly interesting. Mixing green tomatoes, sugar, and jello to make jam definitely isn't something I would have thought to do, but the recipe had pretty good reviews, so I decided to give it a go.

Green Tomato Jam
4 cups shredded green tomatoes (I just tossed the tomatoes in the food processor)
4 cups white sugar
1 6-oz. box flavored gelatin mix (original recipe calls for raspberry)
Combine tomatoes and sugar in a large saucepan and bring to a boil over medium heat. Stir and cook about 10 minutes. Add the gelatin, reduce heat to low, and simmer for 20 minutes.
Spoon into hot, sterilized jars and seal; or, pour into freezer containers and freeze.
This turned out similar to the orange pear jam I made last year, which is also made using jello. And it was easy to make; the hardest part was standing there stirring it. I made three batches, using lime jello, strawberry jello, and then orange jello. I ended up with about 8 1/2 pints.

I'm sure I'll be posting a few more green tomato recipes in the near future, I still have a lot of tomatoes to use!
And another picture, just because I think this jam is so pretty!

Sunday, October 24, 2010
Mini Winter Squash Whoopie Pies
Whoopie pies are so fun - cakelike cookies sandwiched with a creamy filling. They are usually a few inches across, but this recipe makes much smaller cookies, about an inch across. Fun, bite-sized cookie sandwiches. This was originally a recipe for pumpkin whoopie pies, but I didn't use pumpkin. We had some banana squash that we purchased on clearance that needed to be used. So we cooked it in the slow cooker, then pureed it and used it in this recipe.
There is a very large variety of winter squash available - acorn squash, banana squash, hubbard squash, butternut squash - that can be used interchangeably in many recipes. We don't usually have pumpkin on hand, so it's nice to have alternatives when it comes to fall baking. The flavor and color will be different depending on what squash you use (my cookies are much more yellow than the original orange of pumpkin cookies), but they turn out equally delicious.
To prepare winter squash for use in baking, simply cut up the squash and remove the seeds, cook in either a slow cooker or the oven until it is soft, remove the skin, and mash the squash into a puree.
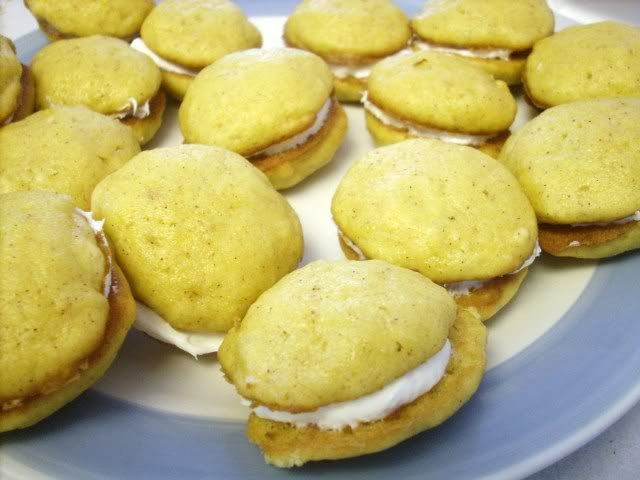
Mini Winter Squash Whoopie Pies
Cookies:
2 cups all-purpose flour
1 teaspoon baking powder
1 teaspoon baking soda
1 teaspoon ground cinnamon
1/2 teaspoon ground ginger
1/2 teaspoon salt
1/2 cup butter, softened
1 1/4 cups granulated sugar
2 large eggs, at room temperature, lightly beaten
1 cup winter squash puree
1 teaspoon vanilla extract
Cream Cheese Filling:
4 ounces cream cheese, at room temperature
6 tablespoons butter, softened
1/2 teaspoon vanilla extract
1 1/2 cups powdered sugar
For cookies: Preheat oven to 350 degrees F. Lightly grease or line four baking sheets with parchment paper.
Combine flour, baking powder, baking soda, cinnamon, ginger and salt in medium bowl. Beat butter and sugar in large mixer bowl on medium speed for 2 minutes. Add eggs, one at a time, beating well after each addition. Add squash and vanilla extract; beat until smooth. Stir in flour mixture until combined. Drop by heaping measuring teaspoons onto prepared baking sheets.
Bake for 10 to 13 minutes or until springy to the touch. Cool on baking sheets for 5 minutes; remove to wire racks to cool completely.
For cream cheese filling: Beat cream cheese, butter and vanilla extract in small mixer bowl on medium speed until fluffy. Gradually beat in powdered sugar until light and fluffy.
Spread a heaping teaspoon of filling onto flat side of one cookie; top with flat side of second cookie to make a sandwich. Repeat with remaining cookies and filling. Store in covered container in refrigerator.
There is a very large variety of winter squash available - acorn squash, banana squash, hubbard squash, butternut squash - that can be used interchangeably in many recipes. We don't usually have pumpkin on hand, so it's nice to have alternatives when it comes to fall baking. The flavor and color will be different depending on what squash you use (my cookies are much more yellow than the original orange of pumpkin cookies), but they turn out equally delicious.
To prepare winter squash for use in baking, simply cut up the squash and remove the seeds, cook in either a slow cooker or the oven until it is soft, remove the skin, and mash the squash into a puree.

Mini Winter Squash Whoopie Pies
Cookies:
2 cups all-purpose flour
1 teaspoon baking powder
1 teaspoon baking soda
1 teaspoon ground cinnamon
1/2 teaspoon ground ginger
1/2 teaspoon salt
1/2 cup butter, softened
1 1/4 cups granulated sugar
2 large eggs, at room temperature, lightly beaten
1 cup winter squash puree
1 teaspoon vanilla extract
Cream Cheese Filling:
4 ounces cream cheese, at room temperature
6 tablespoons butter, softened
1/2 teaspoon vanilla extract
1 1/2 cups powdered sugar
For cookies: Preheat oven to 350 degrees F. Lightly grease or line four baking sheets with parchment paper.
Combine flour, baking powder, baking soda, cinnamon, ginger and salt in medium bowl. Beat butter and sugar in large mixer bowl on medium speed for 2 minutes. Add eggs, one at a time, beating well after each addition. Add squash and vanilla extract; beat until smooth. Stir in flour mixture until combined. Drop by heaping measuring teaspoons onto prepared baking sheets.
Bake for 10 to 13 minutes or until springy to the touch. Cool on baking sheets for 5 minutes; remove to wire racks to cool completely.
For cream cheese filling: Beat cream cheese, butter and vanilla extract in small mixer bowl on medium speed until fluffy. Gradually beat in powdered sugar until light and fluffy.
Spread a heaping teaspoon of filling onto flat side of one cookie; top with flat side of second cookie to make a sandwich. Repeat with remaining cookies and filling. Store in covered container in refrigerator.
Wednesday, October 13, 2010
Chocolate Soup
Every once in a while you just gotta have chocolate for dinner, you know? Tonight was one of those nights. I didn't feel like making a big dinner, it was just me and the kids. So we had some bread, some apples, and a nice steaming pot of chocolate soup.
I actually just used a recipe for chocolate pudding, but by calling it soup, I felt a little more justified in serving it for dinner. ;-)
Chocolate Soup
1/3 cup sugar
2 tbsp. cornstarch
2 tbsp. cocoa powder
2 cups milk
1 tsp. vanilla
In a saucepan combine sugar, cornstarch, cocoa, and milk. Heat over low, stirring constantly, until thickened. Remove from heat and add vanilla.
Since it was really hot but I wanted to serve it right away, I sliced a couple frozen strawberries into each bowl before ladling in the soup. The hot soup thawed the strawberries, and the strawberries cooled down the soup so the kids could eat it without scalding their tongues. They sure were excited to be having chocolate for dinner!
Not only is this good served warm as a soup, it's also good served chilled as a pudding. I had some later tonight with a dollop of whipped topping, yummy!
Labels:
chocolate,
dessert,
fun kid pleasers,
soups or stews
Saturday, October 9, 2010
6 Years
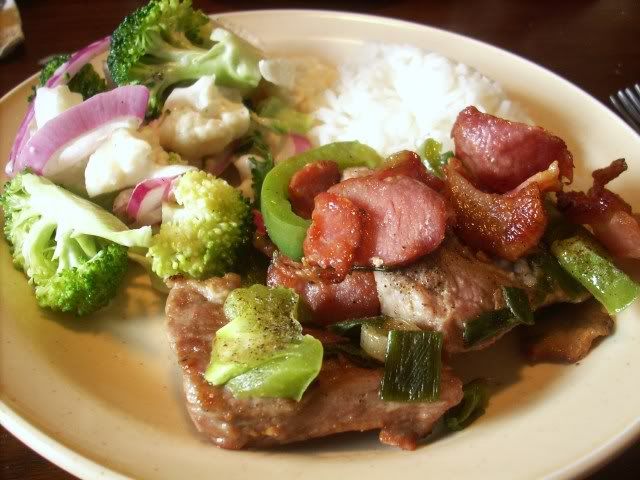
My sweet husband and I have been married for 6 years, as of yesterday. When Jeff asked if I wanted to go out to eat or make something special here at home, my answer was obvious - I always prefer a great home cooked meal! So here's what we ate for our special meal to celebrate 6 years of marriage.
Pork and Bacon Skillet
Jeff created this dish specifically to use cheap cuts of pork and bacon ends. Since he didn't really measure anything, all amounts are approximate.
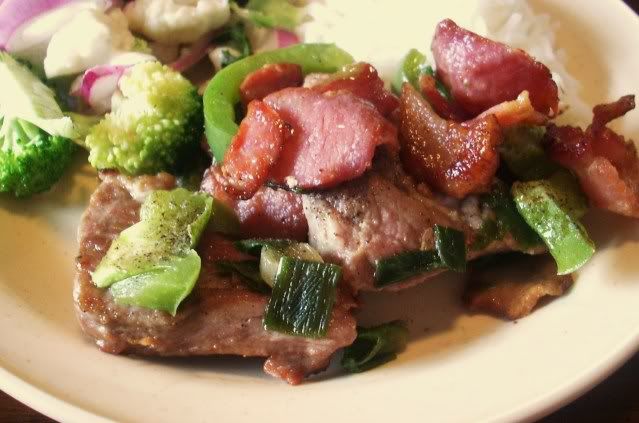
Start by cooking about 1/4-1/2 lb. bacon ends. Remove from pan and set aside, leaving bacon grease in the pan. Cut about 2 lb. pork into 3-inch chunks and add to pan. Brown on both sides. Add a sliced green pepper, some sliced green onions, 1 cup beef broth (or 1 cup water and 1 tsp. bouillon), and the bacon, plus salt and pepper to taste. Cover and simmer about 30 minutes, stirring occasionally. Serve with rice.
Broccoli and Cauliflower Salad
A delicious and hearty salad from the new Southern Plate Cookbook (love this book!!!!!!!)
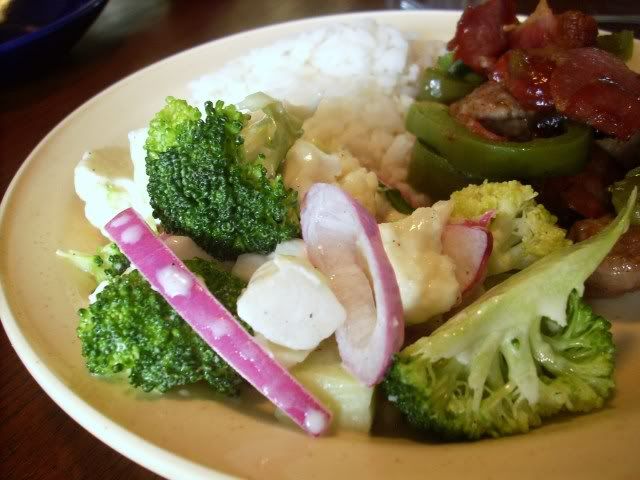
1 head cauliflower, broken and sliced
1 head broccoli, cut up
2 small onions, cut and separated into rings (I used half of a large red onion)
1/2 cup mayonnaise
1/3 cup vegetable oil
1/3 cup cider vinegar
1/4 cup sugar
1/2 tsp. salt
1/4 tsp. pepper
Combine the vegetables in a large bowl. Whisk together the remaining ingredients in a separate bowl. Add to vegetables and toss to coat. Refrigerate until ready to serve.
Anniversary Pie
This pie has become tradition since I created it a couple years ago. I've made it differently each time, but it's always delicious. This time I went for a yummy cinnamon flavor.
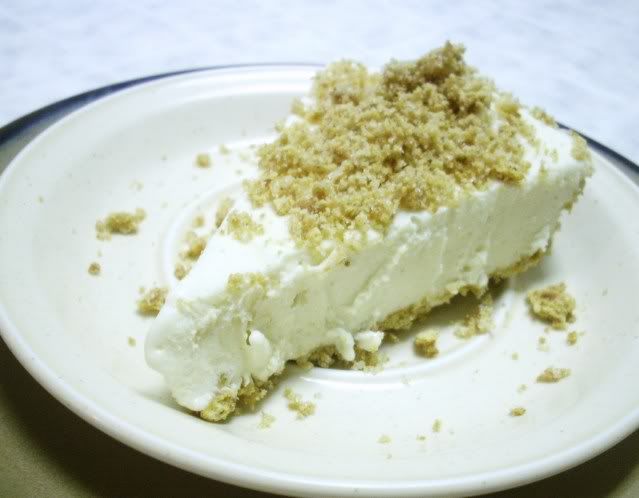
1 package cream cheese, softened
1/3 cup sugar
1/2 cup eggnog
1/2 cup ice cream (fried ice cream flavor - cinnamon ice cream with shortbread chunks and a caramel swirl, yummmm)
1 graham cracker crust, made with cinnamon grahams
Additional cinnamon graham cracker crumbs
Beat cream cheese and sugar until smooth. Beat in eggnog and ice cream. Pour into crust and freeze until firm. Remove from freezer 10 to 15 minutes before slicing to soften the pie. Return any uneaten portion to the freezer. Sprinkle each slice with additional cracker crumbs.
Labels:
dessert,
frozen treats,
ham and pork,
main dishes,
rice and other grains,
salads
Tuesday, September 7, 2010
Warm Caramel Apple Cake
On Sunday I invited some friends over for lunch the next day, Labor Day. I hadn't planned a menu or anything, it was a spur-of-the-moment invite. So after church Jeff and I were planning out what we were going to have for lunch. Hamburgers, hot dogs, fruit salad, potato salad, the typical summer holiday menu. I got stuck trying to figure out what to do for dessert, until I happened to glance at the fridge and see my calendar.
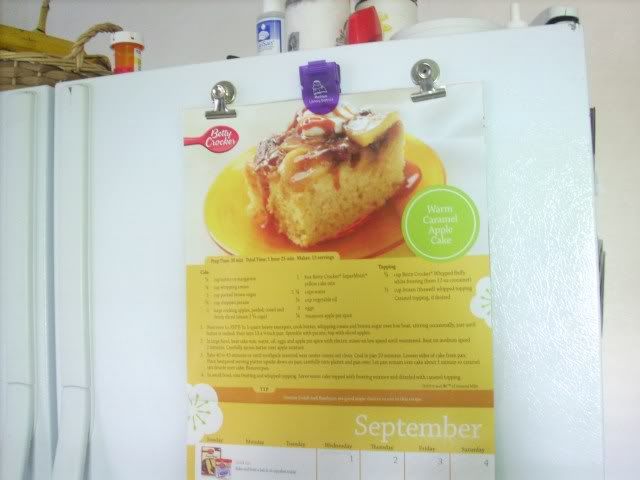
I love my calendar; each month has a different recipe, and they all look so delicious! This month's was Warm Caramel Apple Cake, and I decided right then and there that I had found the perfect thing to make for dessert.
I did do a bit of doctoring to the original recipe, mostly with the topping. Instead of caramel topping and canned frosting, I used some cinnamon caramel apple dip that I got on clearance, and some of my favorite cream cheese frosting. Here's the recipe as I made it for our get-together. It was definitely a big hit with everyone! (click here to see the original recipe)

Warm Caramel Apple Cake
1/2 cup butter or margarine
1/4 cup milk
1 cup packed brown sugar
1/2 cup chopped pecans
2 large cooking apples, peeled, cored and thinly sliced
1 box yellow cake mix
1 1/4 cups water
1/3 cup vegetable oil
3 eggs
1/4 teaspoon cinnamon
Dash each nutmeg, allspice
Topping:
8 oz. cream cheese, softened
8 oz. frozen whipped topping, thawed
1/3 cup sugar
Caramel apple dip or caramel topping
Heat oven to 350°F. In 1-quart heavy saucepan, cook butter, milk, and brown sugar over low heat, stirring occasionally, just until butter is melted. Pour into 13x9-inch pan. Sprinkle with pecans; top with sliced apples.
In large bowl, beat cake mix, water, oil, eggs and spices with electric mixer on low speed until moistened. Beat on medium speed 2 minutes. Carefully spoon batter over apple mixture.
Bake 40 to 45 minutes or until toothpick inserted near center comes out clean. Cool in pan 10 minutes. Loosen sides of cake from pan. Place heatproof serving platter upside down on pan; carefully turn platter and pan over. Let pan remain over cake about 1 minute so caramel can drizzle over cake. Remove pan.
In medium bowl, beat cream cheese until smooth. Beat in whipped topping and sugar. Microwave caramel dip about 30-60 seconds, until thin and smooth. Serve warm cake topped with frosting mixture and drizzled with caramel.
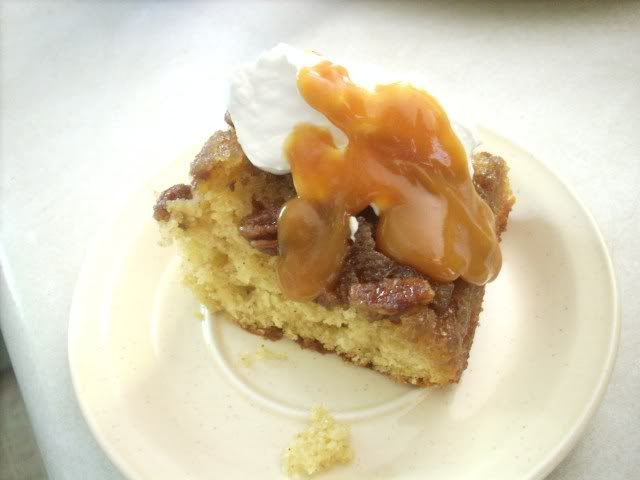

I love my calendar; each month has a different recipe, and they all look so delicious! This month's was Warm Caramel Apple Cake, and I decided right then and there that I had found the perfect thing to make for dessert.
I did do a bit of doctoring to the original recipe, mostly with the topping. Instead of caramel topping and canned frosting, I used some cinnamon caramel apple dip that I got on clearance, and some of my favorite cream cheese frosting. Here's the recipe as I made it for our get-together. It was definitely a big hit with everyone! (click here to see the original recipe)

Warm Caramel Apple Cake
1/2 cup butter or margarine
1/4 cup milk
1 cup packed brown sugar
1/2 cup chopped pecans
2 large cooking apples, peeled, cored and thinly sliced
1 box yellow cake mix
1 1/4 cups water
1/3 cup vegetable oil
3 eggs
1/4 teaspoon cinnamon
Dash each nutmeg, allspice
Topping:
8 oz. cream cheese, softened
8 oz. frozen whipped topping, thawed
1/3 cup sugar
Caramel apple dip or caramel topping
Heat oven to 350°F. In 1-quart heavy saucepan, cook butter, milk, and brown sugar over low heat, stirring occasionally, just until butter is melted. Pour into 13x9-inch pan. Sprinkle with pecans; top with sliced apples.
In large bowl, beat cake mix, water, oil, eggs and spices with electric mixer on low speed until moistened. Beat on medium speed 2 minutes. Carefully spoon batter over apple mixture.
Bake 40 to 45 minutes or until toothpick inserted near center comes out clean. Cool in pan 10 minutes. Loosen sides of cake from pan. Place heatproof serving platter upside down on pan; carefully turn platter and pan over. Let pan remain over cake about 1 minute so caramel can drizzle over cake. Remove pan.
In medium bowl, beat cream cheese until smooth. Beat in whipped topping and sugar. Microwave caramel dip about 30-60 seconds, until thin and smooth. Serve warm cake topped with frosting mixture and drizzled with caramel.

Saturday, August 28, 2010
Hamburger Stroganoff
This is one of those meals that we ate a lot while I was growing up. It's quick, it's easy, and it's cheap. And most importantly, it tastes good! Just another great recipe to help stretch your grocery dollar. :-)

Hamburger Stroganoff
1 small onion, chopped
1/4 tsp. garlic salt
1 tbsp. oil
1 lb. ground beef (we usually get away with using less)
1/2 tsp. salt
1/4 tsp. pepper
1 can cream of mushroom soup
1 cup sour cream*
Brown onion and garlic salt in oil. Add ground beef, salt, and pepper. Cook until ground beef is browned, then add mushroom soup. Simmer 5 to 10 minutes.
Just before serving, stir in 1 cup sour cream. Serve over hot cooked rice or noodles.
*If you don't have sour cream, you can use this substitute instead:
Combine 1 cup canned milk with 2 tbsp. lemon juice, and let stand 5 minutes. Add 1/4 cup mayonnaise and mix well.
Tuesday, June 29, 2010
Another Picnic Dish (Recipe: X-quisite Layered Fruit Salad)
I volunteered to do another dish for the Virtual Picnic, hosted by Louise at Months of Edible Celebrations. To refresh anyone's memory on the rules, each blogger chooses a letter and "brings" a dish that begins with that letter, also including all the dishes brought by the previous bloggers. Okay, here we go!


I invented this exquisite salad tonight specifically for this picnic game! This recipe is partially based on my family's favorite fruit salad recipe, and utilizes the fruits I happened to have on hand. The layering is something I just thought of tonight, and adds a touch of elegance and beauty to the salad.
X-quisite Layered Fruit Salad
1 3.4-oz. box instant vanilla pudding mix
1 3/4 cup milk
1 12-oz. carton cool whip, divided
1 16-oz. carton cottage cheese
1 3-oz. box strawberry jello
2 cans fruit cocktail, well drained
4 large apples, chopped
1 lb. fresh strawberries
Whisk together pudding mix and milk for 1-2 minutes. Fold in half of cool whip. Chill while preparing other ingredients. Combine cottage cheese and remaining cool whip. Add jello.
Now it's time to layer. Pour drained fruit cocktail into large glass bowl (about 4 quart size, I think). Top with jello/cottage cheese mixture, then apples, then pudding mixture. Lastly, arrange strawberries on top. Cover and chill until serving.
I think the combination of a fruity jello-flavored sauce layer and a creamy pudding-flavored sauce layer really makes this salad pop. This can, of course, be customized with a variety of fruits and jello flavors. I just used what I had on hand, but I think it would be delicious with more fruits, like bananas, mandarin oranges, grapes, pomegranate seeds, fresh peaches, raspberries, etc. Plus, there's so much sauce in this salad that I think you could really get away with adding a larger amount of fruit (like mixing bananas with the apples before adding the pudding layer). Anyway, get creative! I know I will. :-)

I'm going on a picnic, and I'm bringing...


By Sporadic Cook


G: Granola Bars
By Fun Foods on a Budget

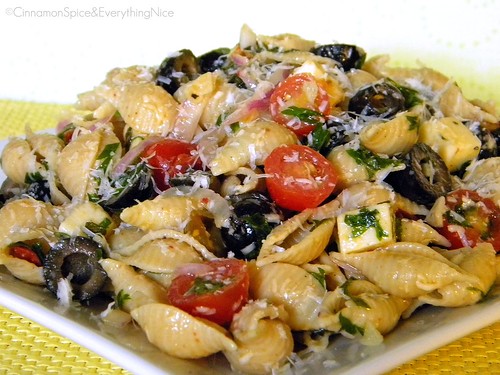
H: Herb and Cheese Pasta Salad
By Cinnamon Spice & Everything Nice
I: Incredibly Fruity Raspberry Cakes
By Raspberry and Chipotle

J: Jeweled Picnic Bars
By Rochelle's Vintage and Frugal Recipes

K: Kaltschale (Cold Fruit Soup)
By Kaffeeklatsch (German)

L: Long Island Lemonade Cocktail
By Culinary Types

M: Mushroom Tart
By Gherkins & Tomatoes

N: Nut Roast
By Green Gourmet Giraffe

O: Olive Nut Bread
By Chaya's Comfy Cook

P: Pomegranate Mousse Cake
By More Than a Mount Full

Q: Quiche
By Sweet and Savory

R: Raspberry Chocolate Macarons
By Anne's Food

S: Spicy Glazed Shrimp and Veggie Kabobs
By God's Perfect Promises

T: Turkey and Pear Wraps w/ Curried Aioli
By Girlichef

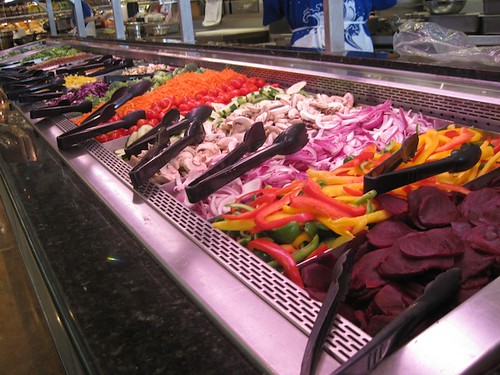
U: Unoriginal Whole Foods Salad Bar
By Mae's Food Blog
V: Vegetable Things of Spring Salad..Veal Shank with Risotto
..and Viennese Chocolate-Cherry Torte
By Postcards From The Dinner Table


W: White Caramel Popcorn
By One Crazy Cookie

My letter X: X-quisite Layered Fruit Salad (recipe below)
By Fun Foods on a Budget
By Cinnamon Spice & Everything Nice

I: Incredibly Fruity Raspberry Cakes
By Raspberry and Chipotle

J: Jeweled Picnic Bars
By Rochelle's Vintage and Frugal Recipes

K: Kaltschale (Cold Fruit Soup)
By Kaffeeklatsch (German)

L: Long Island Lemonade Cocktail
By Culinary Types

M: Mushroom Tart
By Gherkins & Tomatoes

N: Nut Roast
By Green Gourmet Giraffe

O: Olive Nut Bread
By Chaya's Comfy Cook

P: Pomegranate Mousse Cake
By More Than a Mount Full

Q: Quiche
By Sweet and Savory

R: Raspberry Chocolate Macarons
By Anne's Food

S: Spicy Glazed Shrimp and Veggie Kabobs
By God's Perfect Promises

T: Turkey and Pear Wraps w/ Curried Aioli
By Girlichef

U: Unoriginal Whole Foods Salad Bar
By Mae's Food Blog

V: Vegetable Things of Spring Salad..Veal Shank with Risotto
..and Viennese Chocolate-Cherry Torte
By Postcards From The Dinner Table


W: White Caramel Popcorn
By One Crazy Cookie

My letter X: X-quisite Layered Fruit Salad (recipe below)
By Fun Foods on a Budget

I invented this exquisite salad tonight specifically for this picnic game! This recipe is partially based on my family's favorite fruit salad recipe, and utilizes the fruits I happened to have on hand. The layering is something I just thought of tonight, and adds a touch of elegance and beauty to the salad.
X-quisite Layered Fruit Salad
1 3.4-oz. box instant vanilla pudding mix
1 3/4 cup milk
1 12-oz. carton cool whip, divided
1 16-oz. carton cottage cheese
1 3-oz. box strawberry jello
2 cans fruit cocktail, well drained
4 large apples, chopped
1 lb. fresh strawberries
Whisk together pudding mix and milk for 1-2 minutes. Fold in half of cool whip. Chill while preparing other ingredients. Combine cottage cheese and remaining cool whip. Add jello.
Now it's time to layer. Pour drained fruit cocktail into large glass bowl (about 4 quart size, I think). Top with jello/cottage cheese mixture, then apples, then pudding mixture. Lastly, arrange strawberries on top. Cover and chill until serving.
I think the combination of a fruity jello-flavored sauce layer and a creamy pudding-flavored sauce layer really makes this salad pop. This can, of course, be customized with a variety of fruits and jello flavors. I just used what I had on hand, but I think it would be delicious with more fruits, like bananas, mandarin oranges, grapes, pomegranate seeds, fresh peaches, raspberries, etc. Plus, there's so much sauce in this salad that I think you could really get away with adding a larger amount of fruit (like mixing bananas with the apples before adding the pudding layer). Anyway, get creative! I know I will. :-)
Subscribe to:
Posts (Atom)


