Showing posts with label pies and tarts. Show all posts

Monday, July 28, 2014

Chocolate Berry Truffle Cheesecake


When I was a teenager, my dad decided he wanted to learn how to make gourmet cheesecakes. He bought a recipe book featuring a large variety of cheesecakes, and started baking. These cheesecakes were a big departure from the no-bake Jell-O cheesecakes of my childhood. There was a year or two when we were almost constantly trying new fancy cheesecake recipes, everything from Chocolate Turtle Cheesecake to No-Bake Peanut Butter Cheesecake to Banana Split Cheesecake. Mmm. Those were good times.

The very first cheesecake that Dad made out of that beautiful little book was called Chocolate Raspberry Truffle Cheesecake. It was a 10-inch cheesecake that used 2 full pounds of cream cheese, a lot of chocolate chips, and seedless raspberry preserves. He took the sides off the springform pan too soon, so it ended up being a giant shapeless blob in the refrigerator. But it was the richest, most decadently delicious shapeless blog any of us had ever experienced. It was amazing.


After that first cheesecake, Dad's skills improved and we had no more shapeless blobs occupying the place of honor on the fridge shelf. With each cheesecake, he (and those of us kids who watched or helped) learned about ways to keep the cheesecake from cracking, how to mix it properly to reduce lumps, how to bake it and cool it just right. For instance, scrape the sides of the bowl very frequently while mixing, especially after adding a new ingredient. The cheesecake is done baking when the middle half is still relatively jiggly - if it doesn't still jiggle it's overdone. Make sure to let the cheesecake cool completely (and slowly) before removing the springform pan sides. If your cheesecake cracks it's perfectly acceptable to top it with whipped cream or sweetened sour cream to hide the cracks! But still, no matter how many successful and beautiful masterpieces Dad turned out, that first sloppy pile of cheesecake-y goodness has always been my favorite.

The recipe calls for seedless raspberry preserves. But I can't always find those, I don't know why. So I'll sometimes use a different type of berry preserves, with great results. This time I used seedless blackberry preserves. I'll compromise on the type of berry the preserves are made of, but I won't compromise on the fact that they have to be seedless. To get the smooth, perfect texture in the chocolate truffles, you need to use preserves that don't have seeds or chunks.


Chocolate Berry Truffle Cheesecake
Crust:
1 1/2 cups finely crushed cream-filled chocolate sandwich cookie crumbs
2 tablespoons margarine, melted
Filling:
1 1/2 pounds cream cheese, softened
1 1/4 cups sugar
3 eggs
1 cup sour cream
1 teaspoon vanilla
Truffles:
8 ounces cream cheese, softened
9 ounces semi-sweet chocolate, melted
1/2 cup seedless raspberry preserves
Topping:
6 ounces semi-sweet chocolate
1/3 cup heavy cream

1. To make crust, combine cookie crumbs and margarine and press into the bottom of a 10-inch springform pan. Set aside.
2. Preheat oven to 325 degrees.
3. To make filling, with an electric mixer set on medium speed combine 1 1/2 pounds cream cheese and sugar until well blended (scrape sides of bowl frequently throughout steps 3-7 to prevent lumps).
4. Add eggs, one at a time, mixing well after each addition.
5. Blend in sour cream and vanilla and then pour into prepared crust. Set aside.
6. Combine 8 ounces cream cheese and melted chocolate, mixing at medium speed until well blended.
7. Add raspberry preserves, mixing together well.
8. Drop chocolate raspberry batter by tablespoonfuls onto plain cream cheese batter in pan (I used my 2-tbsp. cookie scoop). Do not swirl.
9. Bake for 1 hour and 25 minutes.
10. Remove from oven, loosen cake from sides of pan, and let cool on a wire rack for 1 to 2 hours before removing from pan (I actually leave it in the pan until ready to serve).
11. To make topping, cook chocolate and heavy cream over low heat, stirring constantly, until chocolate has melted and mixture is smooth.
12. Remove from heat and spread over cooled cheesecake.
13. Chill for 4 to 6 hours.

After dolloping on the chocolate truffle mixture and placing in the oven.

Immediately after removing from the oven. The cheesecake sinks quite a bit while cooling, that's normal. I baked the cheesecake last night, forgive my use of the camera flash!

After cooling, the cheesecake is at least half an inch shorter than it was before.

Freshly covered in chocolate ganache.


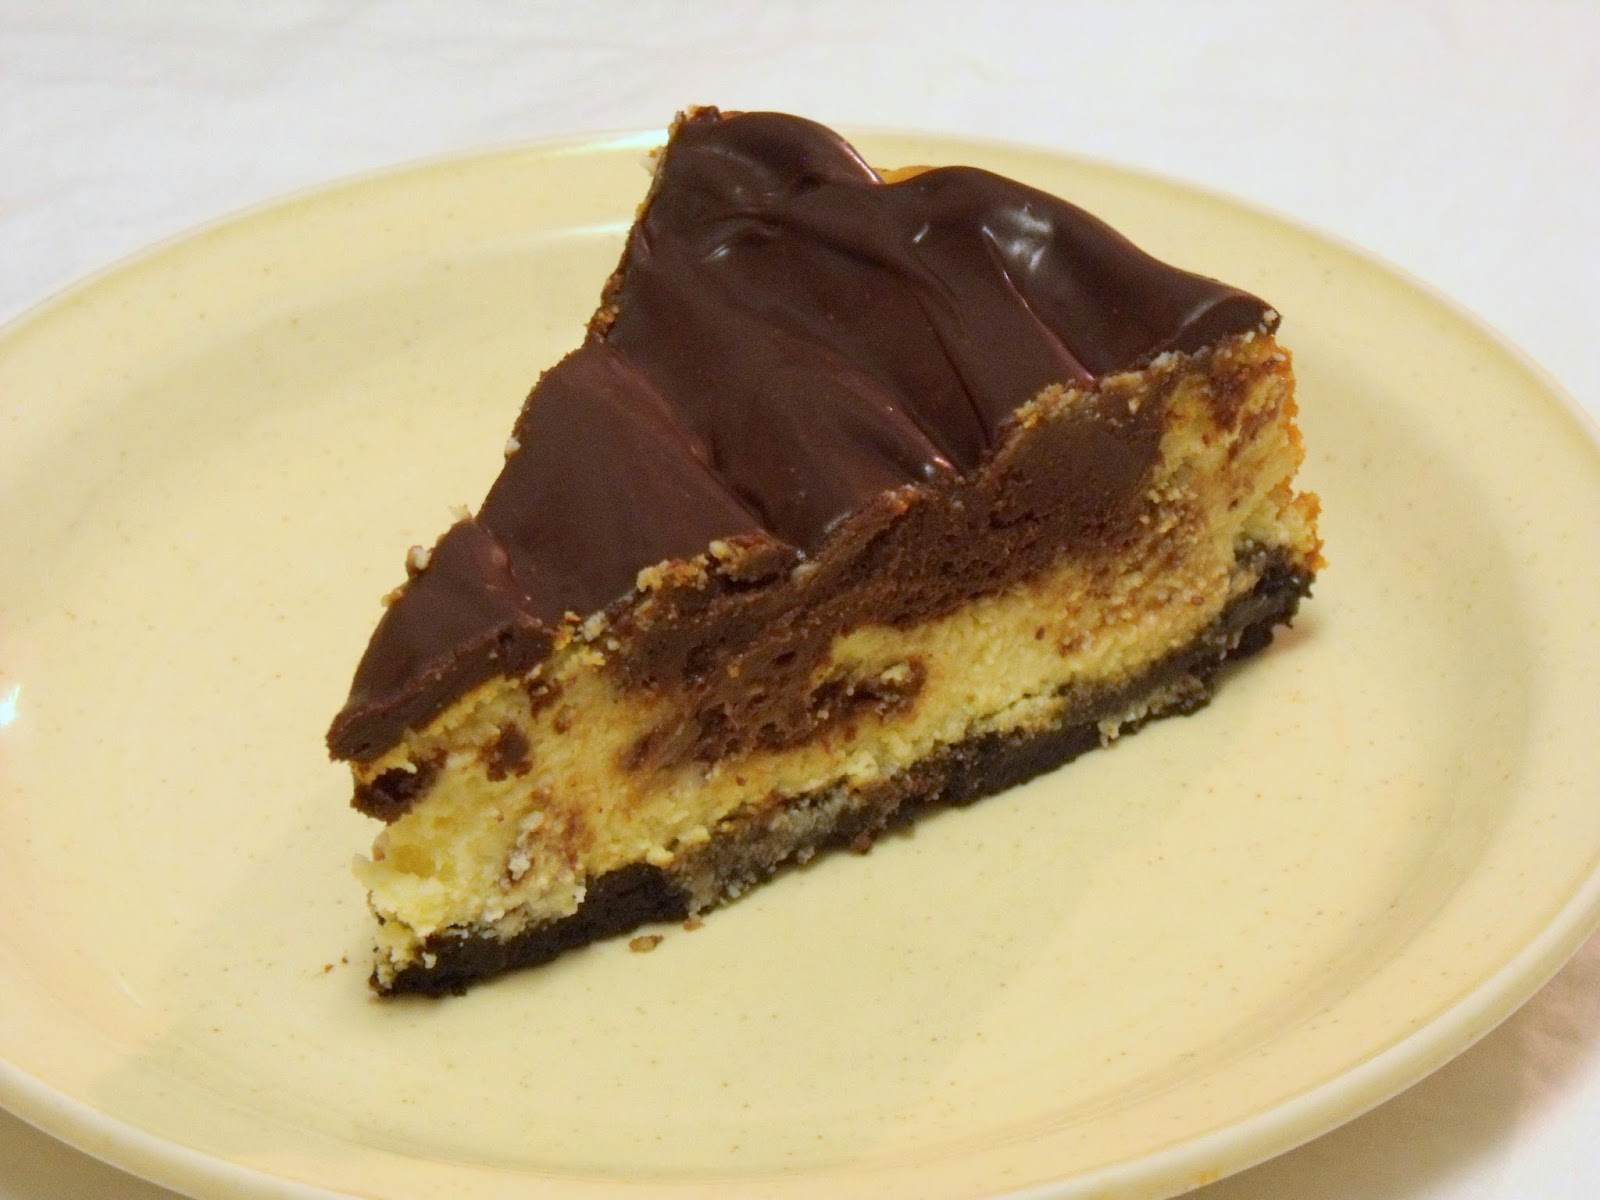
Rich, dense, chocolaty. The most intense cheesecake experience ever.

Linking:
Think Tank Thursday
One Project at a Time
Link Party Palooza
Strut Your Stuff Saturday

Friday, March 14, 2014

Layered Pumpkin Chiffon Pie

In honor of Pi Day (March 14 = 3/14 = 3.14), Jeff and I decided it would be criminal not to make some sort of pie. I know that pumpkin is more of an autumn thing, but it's what we had on hand and the recipe just looked so delicious.

This recipe came from an old (1978) Better Homes and Gardens recipe book, called "All-Time Favorite Pies." I love old recipe books, they're so much fun! Anyway, this layered chiffon pie has a mild pumpkin flavor that Jeff and I agreed would be wonderful as a Thanksgiving dessert. But being so light and fluffy, it wasn't at all too heavy for early spring. Just an all-around delightful pie.


Layered Pumpkin Chiffon Pie
Oil Pastry Crust
1 cup plus 2 tbsp. all-purpose flour
1/2 tsp. salt
1/4 cup oil
3 tbsp. cold milk
Chiffon Filling
1/2 cup sugar
1 envelope unflavored gelatin
1/2 tsp. salt
1/2 tsp. ground cinnamon
1/2 tsp. ground allspice
1/4 tsp. ground ginger
1/4 tsp. ground nutmeg
3 slightly beaten egg yolks
1 cup pumpkin puree, canned or cooked from fresh
1/2 cup milk
3 egg whites
1/4 cup sugar
Whipped Cream Filling
1 cup whipping cream
1/4 cup sifted powdered sugar
1/2 tsp. vanilla
1/4 tsp. ground cinnamon

Prepare crust: Stir together flour and salt. Pour oil and milk into small bowl (do not stir); add all at once to flour mixture. Stir lightly with a fork. Form into a ball; flatten slightly with hands.

Cut waxed paper into two 12-inch squares. Place ball of dough between 2 squares of paper. Roll dough into circle to edges of paper (Dampen tabletop with a little water to prevent paper from slipping). Peel off top paper and fit dough, paper side up, into pie plate. Remove paper.

Prick bottom and sides of pastry all over with a fork, to prevent the crust from puffin up. Line pastry shell with a double thickness of heady-duty foil; press down firmly but carefully. Bake pastry in preheated 450 degree oven for 5 minutes. Remove foil, continue baking 5 to 7 minutes more or until pastry is golden. Set pastry aside.

Prepare chiffon filling: In a saucepan combine the 1/3 cup sugar, gelatin, salt, the 1/2 tsp. cinnamon, allspice, ginger, and nutmeg. Combine egg yolks, pumpkin, and milk; stir into gelatin mixture in saucepan. Cook and stir over medium heat till gelatin dissolves and mixture thickens slightly. Remove from heat. Chill gelatin mixture to the consistency of corn syrup, stirring occasionally. (That's what the recipe says. But with the pumpkin, the consistency was never anywhere near corn syrup, it was too thick and gloppy. I just chilled it until it was noticeably thickened.)

Immediately beat egg whites till soft peaks form. Gradually add the 1/4 cup sugar, beating till stiff peaks form. Fold stiff-beaten egg whites into gelatin mixture. Set aside.

Prepare whipped cream filling: Combine whipping cream, powdered sugar, vanilla, and the 1/4 tsp. ground cinnamon. Whip mixture till soft peaks form.

Spread half of chiffon filling into baked crust, top with half of whipped cream filling. Repeat layers; chill several hours or overnight until set. After serving, cover and chill to store.


I know there's a lot of steps. But the finished product is so worth it. As a side note, I really liked this method of pie crust. No shortening to cut in, no floury mess on the table to roll it out. It turned out light and crispy, a great accompaniment to the airy fluffiness of the filling. Mmm, so yummy!

P.S. Here is the book where I got the recipe. Isn't it delightful?

Thursday, January 2, 2014

Coconut Cheesecake Tart


Sometime in November, my daughter asked me what I wanted for Christmas. She had taken it upon her sweet little 8-year-old self to write letters to Santa on behalf of everyone in the family. I thought about it and told her I would like a tart pan with a removable bottom. I had watched a cooking show where the host made pecan pie in a tart pan and was able to slice and serve the pie easily and beautifully. It looked like a great idea and something that I would actually use. So she wrote this letter to Santa: "Dear Santa, I was good today and I would like a tart pan with a removable bottom. Stephanie." So cute, right?

So I was pleased, but not surprised, to find this lovely fluted tart pan under the tree on Christmas morning.


And yesterday the kids and I mixed up this delicious tart, with a cookie pastry, a cream cheese and coconut filling, and a toasted coconut topping.


Coconut Cheesecake Tart
Tart:
1 1/4 cups flour
1/2 cup butter
2 tbsp. packed brown sugar
1 large egg
Filling:
2 cups shredded coconut
8 oz. cream cheese, room temperature
8 oz. whipped topping
1/3 cup sugar
1 tsp. vanilla

For the crust, preheat oven to 400 degrees. Combine crust ingredients until a dough is formed. Press onto bottom and about an inch up the sides of ungreased 9-inch fluted tart pan. Bake for 12 minutes.

While the crust is baking, spread coconut in a thin layer on a large baking sheet. Toast in the same oven as the crust, stirring every 3-4 minutes, until most of the coconut is golden brown. Set aside.

Once the crust and the coconut are cool, make the filling. Beat cream cheese until smooth, mix in sugar and vanilla. Add whipped topping and mix well. Stir in toasted coconut, reserving 1/2 cup for topping.

Spoon filling into crust, spread evenly. Sprinkle coconut evenly over filling. Remove sides from tart pan, then slide tart off the bottom of the tart pan onto serving dish. Chill until ready to serve.


I gotta say, slicing and serving this delicious tart was a dream! No digging around in the pie pan trying to fish out the first slice without tearing it apart. All I had to do was lift each slice right off the cake stand. It was a beautiful thing.

Linking:
Think Tank Thursday at Joyful Homemaking
Wowza Weekend Link Party at My Love 2 Create
Link Party Palooza at tatertots & jello
Strut Your Stuff Saturday Link Party at Sis Sisters' Stuff
Project Inspire{d} at An Extraordinary Day 

Thursday, March 8, 2012

Cookies n Cream No-Bake Cheesecake


Right about this time, Oreo is celebrating its 100th birthday. So I went and bought a couple packages of delicious chocolate sandwich cookies with the intention of making a yummy dessert to celebrate. This is what Jeff and I came up with - a light and creamy cheesecake filling with chunks of Oreos, surrounded by a crisp cookie crumb crust. Yummers!


Cookies n Cream No-Bake Cheesecake
40 Oreo cookies
1/4 cup butter or margarine, melted
1 8-oz package cream cheese, softened
1 8-oz carton whipped topping
1/3 cup sugar
1 tsp. vanilla

For crust, place 25 cookies in food processor, crush into fine crumbs. Mix well with melted butter. Press into 9-inch pie plate. Set aside in refrigerator while you make the filling.

For filling, cream together the cream cheese, whipped topping, sugar, and vanilla with electric mixer. Coarsely chop remaining cookies and fold in gently. Spread mixture into crust.

Chill in refrigerator for a couple of hours or until set.


Saturday, December 10, 2011

Taste&Create - Min's Pear Pie (but with apples)

Been a long time since I posted, I'll just jump right into this post and we'll forget about the fact that I haven't put anything up here since, um, September. Yeah.


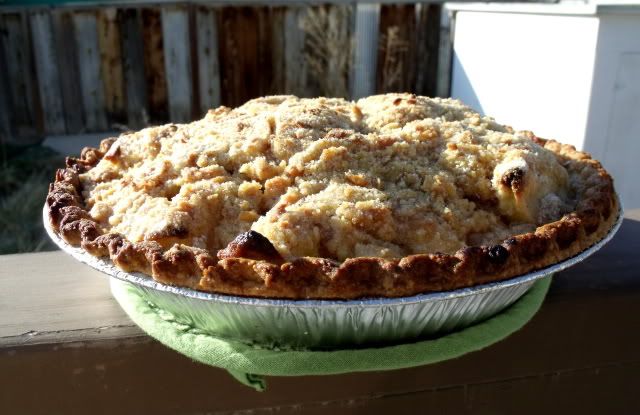
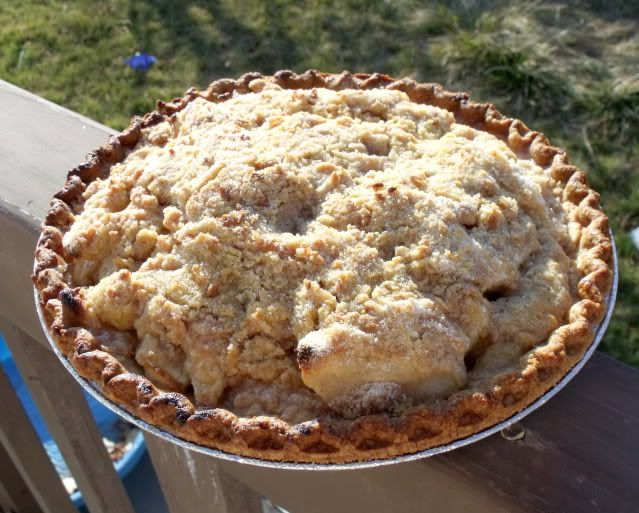
This is a super yummy pie from The Bad Girl's Kitchen, my partner for November's Taste&Create. Taste&Create is a monthly blog event where you're paired up with another blogger, and you make a recipe form your partner's blog while they make one from yours. I chose to make Min's Pear Pie, because it looked tasty, and simple to make. And I love pie. I made it with apples instead of pears, because that's what we had on hand. I would love to try it with pears next time I make it, because there will definitely be a next time. :)

Pear (or apple) Pie

7-8 large pears (or apples), pared, cut into slices
3 TBL lemon juice
1/4-1/2 cup sugar
3 TBL flour
1 tsp. lemon zest

Mix all together and spoon into one 9 inch unbaked pie shell

Sprinkle with the following mixture:

[ 1/2 cup flour, 1/2 cup sugar, 1/2 tsp. each ginger & cinnamon
cut in 4 TBL butter until crumbly ]

Bake Pie in preheated 400 oven for about 45 minutes.


Wednesday, June 22, 2011

Easy, Amazing Cream Cheese Pie

Sorry, no pictures of this one. I can't find my camera...

But this is an incredibly delicious cheesecake/pie. I've actually used this filling recipe as frosting for cake, and it's incredible. I would often eat spoonfuls of the stuff straight out of the bowl, it's that good. So when I saw in a cookbook that it could go in a pie crust, I was super thrilled.

Cream Cheese Pie
8 oz. cream cheese, softened
1/3 cup sugar
8 oz. cool whip
9-inch graham cracker crust

Beat cream cheese and sugar until smooth. Slowly beat in cool whip. Spread into crust. Chill for at least 3 hours. Serve alone or topped with fruit. We ate it with cherry pie filling, yum.

Monday, March 14, 2011

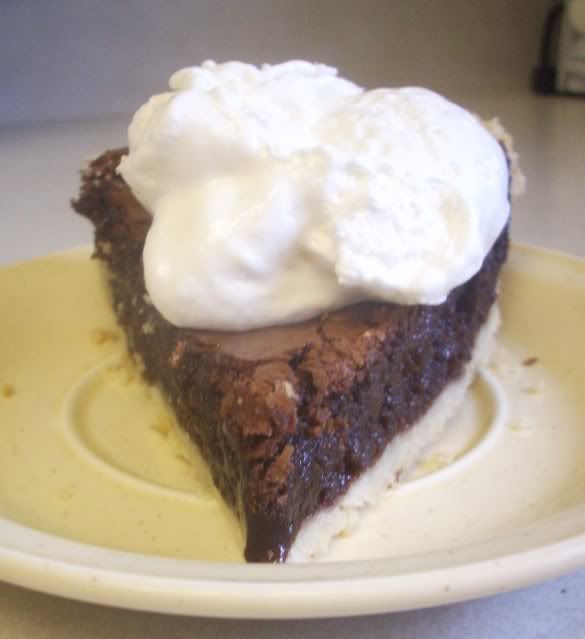
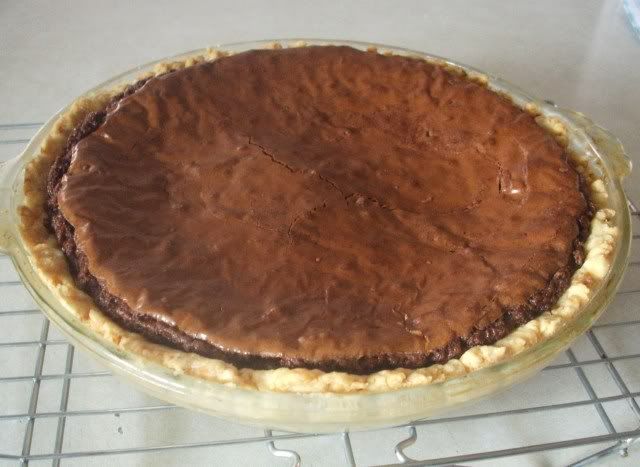
Happy Pi(e) Day! Brownie Pie

Sorry it's been so long since I posted - a whole month, wow! But this is definitely a good recipe to come back with.

Today was Pi Day (3/14 = 3.14 = π). However, since I'm not a mathematician, pi is boring. But pie is cool. So we celebrate Pi Day by making pie! And what a pie this is.


Brownie Pie
1 box brownie mix
1 unbaked 9-inch pie shell

Prepare brownie mix according to package directions. Pour brownie batter into unbaked pie shell. Bake at 350 for 40-45 minutes. Do not overbake. Cool completely, and serve with ice cream or whipped cream.


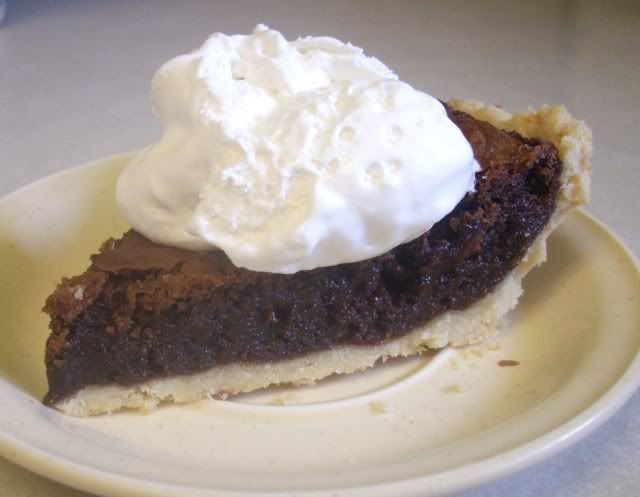
Such simple ingredients, such easy instructions, yet such an incredible dessert! Brownie in a pie crust, does chocoholic life get any better?

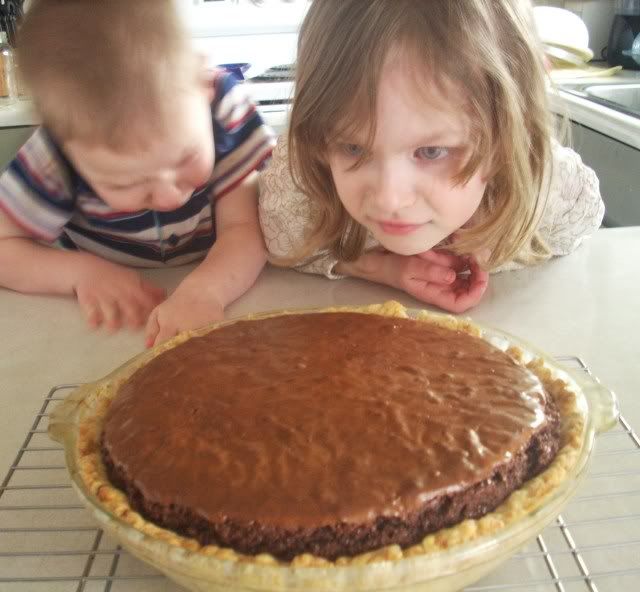
The kids are mesmerized by this pie's scintillating essence.

Monday, April 5, 2010

Lime Cheesecake with Strawberry Sauce

Our Easter meal yesterday was so yummy. Jeff and I made Pork Chops with Apples and Stuffing (last time we made it we did it in the crock pot, this time we baked it according to the original instructions, it's delicious either way!), Jeff's sister and her family brought homemade rolls and a relish tray with olives and other marinated goodness. It was all wonderfully tasty, but for me the crowning jewel was the dessert.


I'm a HUGE fan of cheesecakes, and this one was great. The cheesecake was rich but not too rich, and the flavors were light and fresh, perfect for springtime. I used this recipe from Southern Living, but used regular lime juice instead of Key lime.


Lime Cheesecake with Strawberry Sauce
2 cups graham cracker crumbs
1/4 cup sugar
1/2 cup butter or margarine, melted
3 (8-ounce) packages cream cheese, softened
1/4 cups sugar
3 large eggs
1 (8-ounce) container sour cream
1 1/2 teaspoons grated lime rind (skipped this, Jeff hates any kind of citrus rind)
1/2 cup lime juice
Strawberry Sauce
1 1/4 cups fresh strawberries
1/4 cup sugar
1 1/2 teaspoons grated lime rind (substituted lime juice)

Stir together first 3 ingredients, and firmly press on bottom and 1 inch up sides of a greased 9-inch springform pan.

Bake at 350° for 8 minutes; cool.

Beat cream cheese at medium speed with an electric mixer until fluffy; gradually add 1 1/4 cups sugar, beating until blended. Add eggs, 1 at a time, beating well after each addition. Stir in sour cream, rind, and juice. Pour batter into crust.

Bake at 325° for 1 hour and 5 minutes; turn oven off. Partially open oven door; let stand in oven 15 minutes. Remove from oven, and immediately run a knife around edge of pan, releasing sides.

Cool completely in pan on a wire rack; cover and chill 8 hours.

Just before serving, make strawberry sauce - process all sauce ingredients in a food processor until smooth, stopping to scrape down sides. Spoon sauce over each slice.

Yummmmmm......

Friday, March 19, 2010

Special Apple Cobbler


I was sooooo in the mood for a decadent baked dessert today! Jeff pointed out that we had lots of apples that needed to be used, and there were several cake mixes (purchased on sale, of course) in the pantry. I did some quick thinking and, by combining an apple pie recipe with the recipe for cake mix cookies, came up with this totally awesome apple cobbler. It turned out so delicious!


Special Apple Cobbler
5 medium-sized tart apples (we used granny smith)
2/3 cup sugar
2 tbsp. flour
Dash each cinnamon and nutmeg
1 tbsp. butter or margarine
1 box spice cake mix
2 eggs
1/3 cup oil

Preheat oven to 375 and grease a 9-inch pie pan. Peel apples and cut into small chunks. Mix with sugar, flour, cinnamon and nutmeg. Spread apples in the pan, dot with butter.

Mix together the spice cake mix, eggs, and oil. Drop by large spoonfuls onto the apples. Bake in preheated oven for 30 minutes.

Too bad we didn't have any ice cream, that would have been absolutely perfect.


I think this concept would work well with other fruit and cake combinations. Peach pie filling topped with yellow cake mix, cherry pie filling with chocolate cake mix - yum!!!

Tuesday, December 22, 2009

Brownie Bottom Cheesecake

We had my brother and his girlfriend, and my husband's sister and her family over for dinner on Sunday, a nice big turkey dinner with stuffing and rolls and sweet potatoes topped with marshmallows. For a big dinner like that, you need a super yummy dessert to finish off the meal. This brownie bottom cheesecake is what I made, and it was so good! The brownie layer was chewy and moist, and the cheesecake layer was deliciously creamy. It was a big hit.


Brownie Bottom Cheesecake
4 (1 ounce) squares unsweetened baking chocolate (I used 4 oz. semisweet chocolate chips)
1/2 cup butter or margarine
2 1/4 cups sugar, divided (reduced to 1 3/4 cups because of the chocolate chips)
5 eggs, divided
1/4 cup milk
2 teaspoons vanilla, divided
1 cup flour
1/2 teaspoon salt
3 (8 ounce) packages cream cheese, softened
1/2 cup sour cream

Preheat oven to 325 degrees F. Microwave chocolate and butter in large microwaveable bowl on HIGH 2 min. or until butter is melted. Stir until chocolate is completely melted. Add 1-1/2 cups of the sugar (here I used only 1 cup); mix well.

Add 2 of the eggs, one at a time, mixing on low speed after each addition just until blended. Add milk and 1 tsp. of the vanilla; mix well. Combine flour and salt. Gradually add to chocolate mixture, mixing after each addition just until blended. Spread evenly into greased and floured 9-inch springform pan. Bake 25 min.

Beat cream cheese, remaining 3/4 cup sugar and remaining 1 tsp. vanilla in large bowl with electric mixer on medium speed until well blended. Add sour cream; mix well. Add remaining 3 eggs, one at a time, mixing on low speed after each addition just until blended. Pour over brownie layer in pan (Filling will come almost to top of pan.)

Bake 55 min. to 1 hour or until center is almost set. Run knife or metal spatula around rim of pan to loosen cake; cool before removing rim of pan. Refrigerate 4 hours or overnight. Let stand at room temperature 30 min. before serving. Store leftover cheesecake in refrigerator.

Friday, October 9, 2009

Our Anniversary Dinner, Yummy!


Yesterday Jeff and I celebrated five years of marriage. Then today we celebrated more by closing on our house - we get the keys on Tuesday and are so excited!!!!

Anyway, we like to do special homemade meals for special occasions. Yesterday was no different. We had an absolutely delicious dinner of Pork Chops with Apples and Stuffing, salad with Basic Vinaigrette, and Anniversary Pie for dessert. It was the same pie I made for our anniversary last year, but I changed it up to include chocolate, teehee. The whole meal was absolutely wonderful.


Pork Chops with Apples and Stuffing


This recipe was based on a recipe I got from my sister a long time ago. The flavors of the pork, the stuffing, and the apple pie filling are absolutely wonderful together. It's delicious just the way it is on her blog, Fabulous Food, but I wanted to give it more of a homemade touch, so I made the apple pie filling from scratch. This is what we came up with.

4 pork chops, about 3/4 inch or thicker
6 apples, peeled, cored, and thinly sliced
1 tbsp. lemon juice (only if the apples lack tartness)
1 cup sugar
2 tbsp. flour
1/2 to 1 tsp. cinnamon
Dash nutmeg
1 box stuffing mix

Combine the apples, lemon juice, sugar, flour, cinnamon, and nutmeg. Spread in the bottom of a crock pot.

Quickly sear the pork chops over high heat on the stove, just until they're lightly browned on the outside. They shouldn't be cooked through. Place on top of the apples in the crock pot. Cover and cook on low until the pork is thoroughly cooked. In our crock pot it took about 8 hours.

Just before serving, prepare stuffing according to directions on the box. Serve with the pork chops and apples.

Next time I might add a bit more flour to the apples - it made a whole lot of syrup because it was in the crock pot instead of the oven. But as is, it was still absolutely delicious.


Salad with Basic Vinaigrette


For the salad, I just mixed together some green leaf lettuce with a bunch of veggies - mushrooms, shredded carrot, tomatoes, fresh chives (from the garden of a wonderful elderly gentleman in our church). Then I topped it with this simple vinaigrette.

1/4 cup oil
2 tbsp. vinegar
2 tbsp. water
1 tsp. mustard
1/8 tsp. each sugar, salt, and pepper

Combine ingredients and mix well. Store unused dressing in the fridge.

This recipe is really easy to customize and make it however you want. Use flavored oil or vinegar, specialty mustard, or add herbs and/or spices along with the salt and pepper. I made it very basic last night, but it's fun to change things around and make it your own.


Anniversary Pie


Last year I made this with butter pecan ice cream and a plain graham cracker crust. This year we changed it up a bit. I used vanilla ice cream and brown sugar instead of white. I also made a chocolate graham cracker crust, and we topped the pie with an easy chocolate sauce. It was divine!

Crust:
18-20 graham cracker squares (9-10 full sheets)
1/4 cup sugar
1/4 cup cocoa powder
6 tbsp. butter or margarine, melted

Crush graham crackers in food processor. Add sugar and cocoa powder, process until mixed. Add melted butter and process again until thoroughly mixed. Empty into a 9-inch pie plate and press onto bottom and sides. Set aside.

Filling:
1 8-oz. package cream cheese, softened
1/3 cup brown sugar, loosely packed
1/2 cup eggnog
1/2 cup vanilla ice cream

Beat cream cheese and sugar until smooth. Beat in eggnog and ice cream. Pour into crust and freeze until firm. Remove from freezer 10 to 15 minutes before slicing to soften the pie.

Chocolate Sauce:
1 cup chocolate chips
1/4 cup milk (approximately)

Melt chocolate and milk slowly, either in the microwave, in the top of a double boiler, or on the stove over very low heat. Add additional milk if it's too thick (I don't really know exactly how much milk I used, I just eyeballed it and stopped adding when it was a good texture). Drizzle sauce over individual slices of pie (I admit that I might have drizzled a bit more on after taking the pictures).


Well, by the time we were done eating, my stomach was very full, but I sure was happy! This was definitely a very good meal for our anniversary. May Jeff and I continue to have many more years of cooking beautiful and delicious meals together.

Sunday, August 2, 2009

Raspberry Cream Pie

Yesterday was National Raspberry Cream Pie Day! Hooray, and all that jazz. I technically didn't miss this particular holiday - I did make the pie last night. It just wasn't ready to eat until after we'd all gone to bed. So the eating and the posting are taking place today.

I sorta made this recipe up. Making the pie was a last minute decision, so I was limited in what ingredients I could use, having to rely solely on what I had on hand. I thought it would be delicious to do a pie with a box of vanilla pudding, some cream cheese, raspberry jello, and cool whip. Unfortunately, I was missing three of the four ingredients, so that idea wouldn't work. Then I hit on the idea of doing a homemade cream pie filling and adding the raspberry jello to that. So that's what I did. This is a simple vanilla cream pie, with a box of raspberry jello added. Easy peasy.


Raspberry Cream Pie
3 large egg yolks
2/3 cup sugar
1/4 cup cornstarch
1/2 tsp. salt
3 cups milk
2 tbsp. butter or margarine
2 tsp. vanilla
1 small box raspberry jello powder
1 baked 9-inch pastry shell or graham cracker crust

Beat egg yolks with fork in medium bowl; set aside. Mix sugar, cornstarch, and salt in 2-quart saucepan. Gradually stir in milk. Cook over medium heat, stirring constantly, until mixture thickens and boils (this is the hardest part, because it takes a long time!). Boil and stir 1 minute.

Immediately stir about 1 cup of the hot mixture gradually into egg yolks, then stir back into hot mixture in saucepan. Boil and stir 1 minute; remove from heat. Stir in butter, vanilla, and jello. Pour into pie crust. Press plastic wrap on filling to prevent a tough layer from forming on top. Refrigerate several hours until set.

Remove plastic wrap. If you want to, top with whipped cream or cool whip, maybe some fresh raspberries, mint leaves, etc. I didn't have any of that stuff, so we left the pie garnish-less. Still delicious!


Here's the pie crust I used. It's the kind that you pat into the pan instead of rolling out - not only does it use oil which is a healthier fat than shortening or butter, but it's great for if you rarely have a clean surface on which to roll out a pie crust...

Pat-in-the-Pan Oil Pastry
1 1/2 cups flour
1/2 tsp. salt
1/3 cup oil
2 tbsp. cold water

Mix flour, salt, and oil until all flour is moistened. Sprinkle with cold water, 1 tablespoon at a time, tossing with fork until all water is absorbed.

Gather pastry into a ball. Press in bottom and up sides of pie plate.

Prick bottom and sides of pastry thoroughly with fork. Bake at 475 for 10 to 12 minutes or until light brown; cool on rack. Or if using for a baked filling (like pumpkin pie, single-crust fruit pie, etc.) - fill and bake as directed in pie recipe.


This pie was really the best of both worlds - the creaminess of a pudding pie, with the fruity flavor and sturdy structure of jello. Zaylee has affectionately termed it "yummy pink pie." We decided that this would be a fun pie to experiment with - the variety of flavors you can choose from is as vast as the flavors of jello available. Peach, strawberry, grape, lime, cherry, all would be so delicious in this fun, creamy, fruity pie. :-)

Tuesday, May 26, 2009

Hot Fudge Cheesecake - Finally!!!

I finally made it! Yippee! And it's just as super wonderfully delicious as I remembered. Man, I love cheesecake!

Hot Fudge Cheesecake is rich and chocolaty, though quite small. It is served at room temperature with a creamy Hot Fudge Sauce. This cheesecake is baked in a 7-inch springform pan, which, though fun and cute, is not a very common size. If you don't have a 7-inch, I would try baking it in an 8-inch pan and reducing the baking time.


Hot Fudge Cheesecake
1 cup crushed saltine crackers (about one sleeve)
1/2 cup finely chopped walnuts
6 tbsp. butter or margarine, melted
3 tbsp. sugar
6 (1-ounce) squares semisweet chocolate (I use chocolate chips)
3/4 cup butter or margarine
1 (8-ounce) package cream cheese, softened
3/4 cup sugar
3 large eggs

Hot Fudge Sauce:
2 cups semisweet chocolate chips
1 cup half-and-half (I use evaporated milk)
1 tbsp. butter or margarine
1 tsp. vanilla

Combine first cracker crumbs, walnuts, 6 tbsp. melted butter, and 3 tbsp. sugar; stir well. Firmly press into bottom and 2 1/2 inches up sides of a lightly greased 7-inch springform pan. Bake at 350 degrees for 8 minutes. Set aside. Here's a picture of this step, so you can see how cute and little the 7-inch pan really is. Isn't it tiny?


Reduce oven temperature to 300 degrees. Combine chocolate squares and 3/4 cup butter in a heavy saucepan. Cook over medium-low heat until mixture is melted and smooth, stirring often. Remove from heat, and cool.

Beat cream cheese at medium speed with an electric mixer until creamy. Add 3/4 cup sugar; beat well. Add eggs, 1 at a time, beating after each addition. Stir in cooled chocolate mixture. Pour into prepared crust.

Bake at 300 for 50 minutes to 1 hour or until almost set (Almost set means there's still some jiggle in the middle, but not too much. My oven runs slow, it took about an hour and fifteen minutes). Turn off oven. Let cheesecake cool in oven 30 minutes. Remove to a wire rack; cool to room temperature.


Gently run a knife around edge of cheesecake to release sides of pan; carefully remove pan. Another size comparison - the little hand belongs to my 3-year-old. Kids just can't keep their hands off yummy food, ya know?


Prepare Hot Fudge Sauce: Combine chocolate chips and half-and-half in a heavy saucepan. Cook over medium heat until chocolate melts and mixture is smooth, stirring often. Remove from heat; stir in butter and vanilla.

Serve cheesecake with warm Hot Fudge Sauce. Store leftovers of both cheesecake and sauce covered in refrigerator. Leftover sauce can be served over ice cream or pound cake. :-)


Just a little side note: If you, perchance, accidentally buy milk chocolate chips instead of semisweet, just reduce the sugar to 1/2 cup. You can also use the milk chocolate in the sauce, it will just be sweeter than usual. Still yummy. Not that I, uh, speak from experience or anything. Because of course I would never do anything like that.