Monday, July 28, 2014

Chocolate Berry Truffle Cheesecake


When I was a teenager, my dad decided he wanted to learn how to make gourmet cheesecakes. He bought a recipe book featuring a large variety of cheesecakes, and started baking. These cheesecakes were a big departure from the no-bake Jell-O cheesecakes of my childhood. There was a year or two when we were almost constantly trying new fancy cheesecake recipes, everything from Chocolate Turtle Cheesecake to No-Bake Peanut Butter Cheesecake to Banana Split Cheesecake. Mmm. Those were good times.

The very first cheesecake that Dad made out of that beautiful little book was called Chocolate Raspberry Truffle Cheesecake. It was a 10-inch cheesecake that used 2 full pounds of cream cheese, a lot of chocolate chips, and seedless raspberry preserves. He took the sides off the springform pan too soon, so it ended up being a giant shapeless blob in the refrigerator. But it was the richest, most decadently delicious shapeless blog any of us had ever experienced. It was amazing.


After that first cheesecake, Dad's skills improved and we had no more shapeless blobs occupying the place of honor on the fridge shelf. With each cheesecake, he (and those of us kids who watched or helped) learned about ways to keep the cheesecake from cracking, how to mix it properly to reduce lumps, how to bake it and cool it just right. For instance, scrape the sides of the bowl very frequently while mixing, especially after adding a new ingredient. The cheesecake is done baking when the middle half is still relatively jiggly - if it doesn't still jiggle it's overdone. Make sure to let the cheesecake cool completely (and slowly) before removing the springform pan sides. If your cheesecake cracks it's perfectly acceptable to top it with whipped cream or sweetened sour cream to hide the cracks! But still, no matter how many successful and beautiful masterpieces Dad turned out, that first sloppy pile of cheesecake-y goodness has always been my favorite.

The recipe calls for seedless raspberry preserves. But I can't always find those, I don't know why. So I'll sometimes use a different type of berry preserves, with great results. This time I used seedless blackberry preserves. I'll compromise on the type of berry the preserves are made of, but I won't compromise on the fact that they have to be seedless. To get the smooth, perfect texture in the chocolate truffles, you need to use preserves that don't have seeds or chunks.


Chocolate Berry Truffle Cheesecake
Crust:
1 1/2 cups finely crushed cream-filled chocolate sandwich cookie crumbs
2 tablespoons margarine, melted
Filling:
1 1/2 pounds cream cheese, softened
1 1/4 cups sugar
3 eggs
1 cup sour cream
1 teaspoon vanilla
Truffles:
8 ounces cream cheese, softened
9 ounces semi-sweet chocolate, melted
1/2 cup seedless raspberry preserves
Topping:
6 ounces semi-sweet chocolate
1/3 cup heavy cream

1. To make crust, combine cookie crumbs and margarine and press into the bottom of a 10-inch springform pan. Set aside.
2. Preheat oven to 325 degrees.
3. To make filling, with an electric mixer set on medium speed combine 1 1/2 pounds cream cheese and sugar until well blended (scrape sides of bowl frequently throughout steps 3-7 to prevent lumps).
4. Add eggs, one at a time, mixing well after each addition.
5. Blend in sour cream and vanilla and then pour into prepared crust. Set aside.
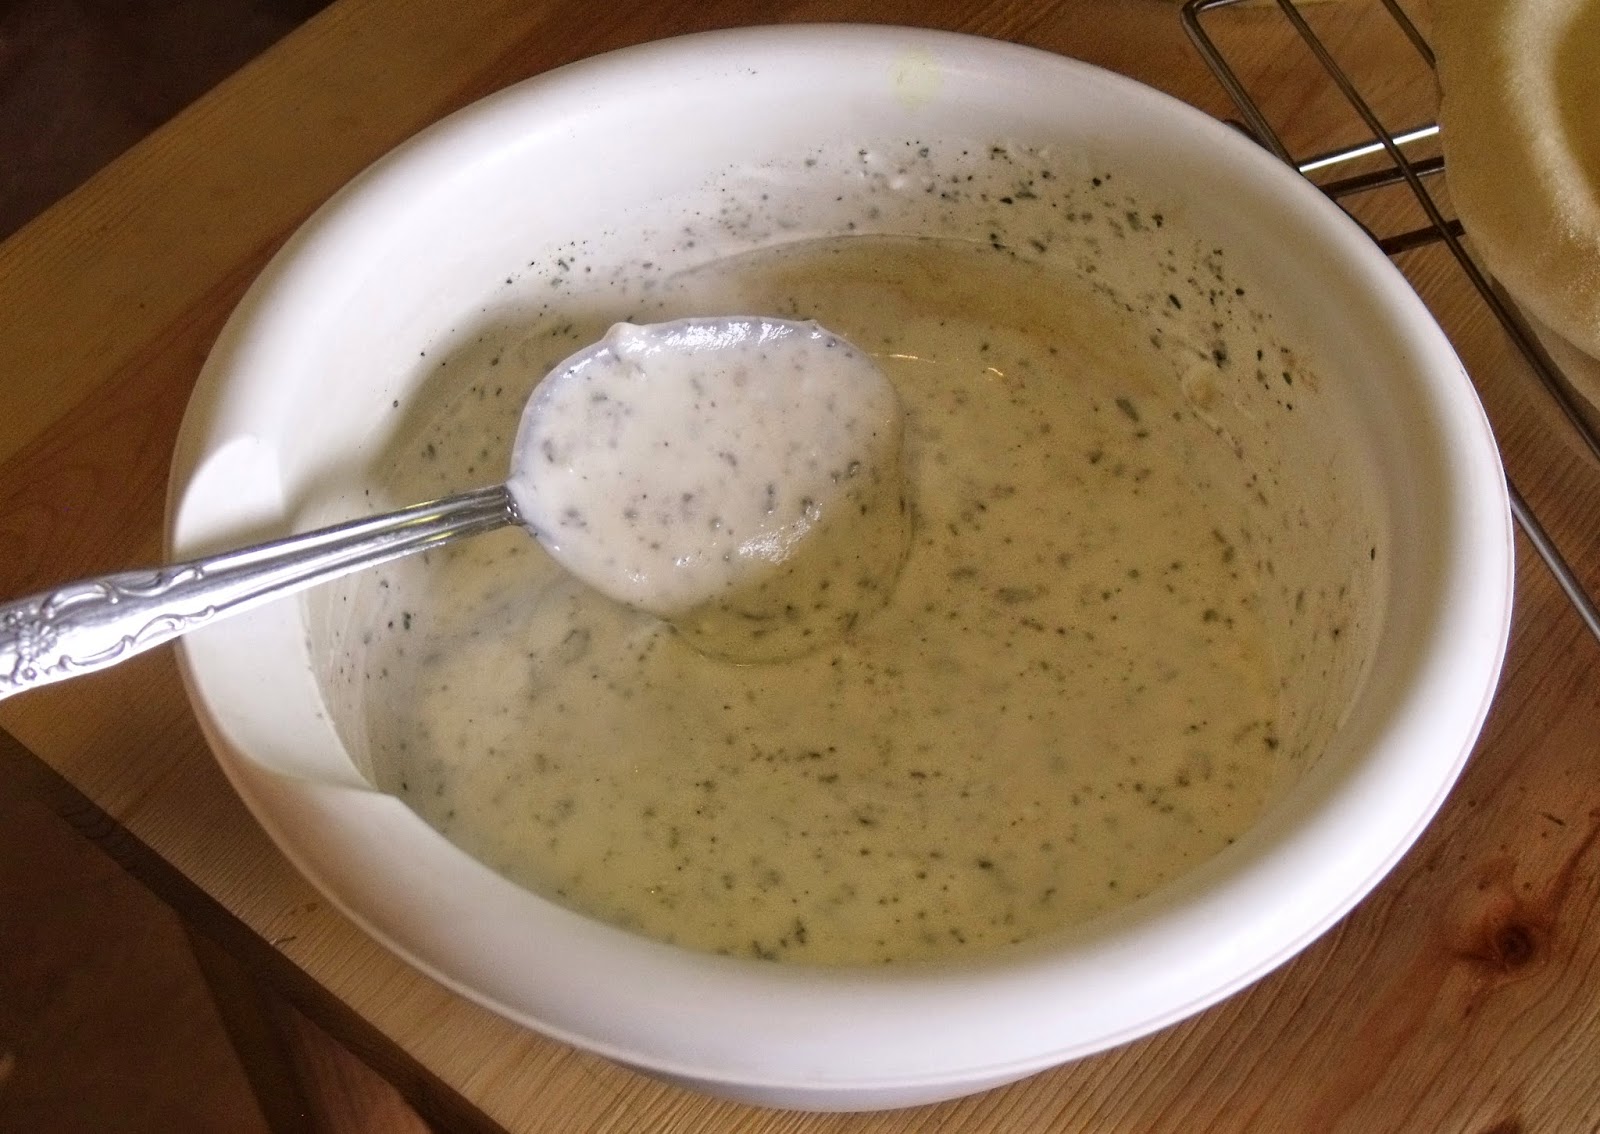
6. Combine 8 ounces cream cheese and melted chocolate, mixing at medium speed until well blended.
7. Add raspberry preserves, mixing together well.
8. Drop chocolate raspberry batter by tablespoonfuls onto plain cream cheese batter in pan (I used my 2-tbsp. cookie scoop). Do not swirl.
9. Bake for 1 hour and 25 minutes.
10. Remove from oven, loosen cake from sides of pan, and let cool on a wire rack for 1 to 2 hours before removing from pan (I actually leave it in the pan until ready to serve).
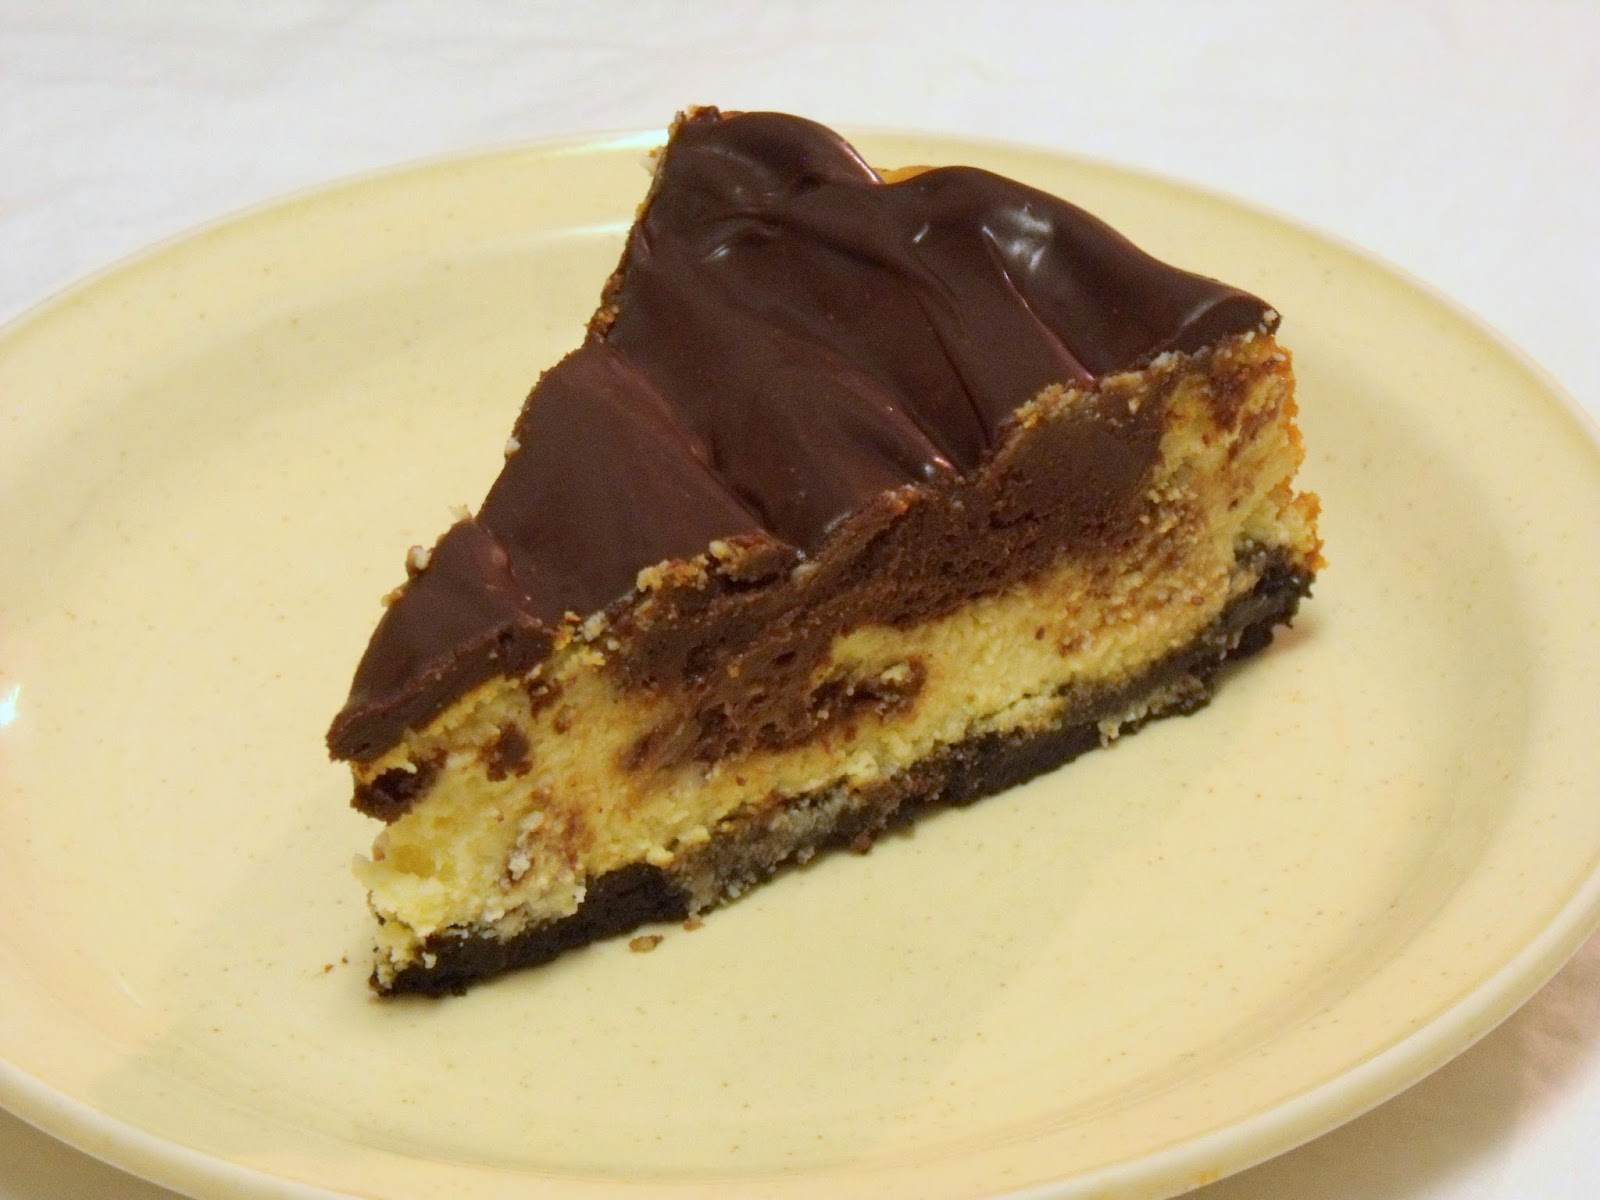
11. To make topping, cook chocolate and heavy cream over low heat, stirring constantly, until chocolate has melted and mixture is smooth.
12. Remove from heat and spread over cooled cheesecake.
13. Chill for 4 to 6 hours.

After dolloping on the chocolate truffle mixture and placing in the oven.

Immediately after removing from the oven. The cheesecake sinks quite a bit while cooling, that's normal. I baked the cheesecake last night, forgive my use of the camera flash!

After cooling, the cheesecake is at least half an inch shorter than it was before.

Freshly covered in chocolate ganache.


Rich, dense, chocolaty. The most intense cheesecake experience ever.

Linking:
Think Tank Thursday
One Project at a Time
Link Party Palooza
Strut Your Stuff Saturday

Friday, July 25, 2014

Biscuits and Gravy Casserole, and Milky Maple Soda

Everyone knows it's fun to have breakfast for dinner. It's one of my personal favorites, because it's usually easy and cheap, and I just love breakfast foods. Biscuits and gravy especially seem to be delicious and appropriate any time of the day.

This recipe takes those simple biscuits and gravy just a step further - a little fancier and a little funner. But without adding a lot of extra work. This recipe originally called for canned biscuits, which I'm sure are absolutely delicious when used in this dish. I took it a little step toward tightwaddery and used homemade biscuit dough.


These biscuits and gravy turned out so yummy. The bottom layer of biscuits soak up the gravy and take on almost a dumpling texture, while the biscuits on top are browned and fluffy like typical biscuits. The gravy is just a basic sausage gravy that complements both layers of biscuits perfectly.


Biscuits and Gravy Casserole
(adapted from lemon-sugar)
2 cups flour
1 tbsp. baking powder
1 tsp. salt
2/3 cup shortening
3/4 cup milk
1/2 lb. ground sausage
3 tbsp. flour
2 1/2 cups milk
1/2 tsp. salt
1/2 tsp. black pepper

Preheat oven to 400 degrees. Prepare a small casserole dish (7x11) with cooking spray. Set aside.

Combine 2 cups flour, baking powder, and 1 tsp. salt. Cut in shortening. Stir in milk just until combined. Turn out onto floured surface and knead gently 2-3 times. Flatten with hand or rolling pin until 1/2 inch thick. Using a pizza cutter, cut into 1 1/2- or 2-inch squares.

Layer half of the biscuit squares in prepared pan. Bake for 10 minutes.

Meanwhile, prepare gravy: In a heavy skillet, cook ground sausage over medium heat until fully cooked. Sprinkle the sausage with 3 tbsp. flour. Stir flour into sausage until completely absorbed. Lower heat to medium, and cook flour/sausage mixture 3-5 minutes, stirring frequently.

Add milk, salt, and pepper; stir to combine. Stir frequently until mixture comes to a slight boil. Taste, and adjust seasonings as desired.

Pour gravy over cooked biscuits. Layer remaining uncooked biscuit squares over the gravy.

Place casserole on a baking dish, and bake for 25 minutes or until golden brown.


This soda recipe came from a book we got at the library. It's called Grandpa's Cloudy With a Chance of Meatballs Cookbook, based on the original story. It's got recipes for things like Spaghetti Twister with a Tomato Tornado, Foggy Pea Soup, Chewandswallow Chicken Legs, and Jello-O Setting in the West.


Jeff decided to mix up some Milky Maple Soda to go with dinner tonight, "just like they serve in Ralph's Roofless Restaurant."


Milky Maple Soda
Milk
Plain seltzer
1 tbsp. maple syrup

Fill 1/4 of a glass with milk. Fill the rest of the glass with seltzer, leaving a little room at the top. Add about a tablespoon of maple syrup (more or less, to your taste). Stir and slurp!

I think I added about an extra tablespoon of syrup to my glass, I like things to be sweet! Anyway, this was a fun and unique little treat.

Linking:
Link Party Palooza
Strut Your Stuff Saturday

Monday, July 7, 2014

Creamed Chicken

I have spent a great portion of the day reading through my blog, sort of a trip down memory lane. It's been fun to reminisce, and to see how my blog has progressed and gone through its many phases and stages. For a while, I was posting so frequently that I felt guilty if I went a whole week without posting. Wow, that is not how I do it lately! Anymore, I only post once or twice a month, if that. I really want to get back into the habit of posting more frequently. So here I am, posting our simple, inexpensive, yet delicious meal that we enjoyed tonight.

I enjoy using chicken leg quarters. They're one of the cheapest sources of meat, at under a dollar a pound. We use them as is, or separated to have the thighs for one meal and the drumsticks for another. My favorite way to use them in recipes is to start by stewing them in water until they are tender. Just cover with water, bring to a boil, reduce heat to medium or medium-high, and simmer until completely done. The longer they cook, the more tender they get. Remove the chicken from the broth, reserving the broth of course. Once the chicken has cooled down, you can pull all the chicken from the bones and use the chicken in whatever recipe you want.

I recently learned a great tip for taking chicken dishes from good to amazing. Adding thyme and a small amount of turmeric gives an incredible flavor, as well as a pretty color, to everything from chicken soup to chicken pie. Tonight I used this seasoning trick in our creamed chicken, with great results. We served the chicken over pasta, but it was so good I was eating the chicken gravy by itself by the end of the meal!


Creamed Chicken
2 chicken thighs, boiled in water until tender, then removed from bones and shredded (see above)
Broth from boiling the chicken
1 cup frozen peas, run under hot water until thawed
1 cup frozen sliced carrots, microwaved with a little water until thawed and softened
1/4 cup margarine or butter
1/4 cup flour
1 or 2 dashes turmeric
1/2 tsp. dried thyme
8 oz. macaroni noodles, cooked and drained

Melt margarine in large saucepan. Add flour and whisk until smooth. Slowly whisk in 2 1/2 cups chicken broth. Cook and stir over medium heat until smooth and thickened. Stir in turmeric, thyme, and salt and pepper to taste. Add peas, carrots, and chicken. Serve over noodles. This would also be good over rice, mashed potatoes, or like I said, all by itself!


Linking to tatertots & jello

Tuesday, July 1, 2014

My Kitchen My World - Israel

It seems that all I'm posting lately is my monthly submission for My Kitchen My World. I need to get on the ball and post other things! Especially since MKMW is going to be taking a break for a while. Participation has not been very high for the past several months. My family and I have really been enjoying the opportunity/excuse to make something fun from a different country each month, we've tried a lot of things we otherwise wouldn't have.

Israel was originally assigned for April, but due to lack of participation it was moved to June to give everyone a chance to try again. The funny thing is, I actually made this meal back in April, but never got around to blogging it. Now here it is all the way into July, and I'm finally putting these delicious recipes up onto the blog. I might be a little bit of a procrastinator...


I chose to make falafel, a popular Israeli street food. We served it with pita bread, yogurt sauce, and fresh tomatoes, cucumber, and lettuce. Super yummy! The whole family liked the little fried balls of seasoned chickpeas, the pita bread was soft and delicious, the yogurt sauce brought it all together. All in all a great meal.


Falafel
(from This American Bite)
2 1/2 cups cooked chickpeas
1 onion, chopped
1/2 cup parsley (used 2 tbsp. dried parsley)
6 cloves garlic (used equivalent in bottled minced garlic)
4 tsp. cumin
2 tsp. coriander
2 tsp. za'atar (substituted thyme)
1 tsp. black pepper
1 tsp. salt
Juice of 1 lemon
1/4 cup whole wheat flour
1 egg

With the exception of the flour and egg, put all of the ingredients into the food processor. Rather than running the food processor continuously,  pulse the ingredients three or four times until the ingredients are minced, but not pureed.

Transfer the falafel mixture into a non-metallic bowl and add 1/4 cup of flour and one egg to bind the mixture.  Mix the flour and egg well so you don’t get any flour pockets.

Using a teaspoon, scoop 1.5 tsp of the falafel mix into your hands then use the spoon to mold them into a ball shape.  Press the mixture so that it is firm – this will prevent them from disintegrating when you fry them.

Using any pot or dutch oven, fill it with a neutral oil, like canola, vegetable or grapeseed oil and use a chef basket. If you have a candy thermometer, wait until the oil reaches 350 degrees before frying putting the falafel balls into the hot oil to fry. If you do not have a candy thermometer, you can put one of your falafel balls into the oil, if it’s not hot enough it won’t cook and it may start to disintegrate.

When you are sure the oil is hot enough, gently place the falafel balls into the hot oil. Don’t crowd the falafel, let them swim in the oil for two minutes, until golden brown. If the top of the falafel float above the oil, turn them with a spoon then fry for another minute. The falafel will cook quickly at this size, so be ready with a plate covered with a sheet of paper kitchen towel to soak up excess oil once cooked.

Best served fresh from the oil, but you can reheat them in a warm oven (no hotter than 250 degrees).


Pita Bread
(from Annie's Eats)
3 cups flour, plus 1/2-3/4 cup more as needed
1 ½ tsp. salt
1 tbsp. sugar or honey
1 packet instant yeast
1 ¼ to 1 ½ cups water, roughly at room temperature
2 tbsp. olive oil, vegetable oil, butter or shortening

Mix the yeast in with the flour, salt, and sugar. Add the olive oil and 1 ¼ cup water and stir together with a wooden spoon. All of the ingredients should form a ball. If some of the flour will not stick to the ball, add more water.

Once all of the ingredients form a ball, place the ball on a work surface, and knead the dough for approximately 10 minutes. If you are using an electric mixer, mix it at low speed for 10 minutes. As the dough is mixing, continue to add flour, a tablespoon or two at a time, until the dough clears the sides of the bowl and is tacky but not sticky.

When you are done kneading the dough, place it in a bowl that has been lightly coated with oil. Form a ball out of the dough and place it into the bowl, rolling the dough around so that it has a light coat of oil on all sides. Cover the bowl with plastic wrap or a damp towel and set aside to rise until it has doubled in size, approximately 90 minutes.

When it has doubled in size, punch the dough down to release some of the trapped gases and divide it into 8 equal pieces. Roll each piece into a ball, cover the balls with a damp kitchen towel, and let them rest for 20 minutes. This step allows the dough to relax so that it will be easier to shape.

After the dough has relaxed for 20 minutes, spread a light coating of flour on a work surface and place one of the balls of dough there. Sprinkle a little bit of flour on top of the dough and use a rolling pin or your hands to stretch and flatten the dough. You should be able to roll it out to between ¼ – 1/8” thick – 6 inches in diameter. If the dough does not stretch sufficiently, you can cover it with the damp towel and let it rest 5-10 minutes before trying again.
Place discs on a lightly greased baking sheet or parchment paper and let rise, uncovered, until barely doubled in thickness, about 30-45 minutes.

While the discs are rising, preheat the oven to 450°. If you have a baking stone, put it in the oven to preheat as well. If you do not have a baking stone, turn a cookie sheet upside down and place it on the middle rack of the oven while it is preheating. This will be the surface on which you bake your pitas.

Open the oven and place as many pitas as you can fit on the hot baking surface. They should be baked through and puffy after 3 minutes. You may need to let the baking surface reheat for a minute or two between batches - if the surface isn't hot enough a pocket will not form. If you want your pitas to be crispy and brown you can bake them for an additional 3 to 5 minutes, but it isn’t necessary.


For the yogurt sauce, I remember that I used elements from various recipes to create it, but it was two months ago and I don't remember exactly how I made it! So this is sort of a guess about the general ingredients and quantities...

Yogurt Sauce
1 cup plain yogurt
1 tsp. onion powder
1 tsp. minced garlic
2 tsp. dried mint, crushed
1 tsp. dried oregano
Salt and pepper to taste

Combine in a small bowl. Chill for at least a couple of hours.


Serve falafel inside pita pockets with yogurt sauce, sliced tomatoes and cucumbers, and shredded lettuce. Enjoy!


Linking to Tatertots and Jello