Showing posts sorted by relevance for query yogurt. Sort by date Show all posts

Tuesday, February 3, 2009

Homemade Yogurt in the Slow Cooker

The other morning as I opened the milk to pour over our oatmeal, I noticed that faintly sour smell that occurs when your milk is about to go bad. You know, it's not there yet, but if you let the milk sit much longer it will all have to be thrown out. Well, we still had about half a gallon left so I didn't want to waste it. I hopped online to look up recipes that use lots of milk, and saw that someone suggested making it into yogurt. I've had my eye on a particular yogurt recipe that uses the crock pot (how cool is that?!), but hadn't gotten around to it yet. This was my chance - that milk needed to be used!

I found the recipe on A Year of CrockPotting.


Homemade Yogurt
8 cups milk - she suggests using whole milk, but we had a combination of 2% and skim so I just used what I had
1/2 cup natural, live/active culture, plain yogurt to use as starter

Plug in crock pot (4 quart or larger) and turn to low. Add an entire half gallon of milk. Cover and cook on low for 2 1/2 hours.

Unplug your crock pot. Leave the cover on, and let it sit for 3 hours.

When 3 hours have passed, scoop out 2 cups of the warmish milk and put it in a bowl. Whisk in 1/2 cup of store-bought live/active culture yogurt (if you've used low fat milk, add 2 tbsp. dry milk powder as well to help it thicken better). Then dump the bowl contents back into the crock pot. Stir to combine.

Put the lid back on your crock pot. Keep it unplugged, and wrap a heavy bath towel all the way around the crock for insulation.

Go to bed, or let it sit for 8 hours.

In the morning, the yogurt will have thickened---it's not as thick as store-bought yogurt, but has the consistency of low-fat plain yogurt.


Chill in a plastic container(s) in the refrigerator. Your fresh yogurt will last 7-10 days. Save 1/2 cup as a starter to make a new batch.

She suggests blending the yogurt in batches with your favorite fruit, such as mango, strawberry, and blueberry. I chose to leave it plain until serving. I went to try it the morning it was done - and go figure, Jeff had finished off the granola for breakfast before leaving for work. Phooey. So the kids and I ate it with some sugar and cut up fruit.

My yogurt did turn out quite a bit thinner than I expected. Part of that is just the result of it being homemade, I think. But I also think I should have insulated my crock pot better. I wrapped it in two towels - but only on the top and sides. Next time I think I would wrap it on the bottom as well. Or instead of towels, I could insulate it with our electric blanket, turned to low. Or just move it into our room for the night, because it's warmer there at night than in the kitchen. Lots of options available.

One quick note - if you make yogurt and it doesn't set up - DON'T THROW IT AWAY!! There's no sense wasting an entire half gallon of milk just because it isn't thickened. There are several fun ways to use over-thin yogurt. Mix it with jam and freeze as popsicles. Or just mix it with jam and drink it down like those amazingly overpriced drinkable yogurts. Use it in smoothies. Add to soup in place of milk or cream. I'll be doing some of these with my thinner-than-usual yogurt, as well as just eating it. And I think I need to make some more granola.

Tuesday, July 1, 2014

My Kitchen My World - Israel

It seems that all I'm posting lately is my monthly submission for My Kitchen My World. I need to get on the ball and post other things! Especially since MKMW is going to be taking a break for a while. Participation has not been very high for the past several months. My family and I have really been enjoying the opportunity/excuse to make something fun from a different country each month, we've tried a lot of things we otherwise wouldn't have.

Israel was originally assigned for April, but due to lack of participation it was moved to June to give everyone a chance to try again. The funny thing is, I actually made this meal back in April, but never got around to blogging it. Now here it is all the way into July, and I'm finally putting these delicious recipes up onto the blog. I might be a little bit of a procrastinator...


I chose to make falafel, a popular Israeli street food. We served it with pita bread, yogurt sauce, and fresh tomatoes, cucumber, and lettuce. Super yummy! The whole family liked the little fried balls of seasoned chickpeas, the pita bread was soft and delicious, the yogurt sauce brought it all together. All in all a great meal.


Falafel
(from This American Bite)
2 1/2 cups cooked chickpeas
1 onion, chopped
1/2 cup parsley (used 2 tbsp. dried parsley)
6 cloves garlic (used equivalent in bottled minced garlic)
4 tsp. cumin
2 tsp. coriander
2 tsp. za'atar (substituted thyme)
1 tsp. black pepper
1 tsp. salt
Juice of 1 lemon
1/4 cup whole wheat flour
1 egg

With the exception of the flour and egg, put all of the ingredients into the food processor. Rather than running the food processor continuously,  pulse the ingredients three or four times until the ingredients are minced, but not pureed.

Transfer the falafel mixture into a non-metallic bowl and add 1/4 cup of flour and one egg to bind the mixture.  Mix the flour and egg well so you don’t get any flour pockets.

Using a teaspoon, scoop 1.5 tsp of the falafel mix into your hands then use the spoon to mold them into a ball shape.  Press the mixture so that it is firm – this will prevent them from disintegrating when you fry them.

Using any pot or dutch oven, fill it with a neutral oil, like canola, vegetable or grapeseed oil and use a chef basket. If you have a candy thermometer, wait until the oil reaches 350 degrees before frying putting the falafel balls into the hot oil to fry. If you do not have a candy thermometer, you can put one of your falafel balls into the oil, if it’s not hot enough it won’t cook and it may start to disintegrate.

When you are sure the oil is hot enough, gently place the falafel balls into the hot oil. Don’t crowd the falafel, let them swim in the oil for two minutes, until golden brown. If the top of the falafel float above the oil, turn them with a spoon then fry for another minute. The falafel will cook quickly at this size, so be ready with a plate covered with a sheet of paper kitchen towel to soak up excess oil once cooked.

Best served fresh from the oil, but you can reheat them in a warm oven (no hotter than 250 degrees).


Pita Bread
(from Annie's Eats)
3 cups flour, plus 1/2-3/4 cup more as needed
1 ½ tsp. salt
1 tbsp. sugar or honey
1 packet instant yeast
1 ¼ to 1 ½ cups water, roughly at room temperature
2 tbsp. olive oil, vegetable oil, butter or shortening

Mix the yeast in with the flour, salt, and sugar. Add the olive oil and 1 ¼ cup water and stir together with a wooden spoon. All of the ingredients should form a ball. If some of the flour will not stick to the ball, add more water.

Once all of the ingredients form a ball, place the ball on a work surface, and knead the dough for approximately 10 minutes. If you are using an electric mixer, mix it at low speed for 10 minutes. As the dough is mixing, continue to add flour, a tablespoon or two at a time, until the dough clears the sides of the bowl and is tacky but not sticky.

When you are done kneading the dough, place it in a bowl that has been lightly coated with oil. Form a ball out of the dough and place it into the bowl, rolling the dough around so that it has a light coat of oil on all sides. Cover the bowl with plastic wrap or a damp towel and set aside to rise until it has doubled in size, approximately 90 minutes.

When it has doubled in size, punch the dough down to release some of the trapped gases and divide it into 8 equal pieces. Roll each piece into a ball, cover the balls with a damp kitchen towel, and let them rest for 20 minutes. This step allows the dough to relax so that it will be easier to shape.

After the dough has relaxed for 20 minutes, spread a light coating of flour on a work surface and place one of the balls of dough there. Sprinkle a little bit of flour on top of the dough and use a rolling pin or your hands to stretch and flatten the dough. You should be able to roll it out to between ¼ – 1/8” thick – 6 inches in diameter. If the dough does not stretch sufficiently, you can cover it with the damp towel and let it rest 5-10 minutes before trying again.
Place discs on a lightly greased baking sheet or parchment paper and let rise, uncovered, until barely doubled in thickness, about 30-45 minutes.

While the discs are rising, preheat the oven to 450°. If you have a baking stone, put it in the oven to preheat as well. If you do not have a baking stone, turn a cookie sheet upside down and place it on the middle rack of the oven while it is preheating. This will be the surface on which you bake your pitas.

Open the oven and place as many pitas as you can fit on the hot baking surface. They should be baked through and puffy after 3 minutes. You may need to let the baking surface reheat for a minute or two between batches - if the surface isn't hot enough a pocket will not form. If you want your pitas to be crispy and brown you can bake them for an additional 3 to 5 minutes, but it isn’t necessary.


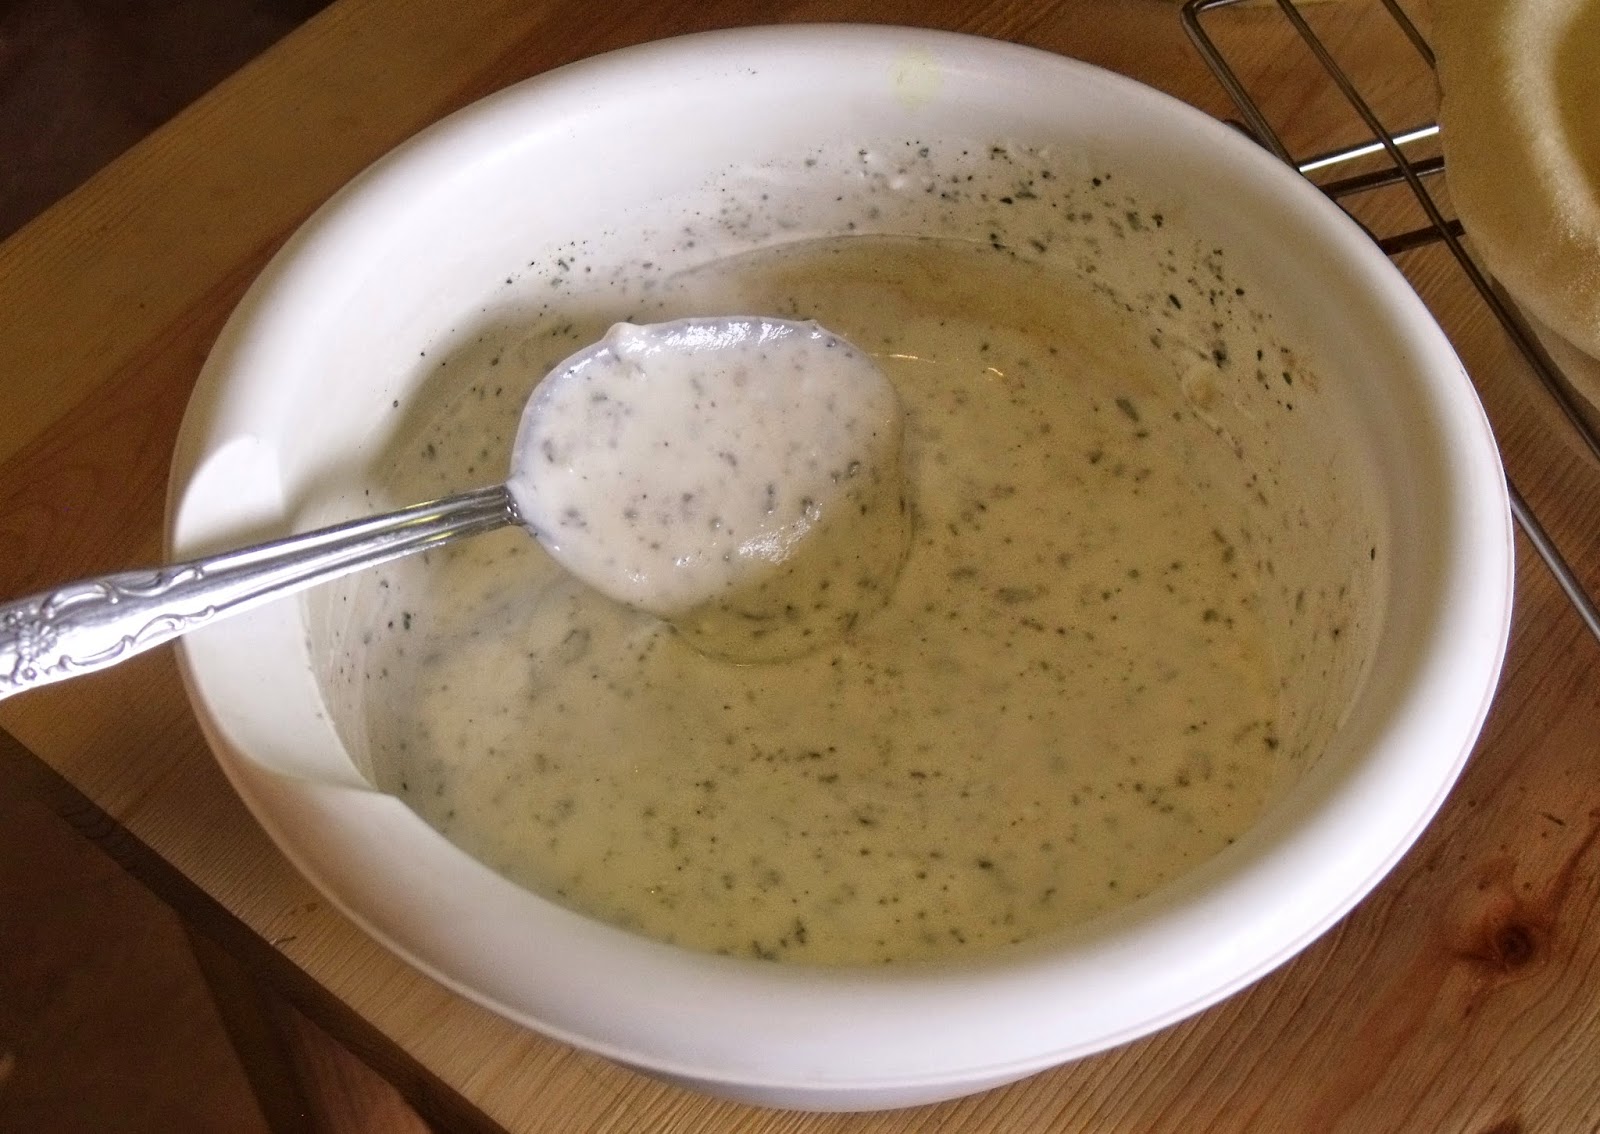
For the yogurt sauce, I remember that I used elements from various recipes to create it, but it was two months ago and I don't remember exactly how I made it! So this is sort of a guess about the general ingredients and quantities...

Yogurt Sauce
1 cup plain yogurt
1 tsp. onion powder
1 tsp. minced garlic
2 tsp. dried mint, crushed
1 tsp. dried oregano
Salt and pepper to taste

Combine in a small bowl. Chill for at least a couple of hours.


Serve falafel inside pita pockets with yogurt sauce, sliced tomatoes and cucumbers, and shredded lettuce. Enjoy!


Linking to Tatertots and Jello

Friday, April 4, 2008

Conference Menu - Part 1

Ever since we lived in Oklahoma when I was a young girl I have equated General Conference with Potato Salad. We would drive to the Stake Center, watch the first session, then picnic on the grounds between sessions, and a deliciously creamy, dilly potato salad was always on the menu. We continue this tradition even now, and the duty of making the potato salad has fallen on my shoulders (probably because I was the one who cherished this food tradition the most). I don't measure any of the ingredients, and I don't think I've made it exactly the same way twice. But I guess that's the beauty of it. Here's an approximation of how I made it this time, with notes on how I've made it other times as well, to take to Mom and Dad's house tomorrow.

Potato Salad
2 huge baking potatoes (if you don't have huge potatoes, 3 or 4 regular-sized potatoes would work)
4 eggs
Mayonnaise
Plain yogurt (this is a new addition, I've never done it with this before, but we were low on mayo. It worked better than I expected!)
Dill relish (or I just use chopped up pickles and some pickle juice)
Mustard
1/2 can olives, sliced (I don't always add these, but they're good!)
Dill weed

Cut the potatoes in 1/2- to 1-inch cubes. Cover with water and boil until done. Drain, then put in a large bowl and chill in the refrigerator. While you're doing the potatoes, boil the eggs: cover with water, bring to a boil, turn off heat, cover, let sit for a long time or until you remember that you left them there. When the eggs are cooled, peel and chop them, and add them to the potatoes in the fridge.

When the potatoes and eggs are cool, then it gets fun. Plop in some mayo and plain yogurt (start with a little, and add more if necessary). Add some relish, some mustard, the olives, and dill weed (opt.). Basically, at this point it's a pinch of this and a dash of that. I think I ended up using about 1/2 cup mayo, about 1/4 cup yogurt, 1/2 cup relish (I like lots of dill flavor), and a couple tsp. mustard. Add salt and pepper to taste. Chill until serving. If desired, sprinkle with paprika and additional dill weed to add some color.

Yes, this recipe is fairly disorganized and thrown-together, but that's how I make the potato salad, so that's how I wrote it out. Give it a try if you dare decipher my instructions!

Saturday, March 8, 2008

Stuffed Potatoes

This is another low-calorie dish that I found in the Better Homes and Gardens Calorie-Trimmed Recipes. Jeff made chicken pie last night, and we had leftovers for lunch (do you know how many calories are in a piece of pie? It's ridiculous!). This was after eating a calorie-rich breakfast of fried potatoes and cheesy eggs. So I was excited to find this recipe. It's so low-cal, I even have calories left for dessert!2 large potatoes
1/4 cup plain yogurt
1 tbsp. skim milk
2 tbsp. snipped chives
1 tsp. salt
1/8 tsp. garlic powder
Dash pepper
2 tbsp. Parmesan cheese
Paprika

Scrub potatoes; prick with a fork. Bake potatoes in 375 degree oven for 70 minutes or till done (Actually, I just microwaved 'em. Much faster!). Slice potatoes in half lengthwise. Scoop out inside, leaving shells intact. Mash potatoes (the inside, not the shell). Add yogurt, milk, chives, salt, garlic powder, and pepper. Beat till fluffy. Spoon or pipe to potato mixture into each potato shell. Sprinkle the top of each potato with cheese and paprika. Return to oven (still at 375); bake 10 minutes or till heated through. If desired, place under broiler to lightly brown tops.

Makes 4 servings.
70 calories per serving

Monday, January 19, 2009

A Simple Cheesecake and Bonus Lentil Burgers

I wanted to have something sweet and not low-calorie for dessert tonight - when you're dieting it's good to splurge every now and then or you'll feel deprived. I had some cream cheese in the refrigerator, and decided on a cheesecake. This recipe is from a Mennonite cookbook I have, called the More-With-Less Cookbook - it's very simple, nothing fancy, but it satisfied my sweet tooth wonderfully!


Cheesecake
2 eggs
8 oz. cream cheese
1/3 cup sugar
1/4 cup dry milk solids (powdered milk)
2 tsp. vanilla
1-2 tbsp. lemon juice
1 8" graham cracker crust (I used a 9" crust, and my cheesecake came out rather thin, so I suggest using the 8" crust)

Preheat oven to 375, and prepare your graham cracker crust.

Combine eggs, cream cheese, sugar, dry milk, vanilla, and lemon juice. Mix well with electric mixer, scraping bowl with rubber spatula often. Pour into crust and bake 30 minutes. Cool for 1 hour. Add topping, if desired, and chill.

I left mine topping-less, but here are the topping options given:
-Combine 1 cup yogurt or sour cream, 2 tbsp. sugar, 1 tbsp. vanilla, 1 tsp. cinnamon, and 1/4 tsp. nutmeg.
-Add drained strawberries, pineapple, peaches, cherries, blueberries, or nuts to yogurt or sour cream topping.
-Thicken any of above fruits with cornstarch and use as a topping.


As a bonus, here's the recipe we used for dinner tonight, from the same cookbook. This one is healthy and low-calorie.


Lentil Burgers
2 cups cooked, cooled lentils, drained
1 egg
1/2 cup cracker crumbs
1 small onion, minced
Tomato juice (I didn't have tomato juice, so I smushed up some canned diced tomatoes instead)
Salt and pepper to taste

Mix all ingredients together using just enough tomato juice to hold mixture in shape when pattied. Fry like hamburgers in small amount hot oil, shortening, or bacon fat.

That's the exact wording in the book. Mine never really would hold its shape if I tried to form it into patties with my hands, so I just spooned it into pattie shapes onto the skillet. They held their shapes if I turned them very carefully, but they were fairly crumbly. That said, they had a very good taste, and I wouldn't be opposed to making them again. Still, I think I prefered the pumpkin chickpea burgers I made a while back. While I love real hamburgers, I also like making meatless burgers - there are so many varieties that you can make! There's a recipe for black bean burgers that I've got my eye on, it actually looks almost like real ground beef.

Saturday, September 19, 2009

Zaylee's Birthday Cake, Fit for a Princess!

Wow, it's been a while since I posted here. We spent a week visiting family in Idaho, and then I just haven't gotten around to really doing anything special for the food blog. But I'm back, and hoping to get things going again.

While we were in Idaho, Zaylee had her 4th birthday. We had a fun family get-together to celebrate, complete with a fun cake!


This was such an easy cake to decorate, and everyone enjoyed it. I started with a simple yellow cake recipe, making 1 1/2 of the recipe. I made one 9x13 layer, and one 8x8 layer. While those cooled, I made a double batch of one of my favorite frosting recipes of all time. This stuff is so yummy!!!

Cream Cheese and Cool Whip Frosting
1 8-oz. pkg. cream cheese
1 8-oz. carton frozen whipped topping
1/3 cup sugar (granulated)
1 tsp. vanilla

Beat cream cheese until softened. Beat in remaining ingredients until combined and creamy. Add a few drops of food coloring if desired.

I would have done all the frosting pink (Zaylee is such a girly girl), but I have a nephew who is sensitive to red dye, so we needed to have at least part of the cake with no red or pink at all. I frosted the 9x13 with white frosting, then dyed the rest pink. I stacked the 8x8 right in the center of the larger cake, and frosted it with the pink frosting.

Then came the fun part. We had paid a visit to the bulk section at WinCo and picked out lots of fun candies - lots of pink, but again making sure to get some things with no red dye. We placed four ice cream cones on the corners of the top layer to act as turrets, then frosted them and added pink jelly beans around the sides. Then we just went crazy with the candies! Lots of pink on the top layer, and all sorts of other candies on the bottom. We used chocolate covered peanuts, yogurt covered peanuts, jelly beans, gumdrops, and those little pastel mint chocolate chip thingies.

Four big red gumdrops sat on top of the ice cream cones to hold the candles, and then we were done!

This really is my favorite way to decorate a cake. I have bags and tips for piping frosting, and am fairly decent at it (or I would be if I practiced...) but I really love to just have a fun concept and then create it with things like candies, cookies, and other fun edibles to make a unique and exciting cake that the kids just love! Here's the other cakes in this style that I've blogged about:

Thomas' First Birthday

Thomas' Second Birthday


Zaylee's Third Birthday


And of course, I can't do a birthday post without a picture the little birthday princess. My family gave her several princess dresses as her birthday gift, and she had such a blast trying them all on, over and over again!

Wednesday, February 11, 2009

Homemade Vanilla Pudding

"It has been said that frugality is a hallmark of a good cook. Some of the most talented practitioners I know are nearly fanatical about never wasting a morsel - chunks of stale bread are used for bread crumbs or bread pudding ... and vegetable trimmings invariably find their way into stock. This does not reflect a penurious bent so much as a love of and respect for food and its preparation. Cooking economically is part of the challenge of cooking well."--Pierre Franey

This morning as I was getting ready for breakfast, I noticed that the milk was going a little sour again. Why does that keep happening to us? I guess we need to drink it faster. Anyway, rather than just throw it out, I chose to use this milk on its last legs to make something yummy! Last time that happened I made it into yogurt. But this time there were only a couple cups of milk that needed to be used right away. So I decided it would be fun to make pudding for breakfast.


This recipe comes from allrecipes.com, and is very delicious! It utilizes cornstarch as a thickener instead of egg. So it's cheaper, and I actually think I prefer the flavor of this pudding as opposed to an egg-thickened pudding; the cornstarch allowed the vanilla flavor to come through a bit more.

Homemade Vanilla Pudding
2 cups milk
1/2 cup white sugar (can be reduced if desired)
3 tablespoons cornstarch
1/4 teaspoon salt
1 teaspoon vanilla extract
1 tablespoon butter

In medium saucepan over medium heat, heat milk until bubbles form at edges. In a bowl, combine sugar, cornstarch and salt. Pour into hot milk, a little at a time, stirring to dissolve (typically you don't add cornstarch to hot liquid. But I trusted the recipe and did it this way. As long as you add it very gradually [like, a teaspoon or two at a time], and whisk continuously, there shouldn't be any problems with clumping). Continue to cook and stir until mixture thickens enough to coat the back of a metal spoon. Do not boil. Remove from heat, stir in vanilla and butter. Pour into serving dishes. Chill before serving.

Actually, I served the pudding warm this morning, because I didn't think the kids would be patient enough to wait for it to chill. I sliced banana into the kids' bowls of pudding, but I ate mine plain. It would also be good sprinkled with cinnamon or nutmeg.

Sunday, May 3, 2009

A Forgotten Quiche


I was cruising through some of my old recipes, when I was reminded of a post that I was going to do but never got around to. We made this quite a while ago and I took pictures and everything, but it just never made it to the blog. So yippee, I have a recipe to post without having to do any work for it!

This is another universal recipe from the Tightwad Gazette - Universal Quiche. You can put just about anything in a quiche and have it taste good, as is evidenced by my offering here tonight - we made it with canned salmon and green beans and it was really good. So here you go - the recipe for Universal Quiche, quoted from Amy Dacyczyn's Tightwad Gazette. My additional comments are in italics and parentheses.


Universal Quiche

Crust. Use a standard pastry crust. Some recipes suggest prebaking this before filling to prevent sogginess. I don't. Instead, I prepare the crust, then prepare the various components of quiche, and then assemble the quiche all at once just before putting it on a lower shelf in my preheated oven. You can also make a rice crust using 2 cups of cooked rice, 1 1/2 ounces of grated cheese, and one egg. Combine the ingredients, pat into a Pam-sprayed pie tin, and prebake at 425 for 15 minutes or until just firm.

Eggs. Use 3 or 4.

Cheese. Most recipes call for 1 to 2 cups (4 to 8 ounces) of a grated hard cheese. I use about 1 cup. You can use Swiss, cheddar, feta*, Monterey Jack, or Gruyere*. Or use from 2 tablespoons to 1/2 cup of Parmesan or Romano. Or use a combination of these. Some softer cheeses, such as mozzarella and American, will not set up well (I have used mozzarella in combination with another cheese, like cheddar, with satisfactory results).

Milk or cream. Use 1 to 2 cups of milk, half and half, cream, evaporated milk, or powdered milk made with half the usual water. You may also use part sour cream, cottage cheese, or yogurt.

Filling. Use 1 to 2 cups of a combination of meats and/or vegetables. Meat possibilities include crisply fried and crumbled bacon, or pieces of crab*, lobster*, shrimp*, tuna, chicken or ham (and I can add salmon, having tried it and liked it). Use virtually any cooked or steamed vegetables, but squeeze out excess liquid. Don't be afraid to take risks. Once I made a sauerkraut quiche that was very tasty.

*Ha ha. Only if you have a free or cheap source of these items.

Seasoning. For a basic quiche, use up to 1 teaspoon of salt (bearing in mind the saltiness of the other ingredients), 1/4 teaspoon pepper, and a dash of nutmeg (I usually skip the nutmeg). If you're a bit more adventurous, experiment with other seasonings such as chives, Tabasco, tarragon, dry mustard, Worcestershire sauce, cayenne pepper, parsley, paprika, dill, garlic, onion powder, lemon juice, basil, and/or oregano.

To make the quiche: Prepare the crust in a 9-inch pie plate. Grate cheese and prepare the filling ingredients (saute, cook, chop, crumble, etc.) Beat eggs, milk, and seasonings together until just combined. Spread filling ingredients in crust, top this with grated cheese, and cover with egg/milk mixture. (If you've made too little egg/milk mixture, mix up slightly more. If you've made too much, toss the surplus in tomorrow morning's universal muffin recipe.) Bake for 10 minutes in an oven preheated to 425 degrees. Then turn the oven down to 350 degrees and bake for an additional 45 minutes, or until it's done. The quiche is done when it's golden brown and slightly puffed, and when a knife inserted comes out clean.


In a later article, Amy shares this recipe for a low-fat potato crust, which I used in my salmon and green bean quiche: In a 9-inch pie pan, stir together 3 tablespoons vegetable oil with 3 cups of coarsely shredded raw potato. Or you can spray Pam in the bottom of a pie pan and omit the additional oil. Press the grated potato into a pie-crust shape. Bake at 425 degrees for 15 minutes or until just beginning to brown.

Sigh. It feels good to post a real recipe again. :-)

And now I'm craving salmon quiche.

Thursday, July 30, 2009

Healthy(ish) Butterscotch Brownies

I get migraines. Two or three times per week, sometimes more if the weather is bad. At my prenatal appointment yesterday, the midwife suggested cutting out all common dietary migraine triggers for the next two weeks to see if that helps any. This leaves me without: cheddar and other aged cheeses, hot dogs and other foods with nitrites, anything containing MSG, peanuts and peanut butter, sour cream and yogurt ... and chocolate. That's right - no chocolate for two weeks! I can substitute other things - like almond butter for peanut butter, mozzarella or monterey jack for cheddar, etc. And, as is evidenced by my previous post and many other posts, I know that I am perfectly capable of making and enjoying delicious dessert and snack items without using chocolate. But I'm the kind of person where, if you tell me I can't eat chocolate, that's all I think about!

So this is my attempt to curb my sudden intense desire for chocolate by replacing it with something else, to prove to myself that I can satisfy my sweet tooth with something that not only doesn't include chocolate, but also has healthy ingredients too. This recipe (from the More with Less Cookbook) proves to me that yes, I am strong! I can live for two weeks without chocolate! I can survive!

But I don't have to be happy about it.


Healthy Butterscotch Brownies
1/4 cup margarine
1 tbsp. molasses
3/4 cup sugar
2 eggs, beaten
2 tsp. vanilla
1/2 cup plus 2 tbsp. dry milk powder
1/2 tsp. baking powder
1/4 tsp. salt
1 cup wheat germ
1/2 cup walnuts or pecans, chopped (optional)

Preheat oven to 350 and grease an 8-inch square pan.

Melt margarine. Add molasses, sugar, eggs, and vanilla. Stir well. Sift in milk powder, baking powder, and salt. Add wheat germ and walnuts. Stir enough only to blend, using no more than 20 strokes. Spread in prepared pan. Bake 30 minutes.


The verdict? Well, it's not chocolate. And it's not very brownie-like either. The bars are a bit chewy, with a very wheaty flavor and texture. But that said, I like them. They even have almost a cocunutty flavor, though there's no coconut in them. They'd probably be even better spread with a thin layer of cream cheese frosting or sprinkled with powdered sugar or something. But they're pretty good plain too. And they have Zaylee's seal of approval.


But they're just not chocolate. Sigh.

Friday, February 22, 2008

Chalupa Quiche

What do you do with leftover chalupa? Well, for starters, you just reheat it and eat it just like you did the first time! Yummy! But when that gets old (which may take a while because it's so good), what do you do next? You make a quiche! This recipe can also be used with other leftovers - see bottom of recipe.


1 cup plain yogurt (or milk or cottage cheese)
1/4 cup water
2-3 eggs, slightly beaten
1 cup flour
1/2 cup grated cheese
1/2 cup leftover chalupa

Preheat oven to 425 degrees. Mix all ingredients thoroughly. Pour into a greased 9-inch pie plate. Bake for 30 to 35 minutes or until set.

Variations:
-To use up other leftovers, replace the 1/2 cup chalupa with 1/4 cup chopped cooked meat and 1/4 cup chopped cooked vegetables.
-The flour in the filling eliminates the need for a crust. If you prefer a crusty quiche, don't add the flour, add another egg, and pour everything into a 9-inch unbaked pie crust. Bake for 10 minutes in preheated 425 oven, turn oven down to 350 and bake additional 45 minutes until knife inserted comes out clean. I haven't tried this, but looking at other quiche recipes, it should work.