Showing posts with label garden produce. Show all posts
Thursday, July 28, 2011
Watermelon Rind Pickles
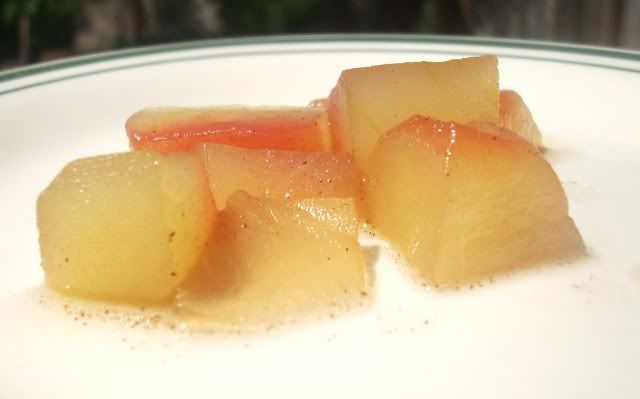
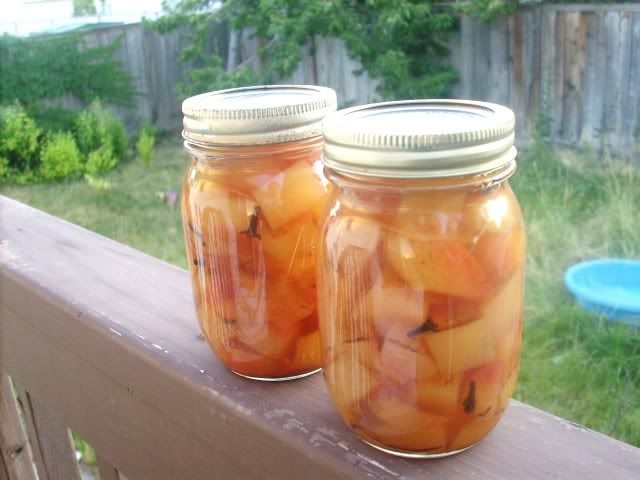
Due to a somewhat extreme case of the lazies during planting season this year, our garden is pretty much nonexistent. But I still get the urge to preserve summer's bounty. So in the absence of homegrown produce, I got creative and used what we had. We bought a watermelon a couple days ago, and after we ate it I got the crazy urge to look up recipes for watermelon rind pickles. Here's the result.
Watermelon Rind Pickles
1 large watermelon
1/2 cup salt
2 1/2 quarts water, divided
2 1/4 cups cider vinegar
2 cups sugar
1 tsp. ground cinnamon
2 tsp. ground allspice
1 tsp. whole cloves
Cut pulp from watermelon rind, leaving a small amount of red pulp on rind. Reserve pulp for another use (if you haven't already eaten it). Remove hard green outer rind. Cut rind into 1-inch cubes, and place in a large bowl.
Stir together salt and 2 quarts water. Pour over rind. Cover and chill 8 hours. Drain; rinse well.
Combine rind with water to cover in a Dutch oven. Bring to a boil; reduce heat, and simmer, uncovered, 10 minutes or until tender. Drain.
Combine remaining 2 cups water, vinegar, and next 4 ingredients in Dutch oven or very large saucepan.
Bring to a boil; reduce heat, and simmer, uncovered, 20 to 25 minutes or until mixture becomes a thin syrup. Add rind, and simmer 5 to 6 minutes or until rind becomes translucent.
Pack hot rind mixture into hot jars, distributing spices evenly and filling to 1/2 inch from top. Remove air bubbles; wipe jar rims. Cover at once with metal lids, and screw on bands. Process in boiling water bath 20 minutes.
Saturday, October 30, 2010
Green Tomato Pickles
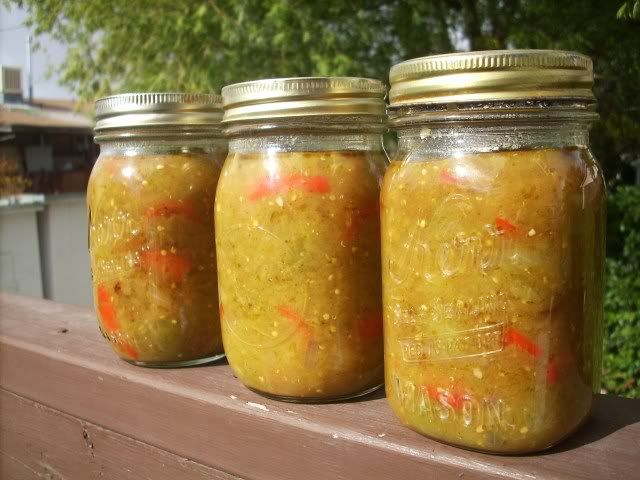
Yet another green tomato recipe. I made these a few days ago. Normally I don't care for sweet-style pickles very much, I prefer dill. But these turned out quite good. I used this recipe, cutting it in half because I accidentally cut my finger while slicing tomatoes, and didn't feel like doing any more slicing that night. :-} So remember to be careful when you're slicing the tomatoes, don't get lazy and start chopping up your extremities.

Green Tomato Pickles
1 peck (40 small) green tomatoes, thinly sliced
4 cups onions, thinly sliced
Salt
4 cups sugar
4 cups white vinegar
2 tbsp. celery seed
1 bay leaf
1 1/2 tsp. ground mustard
3/4 oz. mustard seed
12 whole cloves
8 whole allspice seeds
Alternate layers of tomatoes and onions on a large platter. Shake salt on each layer like you’re salting a meal. Cover platter with plastic wrap and store overnight in refrigerator. Salt will draw moisture from the tomatoes and onions, so place platter on a rimmed baking sheet to catch any water that may spill.
The next day, drain tomatoes and onions in a colander. In a large pot, add the tomatoes, onions, sugar, white vinegar, celery seed, bay leaf, ground mustard, and mustard seed. Place cloves and allspice in a cloth bag, and add to the pot. Bring to a boil. Reduce heat and simmer for 1 hour.
Spoon into sterilized canning jars and seal (I did 5 minutes in a boiling-water bath).
Green Tomato Pickles
1 peck (40 small) green tomatoes, thinly sliced
4 cups onions, thinly sliced
Salt
4 cups sugar
4 cups white vinegar
2 tbsp. celery seed
1 bay leaf
1 1/2 tsp. ground mustard
3/4 oz. mustard seed
12 whole cloves
8 whole allspice seeds
Alternate layers of tomatoes and onions on a large platter. Shake salt on each layer like you’re salting a meal. Cover platter with plastic wrap and store overnight in refrigerator. Salt will draw moisture from the tomatoes and onions, so place platter on a rimmed baking sheet to catch any water that may spill.
The next day, drain tomatoes and onions in a colander. In a large pot, add the tomatoes, onions, sugar, white vinegar, celery seed, bay leaf, ground mustard, and mustard seed. Place cloves and allspice in a cloth bag, and add to the pot. Bring to a boil. Reduce heat and simmer for 1 hour.
Spoon into sterilized canning jars and seal (I did 5 minutes in a boiling-water bath).
Tuesday, October 26, 2010
Green Tomato Relish
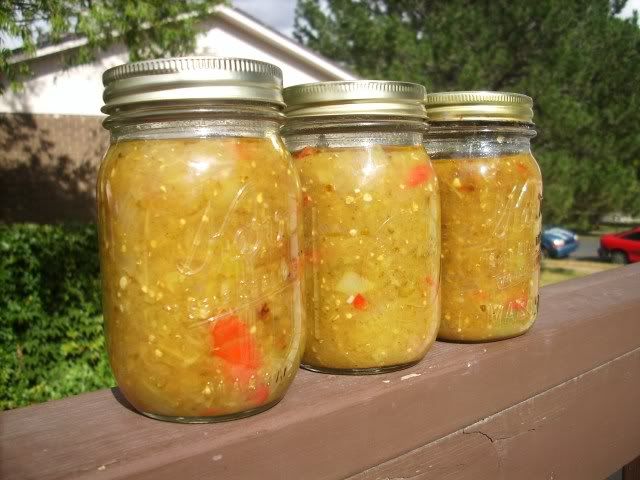
Next in my series of green tomato recipes is this deliciously tangy relish. After cooking this up this morning, I was left smelling strongly of cider vinegar, but I think it was worth it. The relish has a really wonderful flavor, and will be a great accompaniment to lots of future meals! I used this recipe, but instead of refrigerating and then serving right away, we put it in jars to freeze.

Green Tomato Relish
1/3 c. salad oil
3 lg. onions, diced
1 lg. garlic clove, minced
8 lg. green tomatoes (about 4 lbs.), cut into bite-sized chunks
4 med. green peppers, cut into 1/4-inch wide strips
4 med. red peppers, cut into 1/4-inch wide strips
3 c. cider vinegar
1 1/2 c. packed light brown sugar
1 tbsp. salt
1 tsp. ground cinnamon
1 tsp. ground ginger
About 4 hours before serving or up to 1 week ahead: In 8-quart Dutch oven or heavy saucepan over medium heat, in hot salad oil, cook onions and garlic until tender, stirring occasionally. Add green tomatoes and remaining ingredients; over high heat, heat to boiling. Reduce heat to medium-low; cook, uncovered, 2 hours, stirring occasionally, until mixture thickens.
Ladle into jars or freezer containers, cool to room temperature, then freeze. Or ladle into sterilized jars and process in a boiling-water bath for 30 minutes.
Green Tomato Relish
1/3 c. salad oil
3 lg. onions, diced
1 lg. garlic clove, minced
8 lg. green tomatoes (about 4 lbs.), cut into bite-sized chunks
4 med. green peppers, cut into 1/4-inch wide strips
4 med. red peppers, cut into 1/4-inch wide strips
3 c. cider vinegar
1 1/2 c. packed light brown sugar
1 tbsp. salt
1 tsp. ground cinnamon
1 tsp. ground ginger
About 4 hours before serving or up to 1 week ahead: In 8-quart Dutch oven or heavy saucepan over medium heat, in hot salad oil, cook onions and garlic until tender, stirring occasionally. Add green tomatoes and remaining ingredients; over high heat, heat to boiling. Reduce heat to medium-low; cook, uncovered, 2 hours, stirring occasionally, until mixture thickens.
Ladle into jars or freezer containers, cool to room temperature, then freeze. Or ladle into sterilized jars and process in a boiling-water bath for 30 minutes.
Monday, October 25, 2010
Green Tomato ... Jam?
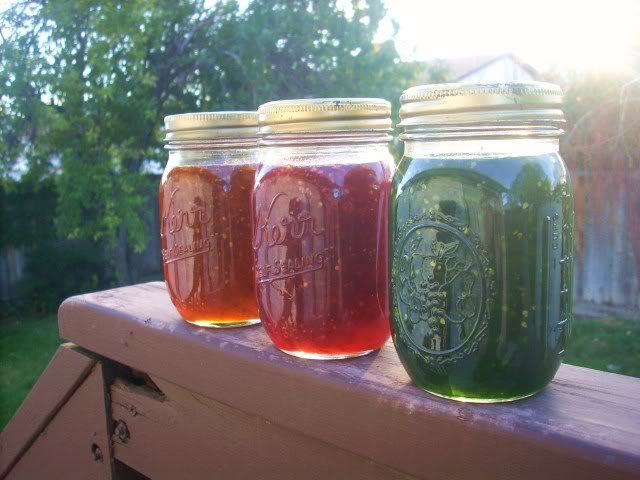
Hello, autumn weather! We had a stormy, windy, frosty night last night, which means it's time to bring in the green tomatoes. Do you have any idea how many green tomatoes you get from 19 tomato plants? A lot more than I currently know what to do with! So far we've brought in three large bowls brimming over with green tomatoes - at least 16 quarts. And that's just from three or four plants.
Anticipating a large green tomato crop, I've been looking up recipes for green tomatoes. This is one I found particularly interesting. Mixing green tomatoes, sugar, and jello to make jam definitely isn't something I would have thought to do, but the recipe had pretty good reviews, so I decided to give it a go.

Green Tomato Jam
4 cups shredded green tomatoes (I just tossed the tomatoes in the food processor)
4 cups white sugar
1 6-oz. box flavored gelatin mix (original recipe calls for raspberry)
Combine tomatoes and sugar in a large saucepan and bring to a boil over medium heat. Stir and cook about 10 minutes. Add the gelatin, reduce heat to low, and simmer for 20 minutes.
Spoon into hot, sterilized jars and seal; or, pour into freezer containers and freeze.
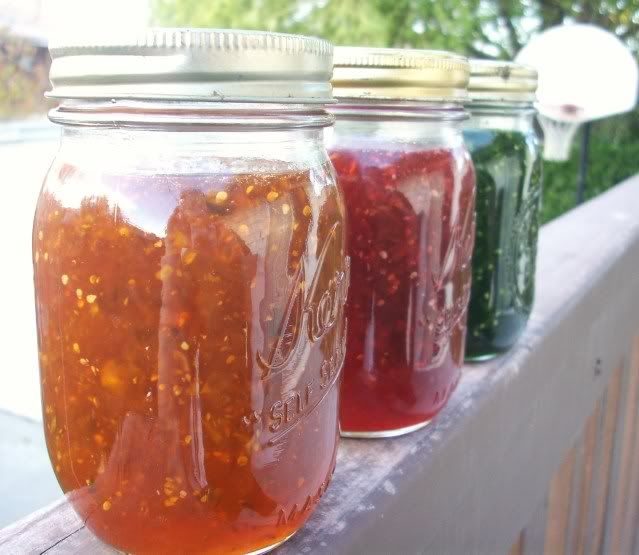
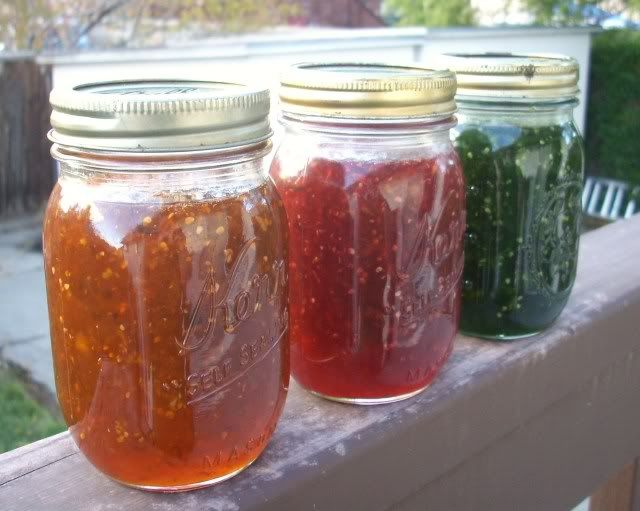
This turned out similar to the orange pear jam I made last year, which is also made using jello. And it was easy to make; the hardest part was standing there stirring it. I made three batches, using lime jello, strawberry jello, and then orange jello. I ended up with about 8 1/2 pints.

I'm sure I'll be posting a few more green tomato recipes in the near future, I still have a lot of tomatoes to use!
And another picture, just because I think this jam is so pretty!
Anticipating a large green tomato crop, I've been looking up recipes for green tomatoes. This is one I found particularly interesting. Mixing green tomatoes, sugar, and jello to make jam definitely isn't something I would have thought to do, but the recipe had pretty good reviews, so I decided to give it a go.
Green Tomato Jam
4 cups shredded green tomatoes (I just tossed the tomatoes in the food processor)
4 cups white sugar
1 6-oz. box flavored gelatin mix (original recipe calls for raspberry)
Combine tomatoes and sugar in a large saucepan and bring to a boil over medium heat. Stir and cook about 10 minutes. Add the gelatin, reduce heat to low, and simmer for 20 minutes.
Spoon into hot, sterilized jars and seal; or, pour into freezer containers and freeze.
This turned out similar to the orange pear jam I made last year, which is also made using jello. And it was easy to make; the hardest part was standing there stirring it. I made three batches, using lime jello, strawberry jello, and then orange jello. I ended up with about 8 1/2 pints.
I'm sure I'll be posting a few more green tomato recipes in the near future, I still have a lot of tomatoes to use!
And another picture, just because I think this jam is so pretty!
Sunday, June 28, 2009
Fresh Salsa
I love making my own salsa - I never buy it anymore because it's really quick and easy! I posted a while back about making salsa in the blender with canned tomatoes. I love that recipe because, like I said, it's quick and easy and always turns out very yummy.
But sometimes I like a good fresh salsa as well. Tomatoes were on sale for $0.33 a pound when we did our grocery shopping this week, and we got a LOT of them! We also got jalapenos, because they were also on sale. I have a recipe for fresh salsa that my sister gave to me a long time ago. It uses essentially the same basic ingredients as the other salsa I make, except fresh tomatoes instead of canned and you just chop everything instead of using the blender. I hadn't made this salsa in quite a while, but decided that this would be the perfect time! Oh, it turned out so good! We ate the whole batch in one sitting.

Fresh Salsa
2 cups seeded and finely chopped tomatoes (about 4 to 5 small)
1 stalk green onion, finely chopped (I used about 1/4 cup finely chopped yellow onion)
1 to 2 hot peppers (green, red, serrano, jalapeno) seeded and finely chopped
2 tbsp. lime juice (or lemon)
2 to 3 tbsp. fresh cilantro, snipped into small pieces (substituted dried parsley)
1 small green pepper, seeded and finely chopped (didn't have, didn't add)
1 large or 2 small cloves garlic, minced
Stir all ingredients together and cover, then chill for 2 hours or up to 2 days.
We served this over Cheesy Chips: Spread tortilla chips in a single layer on a baking sheet. Sprinkle liberally with shredded cheddar, then sprinkle with chili powder. Heat in hot oven (about 450 degrees) until cheese is hot and melted.
But sometimes I like a good fresh salsa as well. Tomatoes were on sale for $0.33 a pound when we did our grocery shopping this week, and we got a LOT of them! We also got jalapenos, because they were also on sale. I have a recipe for fresh salsa that my sister gave to me a long time ago. It uses essentially the same basic ingredients as the other salsa I make, except fresh tomatoes instead of canned and you just chop everything instead of using the blender. I hadn't made this salsa in quite a while, but decided that this would be the perfect time! Oh, it turned out so good! We ate the whole batch in one sitting.
Fresh Salsa
2 cups seeded and finely chopped tomatoes (about 4 to 5 small)
1 stalk green onion, finely chopped (I used about 1/4 cup finely chopped yellow onion)
1 to 2 hot peppers (green, red, serrano, jalapeno) seeded and finely chopped
2 tbsp. lime juice (or lemon)
2 to 3 tbsp. fresh cilantro, snipped into small pieces (substituted dried parsley)
1 small green pepper, seeded and finely chopped (didn't have, didn't add)
1 large or 2 small cloves garlic, minced
Stir all ingredients together and cover, then chill for 2 hours or up to 2 days.
We served this over Cheesy Chips: Spread tortilla chips in a single layer on a baking sheet. Sprinkle liberally with shredded cheddar, then sprinkle with chili powder. Heat in hot oven (about 450 degrees) until cheese is hot and melted.
Sunday, October 5, 2008
Zucchini Soup
This weekend was our Church's General Conference - where members of the Church gather to hear the messages prepared by the leaders of our Church. So yesterday and today, my family all gathered at my parents' house to watch the broadcast and spend time together. This naturally includes lots of delicious foods. We usually have a nice big lunch between the morning and afternoon sessions. Today's lunch was this delicious soup. This is a great way to use up some of those huge zucchinis left in your garden - just shred them up and put them in a soup! We ended up tripling the recipe because there were so many of us.
Zucchini Soup
1 1/2 lb. zucchini, unpeeled and sliced thin (or shredded)
1 medium onion, chopped
1/4 cup butter
1 can chicken broth (or equivalent of water and bouillon)
1 can cream of chicken soup
1/4 tsp. nutmeg
1/2 tsp. salt
1/8 tsp. pepper
1/2 cup light cream (or evaporated milk)
Parsley for garnish (optional)
Saute zucchini and onion in butter til limp. Add chicken broth and simmer covered 15 minutes. Puree in blender. Add cream of chicken soup, nutmeg, salt, pepper, and cream. Mix well. Heat through and serve.
My sister Michelle made some amazing rolls to go with the soup. She has posted the recipe on her blog Fabulous Food! so go check it out!
Also, stay tuned here for the incredible cake that I made for yesterday's dessert!
Tuesday, September 16, 2008
Summer Produce, Autumn Flavor!
Yesterday Jeff and I talked about how fun it would be to try to make a pumpkin pie using summer squash in place of the pumpkin. So today, that's what I did. This really is a neat idea - we are still having a bumper crop of crookneck yellow squash, and are looking for unique ways to use them. This pie allowed us to use up several squash, and have a taste of autumn at the same time!
This pie really did end up tasting delicious. It was slightly different from a real pumpkin pie - in color, texture, and flavor. But it was wonderful in its own right. So if you've got a lot of summer squash to use, and are in the mood for fall flavor, give this pie a try. You'll be glad you did.
Summer Squash Custard Pie (or Mock Pumpkin Pie)
Several yellow summer squash
Single pie crust, partially baked (see below)
2 large eggs
1/2 cup sugar
1 1/2 tsp. pumpkin pie spice (or use 1 tsp. cinnamon, 1/2 tsp. ginger, and 1/4 tsp. cloves)
1/2 tsp. salt
1 can evaporated milk (not sweetened condensed)
Cut up summer squash and place in saucepan. Add water, not quite covering the squash. Heat to boiling and cook until squash is tender. Drain. Place squash in blender and puree. If necessary, add water 1 tbsp. at a time. Add as little water as possible, because too much will change the texture of the pie. Allow squash to cool.
While squash is cooling, prepare your crust. Any regular pie crust recipe will work, or use frozen. Partially prebake crust to keep it from getting soggy: Line crust with a double thickness of foil. Heat oven to 425 and bake foil-lined crust for 10 minutes. Remove foil and bake an additional 2-4 minutes until crust is just barely starting to brown. Press down any bubbles with a fork. Don't prick the crust, though; you don't want filling leaking through.
To make filling, lightly beat eggs in medium mixing bowl. Measure 1 1/2 cups pureed squash, and add to bowl along with remaining ingredients. Mix well, and pour into crust. To prevent spillage, place crust on oven rack and then pour or spoon in the filling. Place a large baking sheet on the rack under the pie to catch any spills that might occur while cooking.
Bake at 425 for 15 minutes, then turn heat down to 350 and bake an additional 45 minutes, until butter knife inserted near center comes out clean. You can line the edges of the crust with foil for the first 30 to 45 minutes of baking time to prevent over-browning. I didn't, because I didn't really have an edge of crust to protect.
Let cool on wire rack two hours before slicing and serving. Pie can be kept at room temperature for 2-4 hours after this, but then should be covered and stored in refrigerator.
I really wanted to serve this with whipped cream or ice cream. But we don't have any at the moment. That's okay - this was good even without it!
See how nicely it held its shape? This pie was just beautiful.
I'm submitting this recipe to the I Love Baking blog event. Yum!
Labels:
autumn,
dessert,
garden produce,
I Love Baking,
pies and tarts
Friday, September 12, 2008
Frugal Fridays - Zucchini Lasagna
Recap: Frugal Fridays is a blogging event where you prepare a cheap meal - serves 4 for under $10 - and you post about it sometime between Thursday evening and Saturday morning. I've been a Frugal Fridays slacker lately - I've still been preparing frugal meals on Fridays (and every day!), but I haven't been posting them. They were a little too plain, I felt, to be submitted to a blogging event.
This is a plain dish. I decided to post it anyway. Sometimes you just have to have plain dishes when you're on a tight budget. But plain can still be delicious.
This was a really frugal meal - one of those throw-together-whatever-you've-got sort of meals. I had a zucchini in the fridge. I had some homemade spaghetti sauce (made from blending together canned tomatoes, onion, and seasonings). I had some pepperoni. I had some shredded cheese. So I layered them all in a little pan and cooked it up!
Price of ingredients:
Zucchini - this came free from Mom's garden.
Spaghetti sauce - since I made it a few days ago, I don't recall what all went in it. I'll say it cost about $1.
Pepperoni - I only used about 10 slices; it was leftover from making pizza last week. We'll say $0.50.
Shredded cheese - Shhh, this was actually fake cheese, or "alternative shred," because we discovered that it was much cheaper than buying real cheese. It cost $4.25 for 2 lbs, and I used about 2/3 cup. So that cost me about $0.70.
Total - about $2.20. Woot!
The recipe wouldn't feed 4 hungry people, though. It was just me and the little ones and we pretty much finished it off. To feed 4, double it. Even doing that, it would cost under $5.
Zucchini Lasagna
1 large zucchini
1 1/2 cups spaghetti sauce
10-15 slices pepperoni
2/3 cup shredded cheese
Slice zucchini at an angle to make those fancy-looking long slices. Spray 8-inch square pan with cooking spray. Layer half the zucchini slices, half the sauce, all the pepperoni, and half the cheese. Then layer the remaining zucchini, sauce, and cheese. Bake at 350 for 30 minutes.
The zucchini slices were still a little crisp, and they were so tasty! The flavors went together better than I expected for such a simple, modest, inexpensive, thrown-together dish. Anyway, it cleaned out some leftovers in the fridge. :-)
Thomas (1 yr old) loved this, as long as I cut the zucchini pieces up really small. He kept wanting more. Zaylee (3 yr old) was less convinced. She had several bites, but decided she was done long before her bowl was empty. I ate two servings.
Tuesday, September 9, 2008
Zucchini Snack Cake
Today is my daughter Zaylee's third birthday. Happy birthday, Zaylee!
We're having her actual party, with the official cake and ice cream, on Thursday because it worked out more conveniently for us. But we wanted to have a little celebration today to commemorate the day our little sweetie was born. So I made this little cake with a zucchini we had sitting in the fridge.
I altered a recipe for Zucchini Bars/Cake from Real Mom Kitchen - the original recipe was for a whole sheet cake, and I just wanted a little cake. So I decreased all the ingredients and here's what I came up with.
Zucchini Snack Cake
2 eggs
1/2 cup oil
2/3 cup sugar
2/3 cup grated zucchini
1/2 tsp. vanilla
3/4 cup plus 1 tbsp. all-purpose flour
1/2 tsp. baking soda
1/2 tsp. baking powder
1/2 tsp. salt
3/4 tsp. cinnamon or pumpkin pie spice
Dash pepper (optional)
Combine ingredients in order given. Pour into greased 8-inch square pan. Bake at 325 for 25-30 minutes. Cool in pan for a few minutes, then remove to wire rack to finish cooling. Top with cream cheese frosting, or powdered sugar for a more vintage feel. I decided to go with powdered sugar because I've been eating way too many calories lately, and didn't want to go overboard - the real party with the calorie-rich frosted cake is only in two days anyway!
This was a tasty little cake - soft and fluffy, not too sweet or too spicy. This would be a great anytime cake, because it's small and nutritious, but still sweet enough to satisfy cravings.
Friday, August 22, 2008
Frugal Fridays - Soup, Bread, and Dessert
Our menu this evening consists of a deliciously flavorful Garden Fresh Lentil Soup, served with French Bread. Dessert is Peanut Pistachio Pudding and Crackers.
Since this post is being submitted to Frugal Fridays, here is the price breakdown:
Lentils - 1/2 lb. - $0.35
Bacon - 1/2 lb. - $0.50
Flour - 4 cups - $0.45
Yeast - 2 1/4 tsp. - $0.17
Graham crackers - 1 sleeve - $0.40
Peanut butter - 1/4 cup - $0.20
Milk - 1 cup - $0.27
Pudding - 3.4-oz box - $0.75
Squash and tomatoes - free from parents' garden
Chicken broth - free from boiling chicken
Seasonings and simple pantry staples - negligible price
Total price: $3.09
Garden Fresh Lentil Soup
1/2 lb. lentils
Water
1/2 lb. bacon
1 large yellow squash
1/4 cup onion
2 large tomatoes
2 cups chicken broth
1 tsp. cumin
1/2 tsp. garlic powder
Salt and pepper to taste
Cover lentils with water (about 3 or 4 cups). Bring to a boil, then reduce heat to medium-low. Cover and simmer until tender.
While the lentils are simmering, cook bacon over medium heat until it reaches desired crispiness. Remove bacon from skillet (leave drippings in skillet) and set aside. Chop squash and saute in bacon drippings. Remove from pan and set aside. Chop onion and saute in remaining bacon drippings. Set aside. Chop tomatoes.
Check on lentils. When they are tender, add chicken broth (my lentils had cooked off all the water. If there is water left when the lentils are done, drain it off before adding broth). Stir in vegetables and seasonings. Heat through. Garnish with bacon and serve.
The great thing about the end of summer is all the fresh garden produce available. Use what is growing, and you can eat delicious and nutritious foods, like this soup, for incredibly cheap.
I only included bacon in this recipe because it was a manager's special and we got it for a dollar per pound. Normally we don't have bacon. This soup is delicious without it, but incredible with it!
Bread Machine French Bread
1 1/2 cups warm water
1 tsp. lemon juice
2 tbsp. oil
2 tbsp. sugar
1 tsp. salt
4 cups flour
2 1/4 tsp. yeast
Place ingredients in bread machine in order suggested by manufacturer. If your machine has a setting for French Bread, select that. Otherwise, set it for basic. Once the machine is set, forget about it until it beeps at you to tell you it's done!
Peanut Pistachio Pudding and Crackers
Approximately 1 sleeve graham crackers
1/4 cup peanut butter
1 cup milk
1 3.4-oz box instant pistachio pudding mix
Place graham crackers along bottom of 8- or 9-inch pan, breaking crackers as needed to cover the pan. I did two layers of crackers. Next time I might do one layer, then the pudding layer, then a second cracker layer on top. Either way. Set aside.
Place peanut butter in mixing bowl. Add milk and whisk until combined. Add pudding mix and whisk for 2 minutes. Spread on top of graham crackers. Chill for a couple hours, then cut into squares and serve.
The dessert isn't much to look at. I originally planned on using chocolate or vanilla pudding, but when I checked the cupboard this evening all we had was pistachio. I wasn't sure how it would turn out, but gave it a try anyway. It turned out delicious.
Labels:
bread,
bread machine,
dessert,
dry beans,
Frugal Fridays,
garden produce,
main dishes,
soups or stews
Tuesday, August 19, 2008
Crock Pot Enchilada Casserole
This recipe was inspired by A Year of CrockPotting's recipe for CrockPot Enchilada Casserole. I pretty much didn't follow the original ingredient list at all, except for tortillas and chicken. But this is where I got the concept and the instructions.
Crock Pot Enchilada Casserole
8 corn tortillas
1-2 cups chicken, cooked and shredded
1 cup zucchini, chopped
Mozzarella cheese
Enchilada Sauce:
1 can diced tomatoes
1 tsp. garlic
1 tsp. chili powder
1 tsp. cumin
1/2 to 1 tsp. crushed red pepper
Salt and pepper to taste
Make your enchilada sauce by placing tomatoes (undrained), garlic, chili powder, cumin, crushed red pepper, and s&p in blender. Puree until smooth (or skip a step and just open up a can of enchilada sauce. It works great, but we don't usually have that on hand).
Layer tortillas (2 at a time) in greased crock pot, followed by sauce, chicken, zucchini, and cheese. Repeat layers until your ingredients run out, ending with cheese. I got four layers in.
Cover and cook on low 4-6 hours.
After cooking, the cheese was all melty and gooey, and the casserole smelled so good!
Notes:
-I made my own tortillas using masa harina. It would be easier to use store-bought, but we didn't have any.
-Don't use flour tortillas. They will get too soggy and be very unpleasant to eat.
-For the chicken, I boiled 2 leg quarters. I shredded one leg quarter, then set aside the broth and the other leg for future use.
-I at first intended to use ground turkey. But we had the chicken thawing in the fridge, so I went ahead and used that. Feel free to substitute ground beef or turkey.
-If you don't like spicy, use less crushed red pepper. If you really don't like spicy, omit the red pepper. I used about 1 tsp, and it had a good bite to it. The kids didn't seem to mind; I gave them some plain rice on the side to tone it down a bit.
This was a really good recipe! It tastes like enchiladas, but without the work and mess of rolling them. My one-year-old absolutely loved it - he threw a fit when I took him out of his seat after his bowl was emptied. So I gave him another serving, which he ate just as enthusiastically as the first. I enjoyed this with some of the salsa I made a couple days ago.
I can very much see myself making this again using a variety of fillings - anything you would put in an enchilada can be layered into an enchilada casserole!
Tuesday, August 12, 2008
Tomato and Squash "Alfredo"
This recipe comes from my sister Michelle's blog, Fabulous Food! She came up with this not-exactly-alfredo dish by doing something I do frequently - throwing things together and hoping it turns out tasty. In this case, it definitely did!
I altered her original recipe. She used chicken breast, but we don't have any on hand. I did pick a couple nice-sized yellow squash from our garden last night, so I added those instead. Also, she put cream in her recipe. I chose instead to add some powdered milk to regular milk, to thicken it up. It worked great, and saved a lot of fat calories.
She calls this "Alfredo" because of the Parmesan. It really isn't an alfredo at all, but like Michelle said in her post, "It's that parmesan flavor, I'm telling you!"
Tomato and Squash "Alfredo"
2 medium yellow squash, cut into bite-size chunks
1 tbsp butter
1 tbsp olive oil
1/2 cup chicken broth
salt and pepper
2 tsp. bottled minced garlic
1 tsp each parsley, thyme, and oregano
1 can diced tomatoes
2 cups macaroni
1/3 cup milk + 1/3 cup powdered milk
1/4 cup Parmenan
Heat oil and butter in a saucepan. Add squash, seasoned with salt and pepper, to the oil and saute until tender-crisp. Add the garlic and herbs, cook a minute or so more. Pour the broth in, and add the can of tomatoes, do not drain the juice out. Let that simmer on low to reduce the liquid by half while the pasta cooks.
Bring salted water to a boil, add macaroni (or pasta of choice). Cook for about 10 minutes, until done. By this time, the liquid in the veggies should have reduced nicely. Drain the pasta and add to the squash and tomatoes.
Whisk together the milk and powdered milk (or use 1/2 cup cream); add to the squash and pasta mixture along with Parmesan. Here I tasted it and realized I needed to add a lot more flavor (I kinda scrimped on the salt and herbs). I added more salt, some Italian seasoning, some garlic powder, and some more Parmesan. That fixed it.
I served this with some steamed green beans and wax beans, also from our garden. I really like having a garden, even if half the things we planted didn't grow. The beans and squash are all doing so well!
Labels:
garden produce,
International cuisine,
main dishes,
pasta
Saturday, August 2, 2008
Frugal Fridays - Eat Your Veggies!
Both of my recipes for today's Frugal Fridays entry have vegetables that feature prominently, but in such a way that kids will be eager to eat them anyway. Reminder of the Frugal Fridays rules - one meal, four people, under ten dollars. Let's go!
Ingredient Prices
Chicken leg quarter - $0.25
Potatoes - $0.15
Mayonnaise - $0.22
Cheese - $1.00
Flour - $0.45
Sugar - $0.12
Shortening - $0.40
Milk - $0.14
Margarine - $0.25
Brown sugar - $0.19
Egg - $0.09
Cocoa powder - $0.36
Chocolate chips - $1.20
Ingredients of negligible cost
Salt, pepper, baking powder, vanilla, baking soda - pantry staples
Zucchini and squash - free garden produce
Total Price: $4.82
On to the Meal!
Potato Chicken Pockets are a fun food to make and eat, and they taste great. Add to that the fact that they are very inexpensive, and you've got a winner recipe!

Potato Chicken Pockets
1 chicken leg quarter
2 medium baking potatoes
1/4-1/2 cup mayonnaise
1/2 cup shredded cheddar cheese
Salt and pepper to taste
Biscuit Dough
2 cups all-purpose flour
1 tbsp. sugar
3 tsp. baking powder
1 tsp. salt
1/2 cup shortening
3/4 cup milk
Place chicken in pot and cover with water. Bring to a boil, cook until chicken is cooked through. When chicken has cooled, remove meat from bone and shred.
Peirce potato skins with fork. Cook in microwave according to manufacturer's instructions (or use leftover baked potatoes).
Mash potatoes coarsely. Add chicken and mayonnaise. If too dry, use a little of the chicken broth, from when you boiled the chicken, to moisten the mixture. Stir in shredded cheese, then salt and pepper to taste. If desired, you can also add stuff like Italian seasoning. Set aside.
Heat oven to 400 degrees.
Mix flour, sugar, baking powder and salt in medium bowl. Cut in shortening using pastry blender or criss-crossing 2 knives, until mixture looks like fine crumbs. Stir in milk until dough leaves side of bowl (dough will be soft and sticky).
Place dough on lightly floured surface. Knead lightly 10 times. Separate into 8 sections. Roll each out into 4- to 5-inch disks. Place about 2-3 tbsp. potato mixture onto each disk of dough, then fold over the dough and seal. Place pockets onto ungreased baking sheet. Bake at 400 for 15 to 20 minutes.
Makes 8 pockets, 2 per person.
These are good served with ketchup or Italian dressing.
On to Dessert!
This is the time of year when everyone with a garden is looking for zucchini and squash recipes, myself included. I'm actually not growing any zucchini, but I had some in the freezer from last year, and my parents have lots of zucchini in their large garden. I found a recipe for Chocolate Zucchini Cookies, and doubled the chocolate by adding chocolate chips.

Double Chocolate Zucchini Cookies
1/2 cup margarine
1/2 cup white sugar
1/2 cup brown sugar
1 egg
1 teaspoon vanilla
2 1/4 cups all-purpose flour
1/3 cup cocoa powder
1 teaspoon baking soda
1/2 teaspoon salt
1 3/4 cups grated zucchini (I actually used some zucchini from my freezer, and some squash from my garden)
2 cups chocolate chips
Preheat oven to 350 degrees. Grease cookie sheets.
In a medium bowl, cream together the margarine, white sugar and brown sugar until smooth. Beat in the egg and vanilla. Combine the flour, cocoa, baking soda and salt; gradually stir into the creamed mixture. Fold in the grated zucchini. Drop by rounded spoonfuls onto the prepared cookie sheets.
Bake for 8 to 10 minutes in the preheated oven. Allow cookies to cool on baking sheet for 5 minutes before removing to a wire rack to cool completely.
Ingredient Prices
Chicken leg quarter - $0.25
Potatoes - $0.15
Mayonnaise - $0.22
Cheese - $1.00
Flour - $0.45
Sugar - $0.12
Shortening - $0.40
Milk - $0.14
Margarine - $0.25
Brown sugar - $0.19
Egg - $0.09
Cocoa powder - $0.36
Chocolate chips - $1.20
Ingredients of negligible cost
Salt, pepper, baking powder, vanilla, baking soda - pantry staples
Zucchini and squash - free garden produce
Total Price: $4.82
On to the Meal!
Potato Chicken Pockets are a fun food to make and eat, and they taste great. Add to that the fact that they are very inexpensive, and you've got a winner recipe!
Potato Chicken Pockets
1 chicken leg quarter
2 medium baking potatoes
1/4-1/2 cup mayonnaise
1/2 cup shredded cheddar cheese
Salt and pepper to taste
Biscuit Dough
2 cups all-purpose flour
1 tbsp. sugar
3 tsp. baking powder
1 tsp. salt
1/2 cup shortening
3/4 cup milk
Place chicken in pot and cover with water. Bring to a boil, cook until chicken is cooked through. When chicken has cooled, remove meat from bone and shred.
Peirce potato skins with fork. Cook in microwave according to manufacturer's instructions (or use leftover baked potatoes).
Mash potatoes coarsely. Add chicken and mayonnaise. If too dry, use a little of the chicken broth, from when you boiled the chicken, to moisten the mixture. Stir in shredded cheese, then salt and pepper to taste. If desired, you can also add stuff like Italian seasoning. Set aside.
Heat oven to 400 degrees.
Mix flour, sugar, baking powder and salt in medium bowl. Cut in shortening using pastry blender or criss-crossing 2 knives, until mixture looks like fine crumbs. Stir in milk until dough leaves side of bowl (dough will be soft and sticky).
Place dough on lightly floured surface. Knead lightly 10 times. Separate into 8 sections. Roll each out into 4- to 5-inch disks. Place about 2-3 tbsp. potato mixture onto each disk of dough, then fold over the dough and seal. Place pockets onto ungreased baking sheet. Bake at 400 for 15 to 20 minutes.
Makes 8 pockets, 2 per person.
These are good served with ketchup or Italian dressing.
On to Dessert!
This is the time of year when everyone with a garden is looking for zucchini and squash recipes, myself included. I'm actually not growing any zucchini, but I had some in the freezer from last year, and my parents have lots of zucchini in their large garden. I found a recipe for Chocolate Zucchini Cookies, and doubled the chocolate by adding chocolate chips.
Double Chocolate Zucchini Cookies
1/2 cup margarine
1/2 cup white sugar
1/2 cup brown sugar
1 egg
1 teaspoon vanilla
2 1/4 cups all-purpose flour
1/3 cup cocoa powder
1 teaspoon baking soda
1/2 teaspoon salt
1 3/4 cups grated zucchini (I actually used some zucchini from my freezer, and some squash from my garden)
2 cups chocolate chips
Preheat oven to 350 degrees. Grease cookie sheets.
In a medium bowl, cream together the margarine, white sugar and brown sugar until smooth. Beat in the egg and vanilla. Combine the flour, cocoa, baking soda and salt; gradually stir into the creamed mixture. Fold in the grated zucchini. Drop by rounded spoonfuls onto the prepared cookie sheets.
Bake for 8 to 10 minutes in the preheated oven. Allow cookies to cool on baking sheet for 5 minutes before removing to a wire rack to cool completely.
Thursday, July 24, 2008
Frugal Fridays - a day early...
I'm early for this week's installment of Frugal Fridays, because we're leaving tomorrow afternoon to spend the weekend at a family reunion. Yippee!

I made this Garden Saute with Pasta last night for dinner, using a zucchini and a yellow squash from Mom's garden. I absolutely loved how simple, delicious, and easy it was. But I had accidentally left my camera at Mom's house (again!) and wasn't able to take pictures. I was all set and ready to give up on this recipe, which I made up on my own as I was cooking it last night.
But then I went to do laundry at Mom's house today, and there were some more zucchini and squash in the fridge. After some quick thinking, I decided that I had enjoyed this enough to make it again, and this time I had my camera! So here it is: my delicious, simple, and totally cheap recipe of Garden Saute with Pasta.

Garden Saute with Pasta
1 to 2 medium zucchini
1 to 2 medium yellow summer squash
2 tsp. bottled minced garlic
1 can (14.5 oz) diced tomatoes
1 tsp. Italian seasoning
Salt and pepper
8 oz. cooked spaghetti or angel hair pasta
Chop zucchini and squash into bite-sized chunks. Heat about a teaspoon or so of oil in a large skillet. Saute veggie chunks and garlic until veggies are tender-crisp. Partially drain can of tomatoes and add to squash, along with Italian seasoning, and s&p to taste. Simmer until liquid from tomatoes reduces down. Serve over pasta.
That's how I made it last night. When I made this again today, Mom didn't have any canned tomatoes. So instead we added 3 chopped fresh tomatoes with the squash. When the squash were tender, we added about 1/2 cup tomato juice and the seasonings. Again, simmer until liquid reduces. It was delicious either way.
Price of ingredients:
8 oz. spaghetti - $0.80
Can of tomatoes - $1.39
Everything else was either spice cupboard basics or free garden produce.
Total Price: $2.19
Serve with a green salad for a healthy, delicious, inexpensive side dish.
I didn't calculate how many calories this is, but if you stick with a moderate amount of pasta, I'm sure this definitely qualifies as a low-calorie dish.
I made this Garden Saute with Pasta last night for dinner, using a zucchini and a yellow squash from Mom's garden. I absolutely loved how simple, delicious, and easy it was. But I had accidentally left my camera at Mom's house (again!) and wasn't able to take pictures. I was all set and ready to give up on this recipe, which I made up on my own as I was cooking it last night.
But then I went to do laundry at Mom's house today, and there were some more zucchini and squash in the fridge. After some quick thinking, I decided that I had enjoyed this enough to make it again, and this time I had my camera! So here it is: my delicious, simple, and totally cheap recipe of Garden Saute with Pasta.
Garden Saute with Pasta
1 to 2 medium zucchini
1 to 2 medium yellow summer squash
2 tsp. bottled minced garlic
1 can (14.5 oz) diced tomatoes
1 tsp. Italian seasoning
Salt and pepper
8 oz. cooked spaghetti or angel hair pasta
Chop zucchini and squash into bite-sized chunks. Heat about a teaspoon or so of oil in a large skillet. Saute veggie chunks and garlic until veggies are tender-crisp. Partially drain can of tomatoes and add to squash, along with Italian seasoning, and s&p to taste. Simmer until liquid from tomatoes reduces down. Serve over pasta.
That's how I made it last night. When I made this again today, Mom didn't have any canned tomatoes. So instead we added 3 chopped fresh tomatoes with the squash. When the squash were tender, we added about 1/2 cup tomato juice and the seasonings. Again, simmer until liquid reduces. It was delicious either way.
Price of ingredients:
8 oz. spaghetti - $0.80
Can of tomatoes - $1.39
Everything else was either spice cupboard basics or free garden produce.
Total Price: $2.19
Serve with a green salad for a healthy, delicious, inexpensive side dish.
I didn't calculate how many calories this is, but if you stick with a moderate amount of pasta, I'm sure this definitely qualifies as a low-calorie dish.
Subscribe to:
Posts (Atom)