Showing posts with label main dishes. Show all posts

Tuesday, August 19, 2014

Dutch Oven Apricot Chicken

I made those snickerdoodle bars again, that same evening, at a campout for a dutch oven dessert cookoff. And because of all the extra heat in the fire pit where the ovens were, and because I didn't check on the cookie bars as early as I should have, I burned the bottom to a crisp. That having been only the second time I've ever cooked with a dutch oven, I wasn't too embarrassed or devastated or anything, I just scraped the bottom off and served the bars anyway.

I thought I was over it, and okay with it. But when I decided I wanted to plan a dutch oven meal to cook and eat this week, I kind of froze. Recipes I had looked at before and wanted to try suddenly looked too complicated, too easy for me to mess up. I was scared to try again. It took some facebook encouragement from my aunt and a couple friends to get me feeling okay again. I found a very simple recipe to try and wrote it on the menu calendar for today.

Then it rained all morning, and I thought I'd have to put it off until tomorrow. Luckily, by early evening the rain had stopped and the cement in the backyard had dried enough that I was able to go ahead and light up the coals.

I'm so glad I was able to get over my nervousness and give the dutch oven another try. This apricot chicken (again, from Dutch Oven Madness) was very easy to prepare and cook, and turned out very good. For one thing, it's just beautiful. And of course, the flavor is yummy - tangy, with bits of fruit from the jam and onion from the soup mix. I would not be opposed to making this again sometime.


Dutch Oven Apricot Chicken
12" dutch oven
6 boneless skinless chicken breasts
1 cup apricot jam (I used apricot pineapple jam that my aunt made, super yummy)
1 cup catalina or french salad dressing (I used french, because the store I went to didn't have catalina in the generic brand)
2 tbsp. sugar
1 pkg. onion soup mix

Place chicken in your dutch oven. Mix remaining ingredients and pour over chicken. Bake at 350 for 1 hour. Easy peasy! I will say that my chicken didn't take the full hour to cook, it was done at about 45-50 minutes. Check for doneness before the full time has passed.

I served this over reconstituted potato shreds, the kind that comes in a food storage can. I was considering doing rice, but we've had chicken and rice a lot in the last few days, and wanted something different. Just in case anyone was wondering what that weird-looking stuff under the chicken is. :)


I used the Dinwiddie ring method for achieving the correct heat, coal counting works too if that's what you prefer. I had to add a few coals about halfway through as they got smaller. I thought that would be hard to figure out, but I just started more coals than I needed, kept the ones I didn't use right away all together so they would stay hot, and just tucked them in where needed. For longer cooking times, like several hours, I might start a new batch of coals partway through to replenish coals as they go out.

Mmm, look at that chicken swimming in all that tangy sweet sauce!


Linking to:
Think Tank Thursday
Link Party Palooza 
Strut Your Stuff Saturday

Friday, July 25, 2014

Biscuits and Gravy Casserole, and Milky Maple Soda

Everyone knows it's fun to have breakfast for dinner. It's one of my personal favorites, because it's usually easy and cheap, and I just love breakfast foods. Biscuits and gravy especially seem to be delicious and appropriate any time of the day.

This recipe takes those simple biscuits and gravy just a step further - a little fancier and a little funner. But without adding a lot of extra work. This recipe originally called for canned biscuits, which I'm sure are absolutely delicious when used in this dish. I took it a little step toward tightwaddery and used homemade biscuit dough.


These biscuits and gravy turned out so yummy. The bottom layer of biscuits soak up the gravy and take on almost a dumpling texture, while the biscuits on top are browned and fluffy like typical biscuits. The gravy is just a basic sausage gravy that complements both layers of biscuits perfectly.


Biscuits and Gravy Casserole
(adapted from lemon-sugar)
2 cups flour
1 tbsp. baking powder
1 tsp. salt
2/3 cup shortening
3/4 cup milk
1/2 lb. ground sausage
3 tbsp. flour
2 1/2 cups milk
1/2 tsp. salt
1/2 tsp. black pepper

Preheat oven to 400 degrees. Prepare a small casserole dish (7x11) with cooking spray. Set aside.

Combine 2 cups flour, baking powder, and 1 tsp. salt. Cut in shortening. Stir in milk just until combined. Turn out onto floured surface and knead gently 2-3 times. Flatten with hand or rolling pin until 1/2 inch thick. Using a pizza cutter, cut into 1 1/2- or 2-inch squares.

Layer half of the biscuit squares in prepared pan. Bake for 10 minutes.

Meanwhile, prepare gravy: In a heavy skillet, cook ground sausage over medium heat until fully cooked. Sprinkle the sausage with 3 tbsp. flour. Stir flour into sausage until completely absorbed. Lower heat to medium, and cook flour/sausage mixture 3-5 minutes, stirring frequently.

Add milk, salt, and pepper; stir to combine. Stir frequently until mixture comes to a slight boil. Taste, and adjust seasonings as desired.

Pour gravy over cooked biscuits. Layer remaining uncooked biscuit squares over the gravy.

Place casserole on a baking dish, and bake for 25 minutes or until golden brown.


This soda recipe came from a book we got at the library. It's called Grandpa's Cloudy With a Chance of Meatballs Cookbook, based on the original story. It's got recipes for things like Spaghetti Twister with a Tomato Tornado, Foggy Pea Soup, Chewandswallow Chicken Legs, and Jello-O Setting in the West.


Jeff decided to mix up some Milky Maple Soda to go with dinner tonight, "just like they serve in Ralph's Roofless Restaurant."


Milky Maple Soda
Milk
Plain seltzer
1 tbsp. maple syrup

Fill 1/4 of a glass with milk. Fill the rest of the glass with seltzer, leaving a little room at the top. Add about a tablespoon of maple syrup (more or less, to your taste). Stir and slurp!

I think I added about an extra tablespoon of syrup to my glass, I like things to be sweet! Anyway, this was a fun and unique little treat.

Linking:
Link Party Palooza
Strut Your Stuff Saturday

Monday, July 7, 2014

Creamed Chicken

I have spent a great portion of the day reading through my blog, sort of a trip down memory lane. It's been fun to reminisce, and to see how my blog has progressed and gone through its many phases and stages. For a while, I was posting so frequently that I felt guilty if I went a whole week without posting. Wow, that is not how I do it lately! Anymore, I only post once or twice a month, if that. I really want to get back into the habit of posting more frequently. So here I am, posting our simple, inexpensive, yet delicious meal that we enjoyed tonight.
I enjoy using chicken leg quarters. They're one of the cheapest sources of meat, at under a dollar a pound. We use them as is, or separated to have the thighs for one meal and the drumsticks for another. My favorite way to use them in recipes is to start by stewing them in water until they are tender. Just cover with water, bring to a boil, reduce heat to medium or medium-high, and simmer until completely done. The longer they cook, the more tender they get. Remove the chicken from the broth, reserving the broth of course. Once the chicken has cooled down, you can pull all the chicken from the bones and use the chicken in whatever recipe you want.

I recently learned a great tip for taking chicken dishes from good to amazing. Adding thyme and a small amount of turmeric gives an incredible flavor, as well as a pretty color, to everything from chicken soup to chicken pie. Tonight I used this seasoning trick in our creamed chicken, with great results. We served the chicken over pasta, but it was so good I was eating the chicken gravy by itself by the end of the meal!


Creamed Chicken
2 chicken thighs, boiled in water until tender, then removed from bones and shredded (see above)
Broth from boiling the chicken
1 cup frozen peas, run under hot water until thawed
1 cup frozen sliced carrots, microwaved with a little water until thawed and softened
1/4 cup margarine or butter
1/4 cup flour
1 or 2 dashes turmeric
1/2 tsp. dried thyme
8 oz. macaroni noodles, cooked and drained

Melt margarine in large saucepan. Add flour and whisk until smooth. Slowly whisk in 2 1/2 cups chicken broth. Cook and stir over medium heat until smooth and thickened. Stir in turmeric, thyme, and salt and pepper to taste. Add peas, carrots, and chicken. Serve over noodles. This would also be good over rice, mashed potatoes, or like I said, all by itself!


Linking to tatertots & jello

Monday, May 26, 2014

My Kitchen My World - Saudi Arabia


I know that the last time I did a dish for My Kitchen My World I did chicken and rice, but I couldn't resist doing it again this month. It's interesting how so many different countries can do a similar dish, but do it so differently!

Saudi Arabian chicken and rice, called Kabsa, was different from other versions of chicken and rice I've done, thanks to the exotic blend of spices, and the delicious topping of fried nuts and raisins. The whole family very much enjoyed this culinary trip to Saudi Arabia.


Kabsa (Saudi Chicken and Rice)
(adapted from Saji's)
2 chicken breasts
6 cups water
1/2 cup chopped onion
2 bay leaves
1 tsp ground cinnamon
1 tsp salt
2 tbsp olive oil
6 tbsp butter, divided
1 1/2 cup chopped ripe tomato
2 cups chopped onion
2 cups long grain rice
salt to taste
1 tsp ground cardamom (at $10 a bottle, this is too expensive for me - I substituted an additional 1/4 tsp nutmeg, 1/2 tsp allspice, and 1/2 tsp ginger)
1 tsp ground coriander
10 cloves
1/2 tsp nutmeg
1/4 tsp cinnamon
1/4 tsp ground black pepper
1/2 cup raisins soaked in 1/3 cup water
1/2 cup sliced almonds
1/2 cup pistachios
1/2 cup pine nuts

In a large pot place chicken, water, onion, bay leaves, cinnamon, and 1 tsp salt and let cook covered on low heat for about 1 1/2 hour.

In another large pot add olive oil and 1 tbsp butter, then add chopped onions and chopped tomatoes and cook for 10 minutes on medium heat. Next add rice and seasonings. Mix and then add 4 cups of chicken broth from the cooked chicken. Stir and then add 3 tbsp butter. Let come to a boil and then turn down to low heat, cover and let cook for 45 minutes.

In a small pan, add 2 tbsp butter and stir in nuts and raisins, let cook until all are evenly brown, set aside for garnish. In the mean time, pull apart cooked chicken and remove any bones.

After 45 minutes, fluff rice with a fork and let sit another 10 minutes.

Pour out the rice into a large serving dish, place pieces of chicken on top and then put the nut and raisin mixture on top of that. Serve.


Linking to:
My Kitchen My World
Think Tank Thursday (Joyful Homemaking)

Saturday, February 1, 2014

My Kitchen My World - Poland

January's country for My Kitchen My World was Poland. I enjoy cooking foods from European countries, they're almost familiar but different enough to make it fun.

Halushki is a Polish dish made of noodles, cabbage, and pork. This recipe makes a LOT - we were eating leftovers for quite a while. No complaints though, it tasted really good. But until our family has added a couple kids (not for a while!), I'll probably make this recipe in a smaller batch next time.


Halushki
(from allrecipes.com)
1 1/2 lb. pork chops
garlic powder to taste
salt and pepper to taste
1 onion, chopped
1 large head cabbage, cut into squares
1 lb. large egg noodles
1 tbsp. butter

Sprinkle pork chops with garlic powder, salt and pepper and place in a large greased sauce pan or deep skillet with chopped onion and fry until very brown and well cooked. It is ok if they stick a little, as the drippings are essential in this dish. When done, remove chops and set aside.

Add a little water to the saucepan or skillet and mix up the drippings a bit. Place cabbage into the pot, and allow to cook down completely.

In a separate large saucepan, boil the egg noodles in water until cooked. Drain noodles and mix in butter.

Cut up the pork chops to bite size pieces and set aside. When the cabbage has cooked down, add pork and cooked noodles and mix completely.


Thursday, October 10, 2013

My Kitchen My World - Tonga

I wanted to participate in My Kitchen My World last month - I pinned several recipes from Great Britain that looked fun and yummy. But last month we started renovating our kitchen, and it just didn't happen. Go figure - remove the kitchen sink, counters, cabinets, and any semblance of a working kitchen, and suddenly I don't feel like making fancy foreign foods.

But even though we've been working on this kitchen renovation for about a month now and it still looks awful, I just had to participate this month. Tonga was my choice of country to visit in October. Torn-up kitchen or no, I had to make a delicious Tongan meal to share!

I chose Tonga as this month's MKMW destination because we have a lot of Tongan friends and church acquaintances in our neighborhood. I have grown to love the Polynesian culture, including and especially the food!

In Tonga, a common traditional cooking method is an underground earthen oven, called an umu. A common meal is meat and coconut, and sometimes vegetables, wrapped in taro leaves and baked in the umu. The taro leaves are called lu. The main dish I chose to make is called lu pulu, which is lu with beef.

The recipe I used is from the family of John Groberg. He is sort of famous in the Mormon church for serving a mission in Tonga in the 1950's, and writing about his experiences (a movie was even made about it). This is a simplified, Americanized version of lu pulu, using spinach and aluminum foil in place of taro leaves. The recipe also calls for mayonnaise, but I chose to use cream of coconut instead, as being closer to tradition.


Lu Pulu
3 bunches spinach, washed, drained, and stemmed
1 12-oz can corned beef
1 onion, chopped
1 tomato, chopped (optional)
Salt and pepper to taste
5 tbsp cream of coconut (found in the drink mixer section of grocery stores, use mayonnaise instead if you prefer)
19-inch sheet of aluminum foil

Fold foil in half and lay flat. Lay spinach leaves over it, then top with chopped corned beef, onion, tomato, and salt and pepper. Spread with cream of coconut or mayonnaise. Gather edges of foil up and twist at the top to make a tight package. Place in a baking pan. Bake at 350 for 1 hour.

Open foil, mix the ingredients a little, and serve over sweet potatoes, which can be baked in the same oven.

This stuff is pretty yummy! It was very simple to make. Except for opening the can of corned beef. For some reason, my can didn't come with the little key to open it. I had to grab the tab with a vice grip I had lying around, and try to wrench it open. That worked for about half the can, then it broke off. Then I tried to use my super strong kitchen shears to cut the can open the rest of the way. I'm lucky I still have all my fingers! Eventually I just embraced the half-openness of the can and painstakingly scooped the meat out with a spoon.

Anyway, moving on! A popular drink in Tonga is called something called otai. It is typically made up of watermelon pulp and coconut milk. Other fruits are sometimes added to it. When I went to buy ingredients for this meal, I quickly was reminded that watermelon is not in season! I got a small plastic container of watermelon and supplemented with crushed pineapple. Usually otai should be much more pink than this! This recipe made a very chunky drink - we ate it as much as we drank it. But it was still quite yummy! Next time I would probably pull out the blender and give it a whirl.


Otai
3 cups grated watermelon
1 can crushed pineapple (do not drain)
1/2 cup shredded coconut
1/2 cup cream of coconut (this wasn't in the recipe I used, but I figured I had already opened the can for the lu pulu and I might as well add it to the otai)
1 can evaporated milk
2 cans of water (use the evaporated milk can)
Juice of 1/2 lime

Combine all ingredients in pitcher or large bowl. Process in blender if desired. Chill before serving.

As a little bonus, here is a picture of what my kitchen looked like when I made this meal. Yeah, it's scary.


And if anyone is interested, you can visit my other blog to read about our kitchen remodel.

Saturday, August 31, 2013

My Kitchen My World - Sweden

Cutting it close this month! But the last day of August still counts. :)

This month for My Kitchen My World we visited the cuisine of Sweden. I didn't want to do Swedish meatballs, they're too well-known around here to be considered a challenge. Instead, I found a dish called Kroppkakor, or potato dumplings. They turned out so delicious. I don't think I added nearly enough flour to the dough, which made it extremely messy to work with, but at least it tasted good!


Swedish Kroppkakor
10 medium potatoes, peeled, boiled, and cooled
1 egg
1 1/4 cup flour, or enough to make a soft dough
8 oz. bacon, diced
1 small onion, diced
1 tsp. ground allspice

Mash potatoes. Mix in egg and flour to make soft dough, set aside.

Fry bacon and onion until bacon is crispy and onion is soft. Add allspice. I just want to note that this mixture smells absolutely incredible!

Flatten pieces of dough into rounds. Top with 1-2 tsp. bacon mixture, then close the dough around the filling and form a ball.

Drop dumplings into simmering salted water, 4 or 5 at a time. Cook for about 5 minutes (another recipe said 15 minutes, we did somewhere in between).

Serve with bechamel sauce (basic white sauce) or melted butter, and lingonsylt (lingonberry jam). We didn't have lingonberry jam, so I had Jeff make some cranberry sauce instead.


With the potatoes, and the allspice, and the cranberry sauce, this stuff tasted like Thanksgiving! It totally put me in a fall mood. Jeff and I each had several dumplings, my 3-yr-old and 1-yr-old each devoured two, and my two older kids were only able to tolerate one after I put ketchup on it.

One recipe I found says that leftover dumplings are good cut up and fried crispy the next morning. I know what we're having for breakfast tomorrow! :)


*Update: We chopped up the leftovers and fried them in bacon grease. They turned out quite yummy.

Friday, June 7, 2013

My Kitchen My World - Cuban Pork with Black Beans and Rice


After a very long absence, I am once again contributing my culinary offering to My Kitchen My World. The country for June was Cuba. So I hopped onto Allrecipes.com and found some delicious Cuban recipes.


Cuban Pork
(adapted from Allrecipes.com)
1 1/2 lb. pork loin roast, cut into 5 or 6 thick slices
1 lime, zested and juiced
2 tsp. olive oil
1 tsp. cumin
1/2 tsp. salt
1 pinch crushed red pepper
1 tsp. minced garlic

In a bowl, mix together the lime zest, olive oil, cumin, salt, crushed red pepper, and garlic. Reserve the lime juice. Rub the seasoning mixture onto both sides of the pork slices.

Spray a heavy skillet or ridged grill pan with cooking spray, and place over medium heat. Pan-fry the pork slices until browned on both sides, 6 to 7 minutes per side. After you turn the meat over, pour the reserved lime juice over the meat and continue cooking until no longer pink in the center. Serve hot, topped with pan juices.

This pork is just bursting with lime flavor, and it paired really well with some plain rice and some delicious black beans.


Cuban Black Beans
(Adapted from Allrecipes.com)
2 tbsp. olive oil
1 large onion, chopped
1 medium green bell pepper, chopped
4 tsp. minced garlic
3 cans black beans, not drained
1/2 can tomato sauce
4 oz. roasted red pepper, chopped
1 tbsp. vinegar
2 tsp. salt
1 tsp. sugar
1 tsp. black pepper

Heat oil in a medium saucepan over medium heat, and saute onion, green bell pepper, and garlic until tender.

Into the onion mixture, stir the beans, tomato sauce, red pepper, and vinegar. Season with salt, sugar, and pepper. Bring to a boil. Cover, reduce heat, and simmer 30 minutes, stirring occasionally. 


Ahh, feels good to be back. I really am going to try to post recipes more frequently, I've really slacked off the past few...um...years.... 

Linked to:
Weekend Wrap-Up Party at tatertots&jello 
Think Tank Thursday at Joyful Homemaking 
Project Inspire{d} at Dukes and Duchesses 

Tuesday, May 28, 2013

Indonesian Peanut Chicken

Every once in a while Jeff and I grab a cookbook, leaf through it, and choose a couple recipes that we've never done before. Ethnic dishes are particular favorites of ours; we love being able to enjoy flavors from around the world in the comfort (and frugality) of our own home. We also think it's great to be able to introduce various flavor profiles to the kids.

Blah blah, fancy talk, what I really mean is: this week we were bored with the same old meal rut we've been in and wanted to try something less boring. :)

This is a fun recipe, a little sweet, a little spicy, a little exotic. The three-year-old didn't care for it, but the older kids liked it well enough. As for Jeff and I, we found it delicious.


Indonesian Peanut Chicken
(from Betty Crocker)
3- to 3 1/2-pound cut-up broiler-fryer chicken (we used chicken leg quarters)
3/4 tsp. salt
1/2 tsp. pepper
2 tbsp. vegetable oil
1 onion, chopped (1/2 cup)
1/3 cup peanut butter
1/4 cup chili sauce
1/2 tsp. ground cayenne pepper
1 cup water
1/4 cup salted peanuts
1/4 cup chopped red bell pepper

Sprinkle chicken with salt and pepper. Heat oil in 12-inch skillet or 4-quart Dutch oven over medium heat. Cook chicken in oil about 15 minutes, turning occasionally, until brown on all sides. Cover and cook over low heat about 20 minutes or until juice is no longer pink when centers of thickest pieces are cut. Remove chicken from skillet with tongs.

Drain all but 1 tablespoon drippings from skillet; heat over medium heat. Cook onion in drippings, stirring occasionally, until tender; reduce heat. Stir in peanut butter, chili sauce and red pepper. Gradually stir in water, stirring constantly, until peanut butter is melted.

Add chicken. Spoon sauce over chicken. Heat to boiling; reduce heat. Simmer uncovered about 5 minutes, spooning sauce frequently over chicken, until sauce is slightly thickened. Serve sauce over chicken. Sprinkle with peanuts and bell pepper. 

Linking to:
Think Tank Thursday at Joyful Homemaking 
Weekend Wrap-Up at tatertots&jello 

Monday, May 20, 2013

Turkey Chili

A while back, Jeff bought three huge turkeys, because they were super cheap. Thank goodness we have a large freezer downstairs! Anyway, several days ago we cooked one of the turkeys, and of course we boiled up the carcass into some fantastic turkey broth. This dish was a great way to use some of the broth and leftover turkey. It also takes advantage of the fact that fresh cilantro is really inexpensive this time of year. This chili has a delicious flavor and, being a bit lighter than traditional chili, is a great meal for a spring evening.


I may or may not have eaten three bowls in one sitting.

Turkey Chili
1 onion, chopped
1 green pepper, chopped
2 tsp minced garlic
1 tbsp oil
3 cups turkey broth
2 cans beans, drained, or equivalent beans cooked from dry (I used black beans and soy beans)
1 can corn, drained
1/4 cup fresh cilantro, chopped
1/2 tsp salt
1 tsp cumin
1 tsp dried oregano
2 tbsp lemon juice
3 cups chopped turkey

Cook onion, green pepper, and garlic in oil until tender. Add remaining ingredients. Bring to a boil, then reduce heat and simmer about 20 minutes.

If you like your chili spicy, you can add some canned chilies, or some hot sauce.


Linked to:
Weekend Wrap-Up Party at tatertots & jello
Think Tank Thursday at Joyful Homemaking

Wednesday, February 27, 2013

Chicken Cordon Bleu Braid

I love Chicken Cordon Bleu. Absolutely love it. I do not, however, love pounding and rolling chicken. It's messy and not very fun. So a few weeks ago I tried this shortcut Chicken Cordon Bleu, which involves slicing the breast in half lengthwise instead of pounding it, and layering the ingredients instead of rolling them in the chicken. It turned out great!

Here is another fun variation on this classic dish. All the components of Chicken Cordon Bleu are wrapped up in bread dough and baked into an easy and delicious loaf.


Chicken Cordon Bleu Braid
2 chicken breasts, sliced or cubed
1-2 tsp. minced garlic
Deli ham
Swiss cheese, thinly sliced
1 can cream of chicken soup
1 tbsp. dijon mustard
1 tbsp. lemon juice
1 1/2 tsp. worcestershire sauce
1/2 cup parmesan
1 loaf bread dough

Preheat oven to 375. Saute chicken with garlic, salt and pepper to taste. Set aside.

Combine cream soup, mustard, lemon juice, worcestershire sauce, and parmesan. Set aside.

Roll out bread dough into large rectangle. Using a pizza cutter or knife, cut 1-inch wide strips in towards the center, starting on the long sides. There should be a solid strip about 3 inches wide down the center, with the cut strips forming a fringe down each side.

Spread soup mixture down the center strip (use a lot or a little, depending on how saucy you want your loaf. You might not use all the sauce). Top with the chicken, ham, and cheese. Fold the side strips over filling, alternating strips from each side and pressing them into the dough on the opposite side, forming a braid. Pinch or twist to seal.

Bake at 375 for about 30 minutes. Let cool a bit, then slice and enjoy!


Linked to Tatertots and Jello Weekend Wrap-Up Party

Tuesday, February 15, 2011

Our Valentine's Dinner


I love putting together simple yet delicious meals for holidays. Sometimes I like giving them names too, I'm weird like that. This one is called "No such thing as too much shrimp."

Shrimp Appetizer

I posted this recipe last year. But I make it every year for Valentine's Day, so I'm posting it again this year. I love this stuff, it's so delicious!

8 oz. cream cheese
Cocktail sauce
1 can tiny shrimp, drained
Buttery snack crackers (Ritz, Town House, etc)

Place cream cheese on serving platter. Pour about 2/3 cup cocktail sauce on top, and top with shrimp. Serve with crackers.

Garlic Ginger Shrimp

I got this recipe from Angie, The American Homemaker. I attended her cooking class at the Pleasant Grove Macey's last week, and really enjoyed this recipe. I figured it would be perfect for Valentine's Day. It's a little pricier than my usual meals, but not by much. Besides, it was a special occasion.

1 1/2 tsp. ginger
4 cloves garlic (2 tsp. bottled)
1/4 cup butter
1/4 cup olive oil
1 1/2 cups chicken broth
3 tsp. parsley
2 tsp. basil
1/2 tsp. salt (this wasn't in the original recipe, but it needed it)
3 tsp. cornstarch
2 tbsp. cold water
1 lb. raw shrimp, peeled and deveined
1 package angel hair pasta (I used spaghetti)

Start water boiling for pasta.

In a large skillet, saute ginger and garlic in butter and oil for about one minute. Stir in broth, 1 1/2 tsp. parsley, and basil.

Combine cornstarch and water until smooth. Add to skillet. Bring to a boil. Cook and stir for two minutes or until thickened. Reduce heat; add rinsed shrimp. Simmer for two to three minutes or until the shrimp turn pink.

Meanwhile, cook pasta. Add sauce to cooked and drained pasta. Sprinkle with remaining parsley.

Salad

Of course, we also had a simple salad, to round out the meal. Five-lettuce mix with chopped oranges and a honey mustard dressing. Colorful and yummy.

Chocolate Almond Pudding Cake

This was a fantastic ending to a delicious meal. It's a slightly healthified version, with less sugar and oil. It was rich and indulgent, but not overly so. Perfect with vanilla ice cream.

1 cup flour
1/2 cup sugar
1/4 cup chopped almonds
1/4 cup unsweetened baking cocoa
2 tsp. baking powder
1/4 tsp. salt
1/2 cup milk
2 tbsp. canola oil
2 tsp. vanilla
1/4 tsp. almond extract
3/4 cup packed brown sugar
1/4 cup unsweetened baking cocoa
1 3/4 cups water
Vanilla ice cream, if desired

Heat oven to 350°F. Spray 8-inch square (2-quart) glass baking dish with cooking spray. In medium bowl, mix flour, granulated sugar, almonds, 1/4 cup cocoa, the baking powder and salt. Stir in milk, oil, vanilla and almond extract until blended. Spread batter in pan.

In 1-quart saucepan, mix brown sugar and 1/4 cup cocoa with wire whisk. Stir in water; heat just to boiling, stirring occasionally. Pour over batter.

Bake 35 to 40 minutes or until center is set. Cool 30 minutes before serving (Haha, yeah right. We at it right away).

To serve, spoon warm cake into individual dessert bowls; spoon pudding from baking dish over cake. Serve with ice cream.

Saturday, October 9, 2010

6 Years


My sweet husband and I have been married for 6 years, as of yesterday. When Jeff asked if I wanted to go out to eat or make something special here at home, my answer was obvious - I always prefer a great home cooked meal! So here's what we ate for our special meal to celebrate 6 years of marriage.


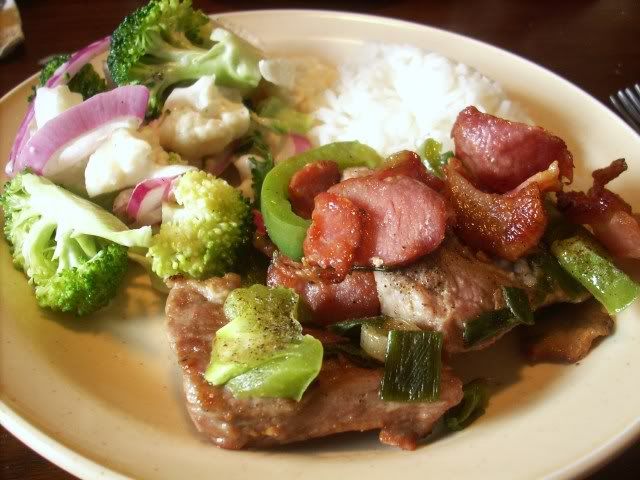
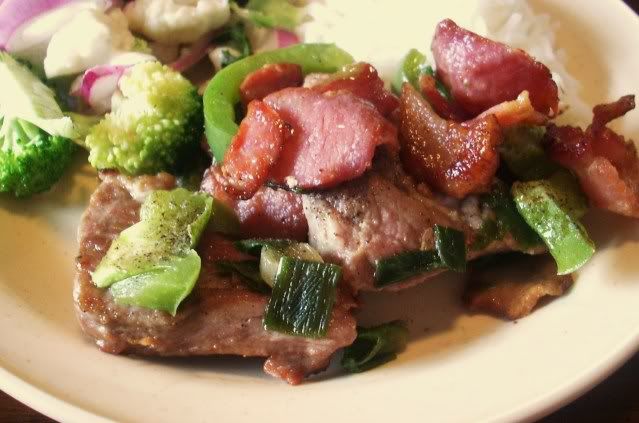
Pork and Bacon Skillet

Jeff created this dish specifically to use cheap cuts of pork and bacon ends. Since he didn't really measure anything, all amounts are approximate.


Start by cooking about 1/4-1/2 lb. bacon ends. Remove from pan and set aside, leaving bacon grease in the pan. Cut about 2 lb. pork into 3-inch chunks and add to pan. Brown on both sides. Add a sliced green pepper, some sliced green onions, 1 cup beef broth (or 1 cup water and 1 tsp. bouillon), and the bacon, plus salt and pepper to taste. Cover and simmer about 30 minutes, stirring occasionally. Serve with rice.


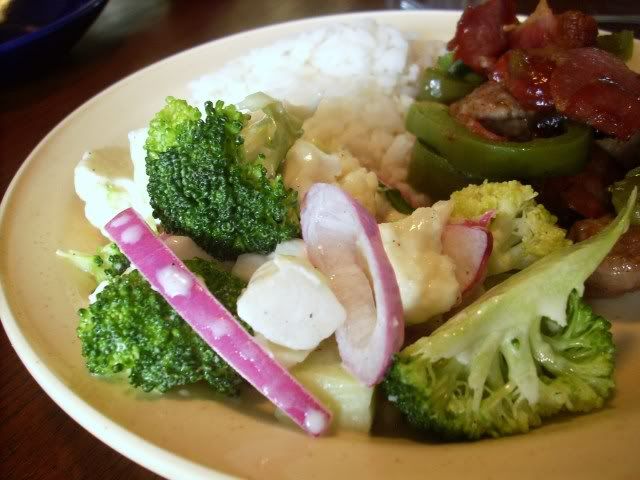
Broccoli and Cauliflower Salad

A delicious and hearty salad from the new Southern Plate Cookbook (love this book!!!!!!!)


1 head cauliflower, broken and sliced
1 head broccoli, cut up
2 small onions, cut and separated into rings (I used half of a large red onion)
1/2 cup mayonnaise
1/3 cup vegetable oil
1/3 cup cider vinegar
1/4 cup sugar
1/2 tsp. salt
1/4 tsp. pepper

Combine the vegetables in a large bowl. Whisk together the remaining ingredients in a separate bowl. Add to vegetables and toss to coat. Refrigerate until ready to serve.


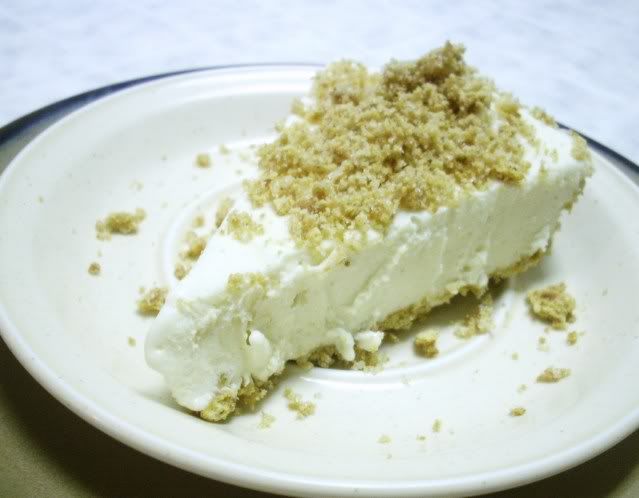
Anniversary Pie

This pie has become tradition since I created it a couple years ago. I've made it differently each time, but it's always delicious. This time I went for a yummy cinnamon flavor.


1 package cream cheese, softened
1/3 cup sugar
1/2 cup eggnog
1/2 cup ice cream (fried ice cream flavor - cinnamon ice cream with shortbread chunks and a caramel swirl, yummmm)
1 graham cracker crust, made with cinnamon grahams
Additional cinnamon graham cracker crumbs

Beat cream cheese and sugar until smooth. Beat in eggnog and ice cream. Pour into crust and freeze until firm. Remove from freezer 10 to 15 minutes before slicing to soften the pie. Return any uneaten portion to the freezer. Sprinkle each slice with additional cracker crumbs.

Saturday, August 28, 2010

Hamburger Stroganoff

This is one of those meals that we ate a lot while I was growing up. It's quick, it's easy, and it's cheap. And most importantly, it tastes good! Just another great recipe to help stretch your grocery dollar. :-)


Hamburger Stroganoff
1 small onion, chopped
1/4 tsp. garlic salt
1 tbsp. oil
1 lb. ground beef (we usually get away with using less)
1/2 tsp. salt
1/4 tsp. pepper
1 can cream of mushroom soup
1 cup sour cream*

Brown onion and garlic salt in oil. Add ground beef, salt, and pepper. Cook until ground beef is browned, then add mushroom soup. Simmer 5 to 10 minutes.

Just before serving, stir in 1 cup sour cream. Serve over hot cooked rice or noodles.


*If you don't have sour cream, you can use this substitute instead:
Combine 1 cup canned milk with 2 tbsp. lemon juice, and let stand 5 minutes. Add 1/4 cup mayonnaise and mix well.

Sunday, June 6, 2010

Grandma's Chili-Cheese Casserole

A few years ago, my paternal grandmother gave me (as well as many of her other granddaughters) a folder containing some of her favorite recipes. This is one of them. It's super simple, and takes only minutes to put together. Like many casseroles, it's not exactly the prettiest thing in the world, but it's yummy.


Here is the recipe exactly as Grandma wrote it.

Chili-Cheese Casserole

Mix together 1 large can chili con carne w/beans and 2 cans cream of mushroom soup. Layer in casserole with large flour tortillas and grated cheese, ending with cheese. Bake for 30 minutes at 350 degrees.


When I made this, I only needed a little bit. Grandma would make this large enough to feed a crowd, but I only had my little family to feed. So I used one regular-sized can of chili and one can of soup, and layered the ingredients in a 9-inch round cake pan, then cooked it for 20 minutes. The soft-taco size tortillas were the perfect size to fit in my cake pan.

Saturday, April 3, 2010

Skillet Pizza


I found this recipe in an old Better Homes and Gardens cookbook I got at the thrift store a long time ago. I had to adjust it quite a bit, because it called for a pizza mix, which included a crust mix, sauce packet, and cheese. I just made my own crust, used some spaghetti sauce, and my own cheese. Really, it was the concept of the recipe that got my attention. We love making pizza, and it's so fun to find new ways to do it. This pizza, cooked in a skillet on the stove, turned out really good, much better than I was expecting. Crispy crust, gooey melty cheese. The only downside is that it only made 4 servings. Next time I'll double the recipe and have two skillets of pizza going at once - when I make pizza I like there to be a lot of it!


Skillet Pizza
1 1/4 tsp. yeast
1/2 cup plus 2 tbsp. warm water
1 tbsp. oil
1/2 tsp. salt
2 cups flour
1/2 cup spaghetti sauce (or add Italian seasoning, garlic powder, and onion powder to 1/2 cup tomato sauce)
1 to 1 1/2 cups shredded cheese (preferably mozzarella, but I used cheddar and Monterey Jack because we're out of mozzarella)
Toppings of choice - I used salami

To make crust, combine yeast, warm water, oil, salt, and flour. Knead for a few minutes until smooth. Spread in a cold, greased, 10-inch skillet, pressing onto bottom and a bit up the sides. Cook for 7 minutes over medium-low heat with lid ajar.

Remove lid and spread with sauce, cheese, and desired toppings. Cook for 15 minutes with lid ajar. Remove lid and cook 7 minutes more.

Loosen crust from pan and slide pizza out onto a plate. Slice and serve!

Wednesday, March 17, 2010

Corned Beef

There's a right way and a wrong way to smoke a corned beef brisket. The right way involves the use of a grill or a smoker. The wrong way involves putting it on the stove to boil, then forgetting about it until the entire upstairs is filled with smoke as the 30-year-old fire alarm emits strange and ethereal gurgles.

Guess which way I did it today.

Well, at least it turned out incredibly delicious anyway.


Though it took me quite a while to clear all the smoke from my lungs.


Happy Saint Patrick's Day!

Wednesday, October 28, 2009

Fantastic Fall Casseroles

I've made a couple delicious casseroles in the past few days. I thought I'd make up for not posting in a while (has it really been a week and a half?) by putting them together into one post.

First up is Harvest Hamburger Casserole. I've made this one several times - we love the combination of flavors. It's a tiny bit similar to Shepherd's Pie, with a beef and tomato layer and a potato layer, but different enough that it's a completely different and unique dish. It's hearty and flavorful, and one of my favorites.


Casseroles are funny things - by that I mean funny looking! No matter what angle I try to shoot at, it just ends up looking like a big blob on a plate. But it's definitely a very tasty blob!


Harvest Hamburger Casserole
1 lb. ground beef, browned and drained
1 cup finely chopped onion
1 can (28 oz) diced tomatoes, with liquid
1 tbsp. Worcestershire sauce
1 tsp. salt
2 cups sliced potatoes
1/3 cup all-purpose flour
1 package (10 oz) frozen corn, thawed
1 package (10 oz) frozen lima beans, thawed (I usually skip this)
1 green pepper, cut into strips (this time I used a combination of green and red)
1 1/2 cups (6 oz) shredded cheese

In a mixing bowl, combine beef, onion, tomatoes, Worcestershire sauce, and salt. Spoon into a greased 3-qt casserole. Layer the potatoes, flour, corn, lima beans, and green pepper on top. Bake, covered, at 375 for 45 minutes. Sprinkle with cheese and continue baking, uncovered, for 30 minutes longer.


Next up is Apple/Sausage/Sweet Potato Casserole. I just made this for the first time today, and it was incredible! I knew as soon as I read the recipe in one of my many little recipe books that I wanted to make it as soon as I could. A layer of sausage, topped with sweet potato and brown sugar, and finished off with apple slices - the delicious definition of a fall casserole!


Apple/Sausage/Sweet Potato Casserole
1 lb. seasoned lean bulk pork sausage
1/4 cup water
1 can (23 oz) sweet potatoes, drained and thickly sliced (I used the equivalent in boiled fresh sweet potato)
1/4 to 1/2 cup packed brown sugar
1/4 cup butter or margarine
3 medium apples (red cooking variety), cored (I used one huge apple)

Form sausage into patties; brown in a skillet and drain. Place patties in bottom of an ungreased 2-qt casserole. Add water. Layer thick slices of sweet potatoes over sausage. Sprinkle with sugar; dot with half the butter. Cut unpeeled apples into 1/2-inch slices; layer over all. Dot with remaining butter. Cover and bake at 350 for 30 minutes. Uncover; bake 15 minutes longer.


Oooohhhh, this one turned out so delicious! This flavor combination is so awesome. Between Jeff and the kids and I, we didn't have any leftovers. Thomas particularly enjoyed the apple slices; Zaylee adored the sweet potato. Jeff and I, we just loved the whole thing!


***By the way, today is National Chocolate Day. Go eat some chocolate and celebrate this inspired holiday!!!!***