Wednesday, April 8, 2015

Sourdough Sticky Buns

The kids and I were watching an old episode of a food network show about sticky buns. I was drooling the whole time. All the kids were fascinated and wanted to know if we could make sticky buns someday. Well, all the kids except for the 2-year-old. He just thought that "sticky buns" was a really silly word, and giggled and repeated it every time someone on the show said it.


I had my sourdough starter all active and bubbly, having just used it that morning to make pancakes. I figured that I would treat the family to a batch of delicious sourdough sticky buns.

I used my new favorite recipe for sourdough bread, because it makes bread that is very soft and not too sour. I combined a couple recipes for the sticky, gooey glaze, and came up with these fantastic sticky buns. Best served warm, so the glaze is caramel-soft.


I didn't make these buns super duper sticky. The caramel topping can be doubled if you want the kind of sticky buns with oozing caramel that drips down your fingers. But any mess the kids made while eating these is a mess I would have to clean up! So I stuck with a smaller amount of topping, one that would leave a minimal amount of sticky on the fingers, face, table, floor, and clothing.


Sourdough Sticky Buns
1/2 batch Velvety-Soft Sourdough Bread dough
3 tbsp. softened butter
1/3 cup sugar
3 tbsp. cinnamon
Caramel Topping:
1 cup packed brown sugar
4 tsp. honey
4 tbsp. melted butter
1 tsp. vanilla
1/2 cup chopped nuts (pecans are traditional, I used almonds)

Prepare bread dough (mix sponge, rise, add flour to make dough, rise twice). I start the sponge early in the evening the previous day, then mix it into dough and set it to rise right before I go to bed. When I get up I punch it down and let it rise again, then punch it down again and it's ready to shape.

Roll out dough into large rectangle. Smear the 3 tbsp. softened butter over the rectangle of dough. Combine sugar and cinnamon and sprinkle over the butter. Roll, starting with long side. Cut into 12 segments. Cover while you make the topping.

In a bowl, combine brown sugar, honey, 4 tbsp. melted butter, and vanilla. Spread into greased 9x13 pan, then top with chopped nuts. Arrange buns on top of caramel topping and nuts. Cover and let rise until double.

Preheat oven to 400 degrees. Bake buns 20-22 minutes. Let sit in pan for about a minute. Invert onto another pan, or serving platter. Let the caramel drip over the buns a bit before removing the baking pan. Scrape any leftover topping out of the pan and spread over top of sticky buns.


I set aside a couple of these to give my husband when he gets home from work. It's taking all of my self-control and all of my love for my husband not to go in and eat them right now. I. Must. Be. Strong...

Linking to:
"Think Tank Thursday" 
Link Party Palooza

Velvety-Soft Sourdough Bread


I have been quietly going through a bit of a sourdough bread saga. When I first started my sourdough, my bread turned out pretty good every time. I always used the same simple recipe, and while it wasn't perfect it was good enough. But it eventually stopped working. I'm not sure what went wrong, but every time I tried making sourdough bread, the loaves would turn out flat and hard. I had one loaf that was supposed to be round and rustic but it ended up looking exactly like a flying saucer. And it tasted about as appealing.

So I've been trying a variety of new recipes, hoping to find one that I can count on, and hoping to improve my skills and knowledge of sourdough at the same time. I found a pretty good recipe for soft sourdough bread that I made a couple times. It worked well and gave me consistent results. Through this recipe I learned that when making bread, you have to make sure the starter is active and bubbly. Some recipes can get away with flat starter that hasn't been fed for a few days. Bread is not one of them - it needs to have been fed within 12-24 hours in order for the yeast to be active enough to make the bread rise.

I recommend the above recipe, and would continue to use it, had I not found one that works for me even better! I recently bought a book called Alaska Sourdough by Ruth Allman. It's full of stories and recipes, all hand written by the author, and is just the sort of homey, down-to-earth book that I love.


I tried the basic sourdough bread recipe and was floored by how well the dough rose. I haven't had my sourdough rise that well since I started keeping a sourdough starter. Then when we sliced into it, I was even more amazed at the softness of the bread. I was seriously running my fingers over the slice of bread, because I like soft things and this bread felt just like velvet.


I did have to cut the recipe in half. I only cook 2 or maybe 3 loaves at a time, because that's how much we can eat before it starts going stale and yucky. I also had to adjust the baking time and temperature. The recipe called for baking the bread for 10 minutes at 500 degrees, then turning it down to 400 for 45 minutes. I took the bread out when there were still 27 minutes left, because it was turning too dark on the outside. The next time I made this bread, I tried 400 for 30 minutes and it baked perfectly.


Velvety-Soft Sourdough Bread
2 cups active (recently fed, bubbly) sourdough starter
1 cup warm potato water (water from boiling potatoes, or just add 1 tbsp. potato flakes to 1 cup water)
1/4 cup sugar
3 tbsp. cooking oil
5 cups flour, approximately
1/2 tsp. salt

Make soft sponge by mixing the sourdough starter, sugar, water, and oil. Add half the flour (2 1/2 cups). Set in warm place to double in bulk.

Add salt and remaining flour to make a dough that is easy to handle, smooth, and elastic. Place in greased bowl. Cover. Let rise in warm place until double in bulk.

Knead down dough. Let rise to double bulk once again.

Form into 2 loaves. Can use loaf pan or make free form loaves. Let rise about half an hour. Slash top of loaf. It's got to be a nice deep slash, or the bread will split down the side. I might or might not know that from several instances of personal experience...

Bake in preheated 400-degree oven for 30-35 minutes. Remove from pans and cool completely on wire rack.


Linking to:
"Think Tank Thursday"
Link Party Palooza

Thursday, March 26, 2015

Sourdough Scones

I knew that I needed to use my starter today. I'll be making three batches of sourdough brownies tomorrow for a friend's wedding this weekend, so I wanted my starter to be drained and fed and ready to go. I didn't want to make bread, since I'm having some weird issues with sourdough bread baking lately and I just didn't feel like trying it again today. So I checked out my Pinterest board and was reminded of these Sourdough Scones that I pinned a while back.

I made these for breakfast, and they turned out so good! I've come to expect a certain flavor when I make sweet baked goods with sourdough, but the baking soda in the recipe neutralized some of that usual sourdough flavor. What was left was just a really delicious scone.

The recipe I'm posting is just a basic sourdough scone that lends itself extraordinarily well to a variety of add-ins. I added spices and dried cranberries this morning, and I'm excited to try other things like chocolate chips, chopped apples, blueberries, etc.


Sourdough Scones
(adapted from allrecipes)
2 1/2 cups flour
1/2 tsp. salt
1 tsp. cream of tartar
1 tsp. baking soda
1/2 cup white sugar
1/3 cup shortening or cold butter
1 1/4 cups sourdough starter (this might vary depending on the hydration level of your starter)
Optional milk and sugar for garnish

Preheat oven to 400 degrees Fahrenheit. Line a large baking sheet with parchment paper.

Whisk together flour, salt, cream of tartar, baking soda, and sugar. Cut in shortening until mixture resembles coarse crumbs. Add the sourdough starter and mix by hand to form a soft dough. I ended up needing a bit more than 1 1/4 cups.

Turn the dough out onto lightly floured surface. Knead gently a couple times. Divide into 4 pieces. Pat or roll one piece of dough into a 1/2-inch thick round. Cut it into 4 wedge-shaped pieces. Repeat with remaining pieces of dough.

Alternately, press the whole batch of dough into a rectangle and cut into 16 triangles. The shape might not turn out quite as traditional, but I thought it was simpler this way.

Place scones on baking sheet about 1 inch apart. Brush the tops of the scones with milk and sprinkle with sugar, if desired.

Bake until the scones just start to turn golden, 12 to 15 minutes.


Optional variations that I'm eager to try:

-Add 1-2 tsp. spices (cinnamon, nutmeg, ginger, allspice, citrus zest, etc) with the dry ingredients.
-Stir in 1-2 cups additions (dried fruit, chopped fresh fruit, baking chips, nuts, etc) after cutting in the shortening.
-Drizzle with powdered sugar glaze after baking.
-Make a savory version by eliminating the sugar, adding savory spices (garlic/onion powder, cayenne, dry mustard, etc) with dry ingredients, and stirring in grated cheese after the shortening.

Linking to:
Link Party Palooza

Friday, March 20, 2015

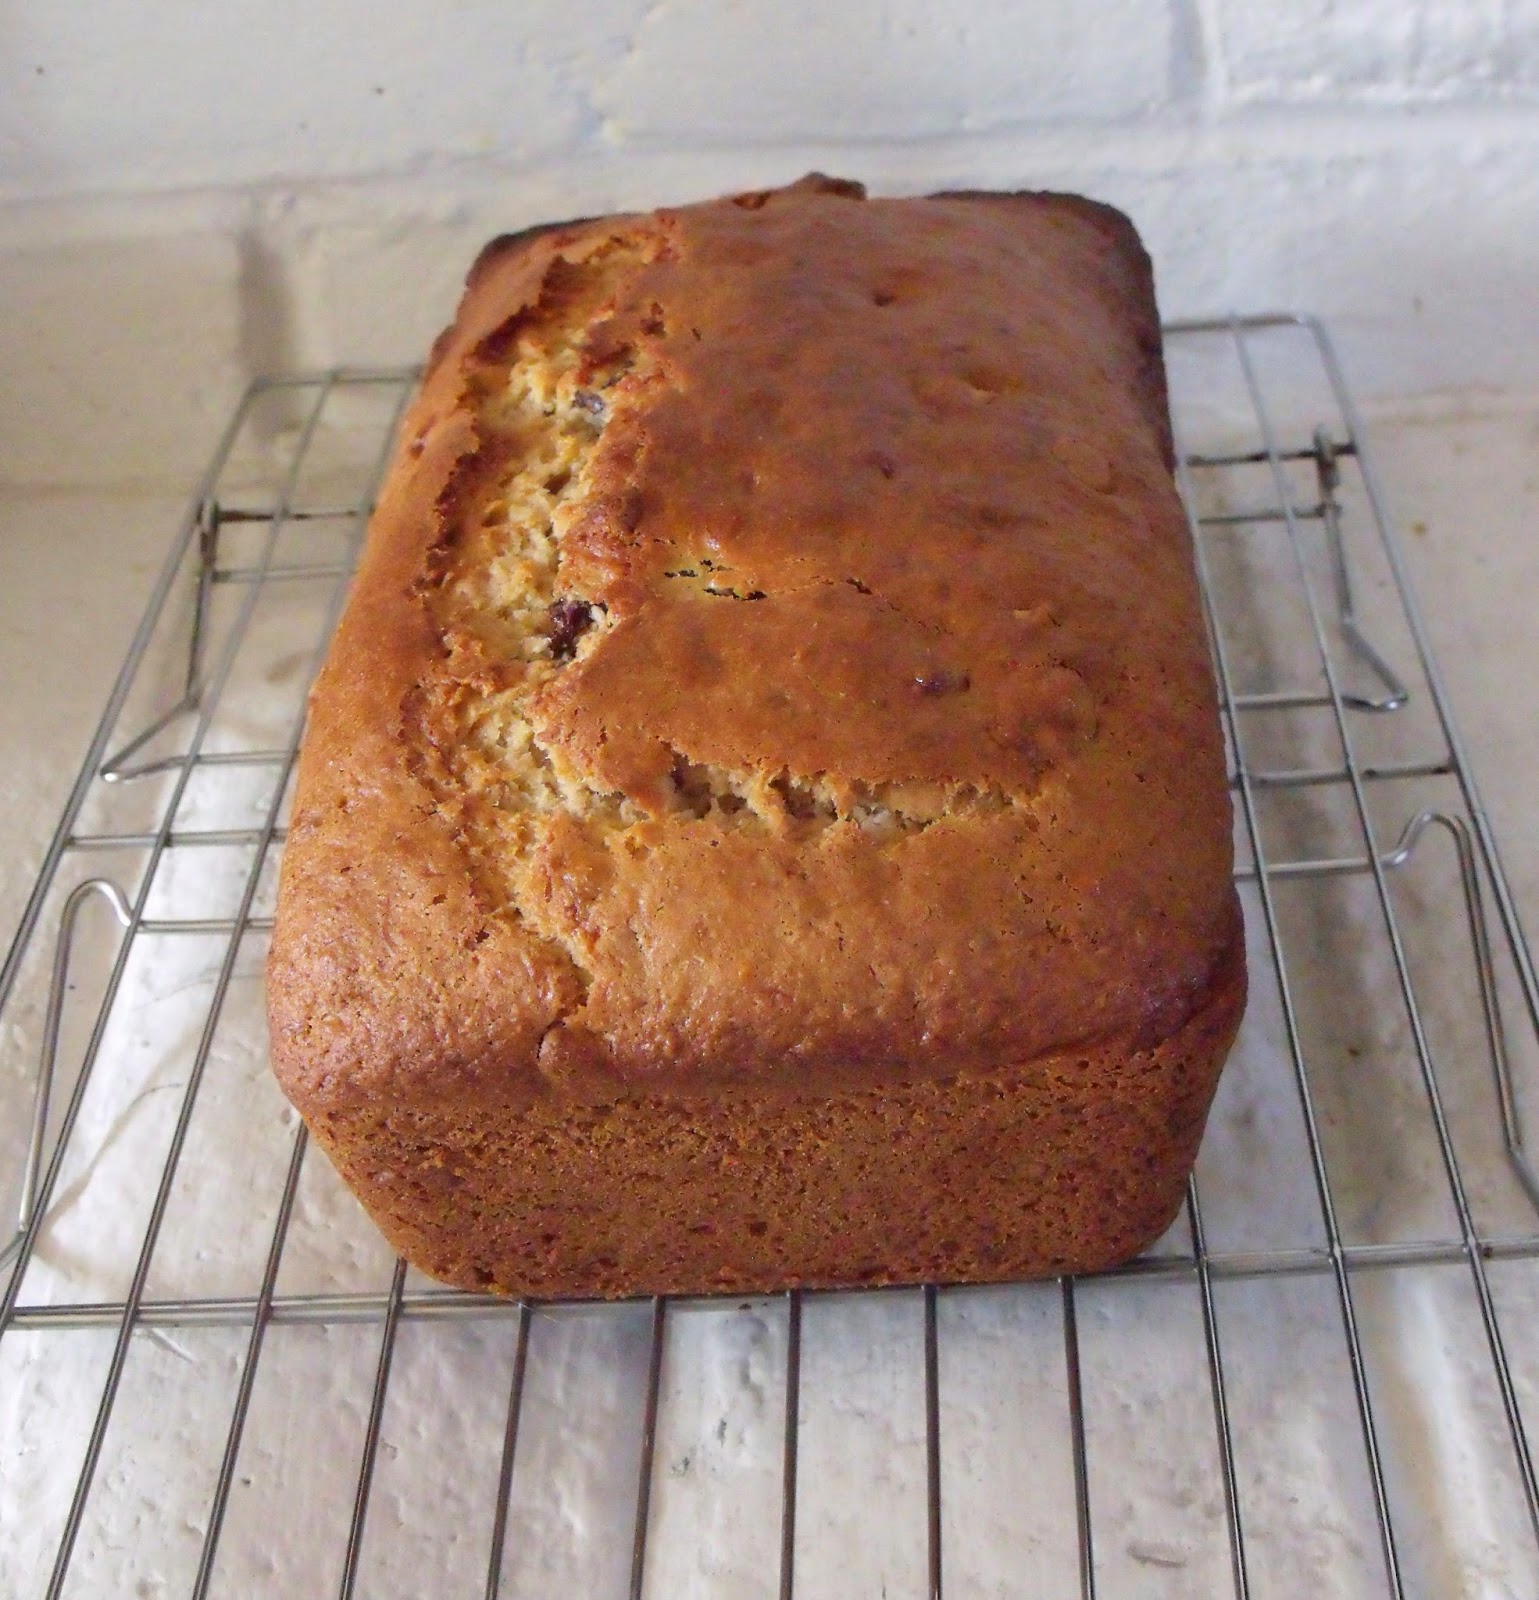
Sourdough Banana Bread

I recently discovered a fun website called Sourdough Surprises - "a monthly baking group who strive to use our sourdough starters for things besides bread (although we do a lot of that, too!)." Given my recent obsession with exploring uses for my sourdough starter, this got me pretty excited. Basically, each month an assignment is given, participating bakers must make a specific something using sourdough starter. Past months have included challenges like steamed buns, croissants, granola bars, kolaches, crepes, and so many more!

The challenge for March, because of celebrating three years of Sourdough Surprises, was to choose from any of the previous challenges. I had some bananas that needed to be used, so I chose the category of Quick Breads and Muffins, and made Sourdough Banana Bread.


I have found that there is a very distinct flavor in every sweet thing that I have made with sourdough. Sometimes it's strong, sometimes it's mild. It's a little bit of tang, a little bit of richness and depth of flavor that you don't really get when you don't sourdough. But add sourdough, and that flavor is always there, whether the recipe is cookies, brownies, cake, muffins, or pudding. This recipe is no exception. Sourdough Banana Bread tastes exactly like I would have imagined it - like banana bread, but with that distinct tang and richness that sourdough adds. It's quite good.


Sourdough Banana Bread
(recipe from Cook's Hideout)
1 cup all-purpose flour
1 cup whole wheat flour
1 tsp. baking powder
1/2 tsp. baking soda
1 tsp. salt
1/3 cup oil
3/4 cup sugar
1 egg
1 cup mashed ripe banana
1 cup sourdough starter
1 tsp. vanilla
3/4 cup chocolate chips or walnuts

Preheat oven to 350. Grease 9x5 loaf pan.

In medium mixing bowl, combine flours, baking powder, baking soda, and salt. Set aside.

In large bowl, mix oil and sugar until sugar is almost dissolved. Add egg and mix well. Next add mashed banana, sourdough starter, and vanilla. Mix well.

Add dry ingredients to wet ingredients and mix until combined. Stir in chocolate chips or chopped walnuts.

Pour batter into prepared pan. Bake 50-60 minutes or until toothpick inserted into center of bread comes out clean.

Cool in pan for 10 minutes before removing to wire rack to cool completely.


Notes: I doubled the recipe because I had lots of bananas to use up. I only have one 9x5 pan, so I put half of the batter into the loaf pan, and the other half went into an 8x8 baking dish. The bread in the 8x8 was finished baking after 50 minutes, the bread in the 9x5 loaf pan took the full 60 minutes.


I used peanut butter chips in one, and a combination of peanut butter chips and chocolate chips in the other, just for fun. Yummy!


This post is linked to:
The Little Thumbs Up (March 2015 - BANANA) event organised by Zoe (Bake for Happy Kids) and Mui Mui (My Little Favourite DIY) and hosted by Faeez of BitterSweetSpicy.
"Think Tank Thursday" at Joyful Homemaking

Saturday, March 7, 2015

Sourdough Pudding


I was recently browsing for new recipes to use my sourdough starter. It's a fun pastime, I highly recommend it. I searched for "sourdough pudding," thinking that sourdough starter might make for an interesting custard, if used in place of cornstarch or flour as a thickening agent.

I found recipe after recipe for sourdough bread pudding, and a few random recipes that had nothing to do with either sourdough or pudding. But no recipes for a custard pudding made with sourdough. I tried different wordings, different search engines, but nowhere could I find a recipe that made a simple custard pudding using sourdough starter.

I couldn't let it go. I had to try it, to see if it would work. I was nervous and excited. I was about to attempt to do something that, according to the internet, had NEVER BEEN DONE BEFORE. Because obviously, if it had ever been done before, it would be somewhere on the internet. Amiright?

Well, now it has been done, and now it is on the interwebs. I have successfully made a custard-style pudding, using sourdough starter in place of flour, cornstarch, and part of the milk. And it totally worked.


The flavor is what I would expect, having tried a number of dessert recipes that use sourdough starter. It's sweet and pudding-like, and it has that bit of tang and richness that sourdough usually gives. I will say that the distinct flavor that sourdough gives is very distinct in this recipe. There aren't any other flavors to compete with it, so it's quite strong. So if you don't like the flavor of sourdough starter, this probably isn't the pudding for you. But if you like sourdough in just about anything, you'll like it in this.

In the interest of being fully honest, at one point I thought I would have to scrap the whole thing, pour it out into cheesecloth, and claim that my intention all along had been to create a sweet sourdough cheese (details in the recipe below). Even now, I'm throwing around the idea of making cheese with sourdough, because I found out today that it would totally work. But I held out and it turned into pudding after all.


Sourdough Vanilla Pudding
2/3 cup sugar
Dash of salt
1/2 cup sourdough starter
2 2/3 cup milk
2 eggs, beaten
1 1/2 tsp. vanilla
1 tbsp. butter or margarine

Combine sugar and salt in large saucepan. Mix together sourdough starter and milk, and add gradually to the sugar, stirring to combine.

Cook over moderate heat, stirring constantly. At some point, the milk will curdle. Sourdough starter is acidic, which I halfway forgot when I was planning out this recipe. The mixture will look like you're making cheese, with chunky curds and watery whey. Just keep stirring. Don't use a whisk at this point, though, or you'll end up with a very large, gloppy, stretchy blob of curds stuck to the whisk. Just use a spoon.

Continue heating and stirring until the curds dissolve back into the whey. At this point you can use a whisk so the mixture gets smooth. Once it comes to a boil, boil for 1 minute, stirring constantly. Remove from heat.

Slowly stir half of the mixture into the beaten eggs. Blend egg mixture into hot mixture in saucepan. Return to a boil, and boil for 1 minute, stirring constantly. Remove from heat. Blend in vanilla and butter.

Pour pudding into serving dish(es). Cover with plastic wrap and chill thoroughly (about 2 hours) before serving.


I'm pretty sure this could be used in place of vanilla pudding in any recipe. I want to try it in a pie crust. You could add bananas and make sourdough banana cream pie. Add coconut and make sourdough coconut cream pie. Stir in a cup of chocolate chips with the vanilla and butter and make sourdough chocolate pudding or sourdough chocolate cream pie. Layer this stuff with bananas and nilla wafers to make sourdough banana pudding. The possibilities are endless!

Linking:
Think Tank Thursday

Monday, March 2, 2015

Amazing Sourdough Brownies


These sourdough brownies are absolutely amazing. The chocolate flavor is intense, more so than any brownie I've ever tried. The texture of the brownies is dense, smooth, and fudgy. The sourdough adds a touch of tang, but its most noticeable contributions are richness and intensity. The overall combination of flavor and texture makes these brownies divine. I would go on and on, but basically no words can really describe how amazing these brownies are, so you should just make them. If you don't have sourdough starter, make some, then make these brownies.

Don't you want to dive in head first?

I made a batch a few weeks ago, and have been dreaming about them pretty much nonstop ever since. My mouth waters just thinking about these incredible bars of chocolate perfection.


This recipe gives ingredient amounts by weight instead of volume. I have a nice little digital kitchen scale that I use, I just zero it out after adding each ingredient. I prefer volume recipes, but I'm willing to make adjustments for a recipe this delicious.

Sourdough Brownies
(source Chef in Disguise)
300 grams chocolate, chopped (I used chocolate chips for one batch, and a *substitute made with cocoa powder, sugar, and oil the second time, both worked great)
226 grams (2 sticks) unsalted butter
200 grams sugar
6 grams (1 tsp.) salt
8.4 grams (2 tsp.) vanilla
3 eggs, room temperature
40 grams cocoa powder
220 grams sourdough starter

Preheat oven to 325 F.

Line a metal 9×13 pan with parchment paper and grease it ( it makes it easier  to lift the brownies out of the pan if you leave some extra parchment at the 13 inch sides).

In a double broiler, saucepan, or the microwave, melt the chocolate and butter. Stir it often so it does not burn.

Pour the melted chocolate/butter into a large bowl. Whisk in the sugar, salt and vanilla.

Add the eggs one at a time, whisking to combine each addition. Sift the cocoa powder over the chocolate and stir to combine. Add the starter and stir gently until it is completely incorporated.

Turn the batter into the prepared pan and bake for about 40 minutes, or until a toothpick inserted into the center comes out clean.

Cool in the pan 20 minutes then lift the parchment paper out and allow to cool the rest of the way on a wire rack. When cool completely, cut into squares and enjoy!


*To make chocolate substitute: For one ounce of semisweet/bittersweet chocolate, whisk together 1 tbsp. cocoa powder, 3 1/2 tsp. sugar, and 2 tsp. oil or softened butter or margarine.

300 grams of chocolate converts to about 10.5 ounces. So for this recipe I used 10 1/2 tbsp. cocoa powder, 12 tbsp. plus 1 tsp. sugar, and 7 tbsp. oil. I then added this mixture to the melted unsalted butter and continued with the recipe from there.

Complicated enough? I know, I know. But I WANTED these brownies and I was out of chocolate. I did what I had to do.

Le Swoon!

Linking to:
Think Tank Thursday 
Link Party Palooza

Thursday, February 26, 2015

Homemade Mayonnaise

I am often thankful that I have a very do-it-myself kind of mindset. When I wanted my kitchen remodeled, I gathered as many details and tutorials as possible, the dug in and did it myself. I also have a I'll-finish-it-later mindset at times, which is why my kitchen still isn't finished, after a year and a half, but that's beside the point...

Sometimes this do-it-myself-ness applies to food, which is always fun. Making my own bread has become second-nature. I recently started making my own pasta. Occasionally I do homemade tortillas. There are lots of things that are typically purchased at the store that can actually be made pretty easily and inexpensively at home.

Today, I wanted to make sandwiches for lunch. I got out the (deliciously homemade) bread, lunchmeat, cheese, pickles, and lettuce. Then I looked for the mayo, only to find that there wasn't any! What to do?! We never run out of mayo! Well, I was too lazy to put away all the sandwich fixings and come up with something else for lunch. But not too lazy to look up a recipe and make my own mayonnaise.


It was super easy. Mayonnaise basically just needs egg, acid, flavor, and oil. For the oil, I used mostly extra-virgin olive oil (store brand, of course) combined with some vegetable oil. It made for a very strongly olive oil-flavored mayo. I thought that might be a problem, as I have been raised on store bought mayo with its mild flavor, but on the sandwiches the flavor was diluted enough to be quite pleasant. Still, if the flavor is too strong, light olive oil could be used, or just less olive and more vegetable or canola. All in all, my homemade mayo was a successful venture.

Super yummy with some ground black pepper

Homemade Mayonnaise
(from What's That Smell?)
1 egg
2 tbsp. vinegar
1/2 tsp. salt
1/2 tsp. dry mustard (or whatever seasoning you'd like)
3/4 cup oil (I used 1/2 cup extra virgin olive oil and 1/4 cup vegetable oil)

Place all the ingredients except the oil in the blender and blend on high for 10 seconds. Reduce speed then slowly pour olive oil in through the top and blend until thick. Store in refrigerator. Mayo will last 2-4 weeks.


Linking to:
Link Party Palooza

Tuesday, February 10, 2015

Sourdough Chocolate Cake

I've been seriously enjoying my sourdough starter lately. You can just do so much with sourdough! I keep trying to find new recipes to try, because the starter needs to be drained and fed every few days. I simply refuse to throw away the starter that I drain off, so I just have to make fun and delicious foods with it instead. Oh so difficult. ;)

My latest sourdough adventure was this delicious chocolate cake. The batter was fun - it looked just like instant chocolate pudding, and tasted similar to pudding too. Yes, I tasted the batter. I licked the beaters, the spatula, the bowl. It was fantastic. I regret nothing.


I topped the cake with a basic cream cheese frosting, and it complimented the cake well. Both the cake and the frosting were sweet with a little bit of a tang, and it was a great combination.

Sourdough Chocolate Cake
(from allrecipes.com)
1 3/4 cups all-purpose flour
2/3 cup unsweetened cocoa
3/4 tsp. baking soda
1/2 tsp. baking powder
1 tsp. salt
2/3 cup shortening
1 2/3 cup white sugar
3 eggs
1 cup sourdough starter (recipe here)
3/4 cup cold water
1 tsp. vanilla extract

Preheat oven to 350 degrees. Grease 9x13 baking pan.

Sift together flour, cocoa, soda, baking powder, and salt.

Cream shortening, sugar, and eggs. Blend in sourdough starter. Add sifted ingredients slowly to creamed mixture, beating until smooth. Stir in water and vanilla, and mix well.

 Pour batter into greased and floured 9 x 13 inch pan.

 Bake for 35 minutes, or until done.

Cool completely before frosting.


Cream Cheese Frosting
 8 oz. cream cheese, softened
1/4 cup butter or margarine, softened
1 tsp. vanilla extract
4 cups powdered sugar

In a stand mixer or with a hand mixer, cream together cream cheese, butter, and vanilla. Slowly add powdered sugar, mixing until smooth and creamy.

I left the cake in the pan and only frosted the top. That way I only used about two-thirds of the frosting, and could keep the leftover frosting in the fridge. Because, let's face it, there are certainly worse things than having a cup or two of cream cheese frosting sitting around waiting to be used. So convenient for delicious snacking...

Linking:
Think Tank Thursday

Friday, January 9, 2015

Sourdough Adventures

Several years ago, I kept a sourdough starter for a while. I wasn't very good at making bread with the recipe that I had (I kept trying to add too much flour, and ended up with rock-hard bread every time), and eventually the starter was neglected into oblivion.

But recently, I started myself a new starter. I'm much more experienced with bread baking now, and have been turning out some lovely loaves of delicious sourdough bread. My kids really like having a sourdough starter, I've told them it's like "pet yeast" because we have to feed it and take care of it just as if it were a pet. But mostly they just really like all the stuff I make with it.

Before, I used to keep my starter in a pitcher in the fridge, and only pull it out to use every once in a while. Nowadays, fridge space is a valuable commodity, and there's just not room in there for a container of sourdough starter. So I keep it in an open cabinet, up high enough that the kids won't bother it, but visible enough that I can check on it and remember that it's there and needs to be used frequently.


See, there it is on the top shelf in the old ice cream bucket. Lots of people store their starter in a jar, but I like a container with plenty of space to stir the starter when I feed it. And I promise that someday I will get around to making doors for my cabinets. Let's just ignore the fact that this cabinet has been waiting for doors for over a year...

I'll share the same recipe I shared six years ago, just because. This particular starter uses flour, water, and yeast. I've seen starters that use only flour and water, taking advantage of the wild yeast that is found naturally in flour. But I didn't know about that type until I'd already had my starter for a while, and I'm not going to throw away a perfectly good starter just because I learned there's another kind. :)

Sourdough Starter
2 cups chlorine-free water (let tap water sit out on the counter for a while)
1 tbsp. yeast
2 cups all-purpose flour

Combine all ingredients. Use glass, plastic, or earthenware container. Metal is a no-no for sourdough starter. Cover loosely with plastic wrap and allow to sit at room temperature for at least 48 hours, until it foams and develops a pleasantly sour smell. At this point you can cover loosely and store in the fridge, like I used to do, or just leave it at room temperature, making sure every 2-4 days to either use or drain some of the starter (I always use it, I'm too tightwad to discard perfectly good sourdough starter), and then feed it.

For feeding the starter, I use equal amounts flour and water. I add back 3/4 of the amount I removed. For example, if I remove 1 cup of starter, I feed the rest of the starter with 3/4 cup water and 3/4 cup flour.

Sometimes the starter will separate, with a layer of liquid on top. That liquid is called the hooch. I just stir it in really well before using the starter.

Here's the recipe I've been using to make bread. It's simple, you don't have to make a sponge, it doesn't call for additional yeast. It turns out quite delicious.


Sourdough Bread
1 cup water
1 tbsp. salt
2 cups sourdough starter
4 to 5 1/2 cups flour

Dissolve the salt in the water in a mixing bowl. Add the starter, and then the flour (only as much as necessary to make a soft dough). Knead into a ball. Cover with a damp towel and let rise overnight at room temperature.

The next morning, punch down risen dough and divide in half. Shape each half into a round loaf, make an X-shaped slash on each top, and place the two loaves on a greased baking sheet. Cover with a damp towel and allow to rise at room temperature for about four more hours. Place a pan of water on the bottom rack of the oven and preheat to 400 degrees. Bake for 35 minutes. Cool on a wire rack.

I have also made this successfully in loaf pans (as shown above), and without the pan of water. Baking time and temp is still the same.

Sourdough bread is great and wonderful, but I don't need to make it every 2-4 days. So when I need to use/feed the starter, I have discovered several different things to make using sourdough starter. Isn't the internet awesome like that? Here are some of the things I've made since I started doing sourdough a few weeks ago:

Cookies


I changed the recipe to use cinnamon chips instead of chocolate chips. I can't wait to try it with chocolate sometime. These cookies were very unique, and enjoyable. The texture was more bread-like than most cookies, almost like a biscuit. The flavor was sweet and tangy. If I weren't watching my calorie intake, these little guys could become quite addictive.

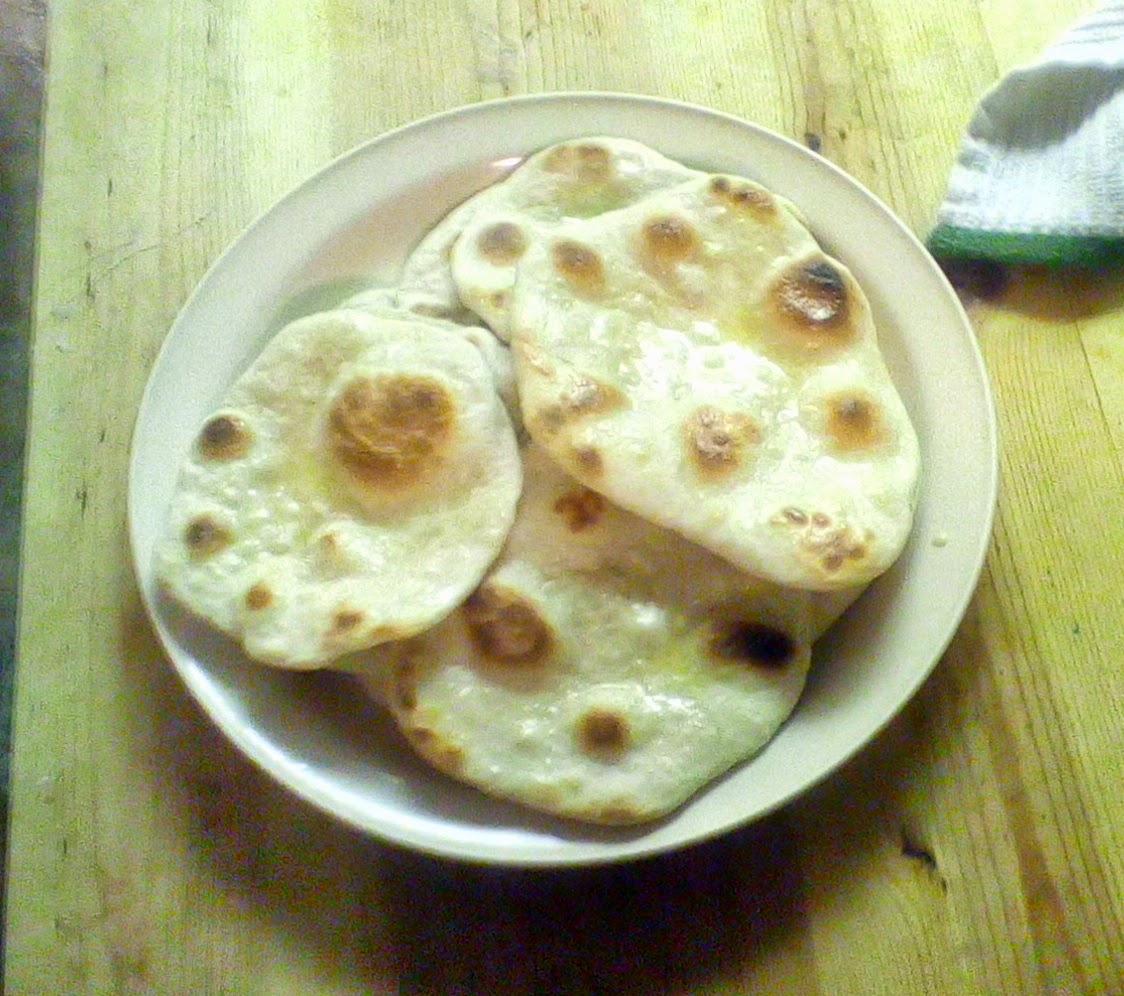
Naan
(recipe here)


I guess my starter is quite a bit less wet than the starter in the recipe, because I had to almost double the starter in order to go from crumbs in the food processor to dough. But once the dough was made, it was extremely easy to work with, and the naan turned out yummy. I made miniature naan, forming the dough into 16 small balls instead of the 8 called for.

English Muffins


I've made these sourdough English muffins twice now, and they've been delicious each time. I start the sponge in the evening, then mix up the dough in the morning to cook up the muffins for breakfast. They're delicious with butter and scrambled eggs, or topped with jam. Any leftovers are good split down the middle and toasted. They don't form huge nooks and crannies like store-bought muffins, but the flavor is wonderful.

I've found that pretty much anything you to which you add sourdough starter develops a wonderful flavor. It's tangy and rich, and downright awesome! That said, I have pinned several more recipes which I am eager to try. Pancakes, waffles, brownies, cake, donuts, cookie bars, muffins - the possibilities are endless! Here's my sourdough Pinterest board for anyone interested.

I do apologize for the poor quality of the pictures in this post. I admit that this post might have been an afterthought... And I can't find my real camera so for most of the pictures, I had to use my husband's little tablet to take some last-minute pictures in poor lighting.

Linking:
tatertots&jello

Monday, October 13, 2014

Cranberry Oat Eggnog Muffins

Good morning, my poor little neglected blog! Let's start the day off with some delicious muffins, shall we?

It's shopping day, so the fridge is pretty bare. Lately, with homeschooling my kids, I've been taking the easy way out of breakfast, with just cold cereal or maybe branching out to scrambled eggs. Not necessarily the cheapest solution, but definitely fast and easy. However, today we were out of cereal, and had only two eggs. I thought about doing oatmeal, my other recent standby, but was kind of bored with that. So I put on my not-so-lazy pants and made muffins instead.

I made these using the universal muffin formula that I've posted before. I've never had a batch fail using this formula (except once when I forgot oil, and the muffins turned out rather tough). Formula cooking isn't for everyone, some prefer specific ingredients and amounts. But I actually really like recipes that I can play with to come up with new variations. In fact, I rarely follow recipes exactly as written, so formula recipes work really well for me.

Anyway, this was a delicious muffin, full of dried cranberries and oats, with a hint of eggnog flavor. Later in the year, this combo would be great for the holidays.


Cranberry Oat Eggnog Muffins
1 cup all-purpose flour
1 cup whole-wheat flour
1/2 cup rolled oats
1/2 tsp. salt
2 1/2 tsp. baking powder
1 tsp. cinnamon
1/3 cup dried cranberries
1/2 cup sugar
1/4 cup oil
1 cup eggnog
1 egg
Additional sugar

Preheat oven to 400 degrees. Grease muffin pan.

Stir together flours, oats, salt, baking powder, cinnamon, and cranberries. In a separate bowl, whisk together sugar, oil, eggnog, and egg. Add wet ingredients all at once to dry ingredients and stir just until moistened.

Divide the batter evenly between twelve muffin cups in prepared pan. Sprinkle about 1/4 tsp. additional sugar over each muffin. Bake for 20 minutes. Remove to cooling rack immediately.

We liked these split through the middle and spread with butter. Jam would also be good, or even just eat them plain.


Wednesday, September 3, 2014

Acorn Squash Casserole

This is one of those awesomely sneaky recipes. It's called a casserole and served as a side dish, but it actually tastes like a dessert. Reminiscent of those delightful candied yams or sweet potato casseroles served alongside turkey and stuffing at Thanksgiving, this acorn squash casserole has a wonderfully sweet autumnal flavor. I found the recipe over at Cooks.com, where it was titled "Heavenly Squash Casserole." I have to agree, this stuff is heavenly.

Sorry about the picture, it was an afterthought. It wasn't until after dinner that I decided I needed to post this recipe so I could have it available whenever I wanted it. So I scooped out another serving just for the picture. Then I ate it. Of course. Can't let it go to waste. :)


Acorn Squash Casserole
(adapted from Cooks.com)
2 large acorn squash
1 cup white sugar
1 stick butter, softened
4 tsp. vanilla, divided
4 eggs, well beaten
Topping:
1 cup brown sugar
1 stick butter
2/3 cup flour
1 cup pecans, chopped (didn't have these, but they would have been an amazing addition)

Split each squash in half and scoop out seeds. Place cut side down in two large baking dishes. Unless you have one large enough for all four halves. Then by all means use that one. Add 1/4 inch water around the squashes. Bake in preheated 400 degree oven for 30-35 minutes or until tender. Scoop out squash into large bowl and beat with mixer or potato masher until smooth.

Add sugar, butter, and 2 tsp. vanilla to the squash. Mix well. In a separate bowl, beat together the remaining 2 tsp. vanilla and eggs. Add to the squash mixture and mix thoroughly. Place in a greased 2 qt. baking dish or 9x13 pan.

Combine topping ingredients and mix well. Sprinkle over top of squash mixture in pan. Bake at 350 degrees for 45 minutes. Serve warm.

This is great served on its own, but topping it with whipped cream takes it to a whole new level. Just saying.

Linking to:
Think Tank Thursday 
Link Party Palooza
Strut Your Stuff Saturday

Tuesday, August 19, 2014

Dutch Oven Apricot Chicken

I made those snickerdoodle bars again, that same evening, at a campout for a dutch oven dessert cookoff. And because of all the extra heat in the fire pit where the ovens were, and because I didn't check on the cookie bars as early as I should have, I burned the bottom to a crisp. That having been only the second time I've ever cooked with a dutch oven, I wasn't too embarrassed or devastated or anything, I just scraped the bottom off and served the bars anyway.

I thought I was over it, and okay with it. But when I decided I wanted to plan a dutch oven meal to cook and eat this week, I kind of froze. Recipes I had looked at before and wanted to try suddenly looked too complicated, too easy for me to mess up. I was scared to try again. It took some facebook encouragement from my aunt and a couple friends to get me feeling okay again. I found a very simple recipe to try and wrote it on the menu calendar for today.

Then it rained all morning, and I thought I'd have to put it off until tomorrow. Luckily, by early evening the rain had stopped and the cement in the backyard had dried enough that I was able to go ahead and light up the coals.

I'm so glad I was able to get over my nervousness and give the dutch oven another try. This apricot chicken (again, from Dutch Oven Madness) was very easy to prepare and cook, and turned out very good. For one thing, it's just beautiful. And of course, the flavor is yummy - tangy, with bits of fruit from the jam and onion from the soup mix. I would not be opposed to making this again sometime.


Dutch Oven Apricot Chicken
12" dutch oven
6 boneless skinless chicken breasts
1 cup apricot jam (I used apricot pineapple jam that my aunt made, super yummy)
1 cup catalina or french salad dressing (I used french, because the store I went to didn't have catalina in the generic brand)
2 tbsp. sugar
1 pkg. onion soup mix

Place chicken in your dutch oven. Mix remaining ingredients and pour over chicken. Bake at 350 for 1 hour. Easy peasy! I will say that my chicken didn't take the full hour to cook, it was done at about 45-50 minutes. Check for doneness before the full time has passed.

I served this over reconstituted potato shreds, the kind that comes in a food storage can. I was considering doing rice, but we've had chicken and rice a lot in the last few days, and wanted something different. Just in case anyone was wondering what that weird-looking stuff under the chicken is. :)


I used the Dinwiddie ring method for achieving the correct heat, coal counting works too if that's what you prefer. I had to add a few coals about halfway through as they got smaller. I thought that would be hard to figure out, but I just started more coals than I needed, kept the ones I didn't use right away all together so they would stay hot, and just tucked them in where needed. For longer cooking times, like several hours, I might start a new batch of coals partway through to replenish coals as they go out.

Mmm, look at that chicken swimming in all that tangy sweet sauce!


Linking to:
Think Tank Thursday
Link Party Palooza 
Strut Your Stuff Saturday

Friday, August 15, 2014

Dutch Oven Snickerdoodle Bars

We recently had our bi-annual family reunion. At these reunions, there is always a big auction, where everyone contributes items to sell and the proceeds go toward funding the next reunion. It's kind of a big deal in our family. I posted about this a few years ago here.

Anyway, Jeff and I had a lot of fun at this year's auction, and got all sorts of neat stuff. Our biggest purchase was a dutch oven. It's a 12-inch, 8-quart dutch oven that has obviously been properly cared for and beautifully seasoned. The thing is, I've never cooked anything in a dutch oven. So I've been reading everything online that I can find about how to cook with and care for dutch ovens, and I was finally ready today to give it a try!


This recipe came from a great blog for anyone interested in using a dutch oven. Toni decided that she wanted to try something new, so she committed to cooking in her dutch oven(s) every day for an entire year! Wow! Her first month or two of recipes include helpful tips of things that she was learning along the way, and she has a few other resources scattered throughout that were helpful and encouraging. Plus she graded almost every recipe so you know what was really good and what wasn't good at all. Most of the recipes rated either a B or an A. These cookie bars received an A.


Dutch Oven Snickerdoodle Bars
(from Dutch Oven Madness)
12" dutch oven
2 1/3 cup flour
1 1/4 tsp. baking powder
1/2 tsp. salt
3/4 cup butter, softened
1 1/4 cup sugar
1/2 cup brown sugar
3 eggs
1 tsp. vanilla
Cinnamon Filling:
1 tbsp. sugar
1 tbsp. cinnamon
Glaze:
1/2 cup powdered sugar
1/4 tsp. vanilla
1/2 tbsp. milk

In a small bowl combine the flour, baking powder, and salt. In a large bowl beat the butter until creamy. Beat in the sugars until fully incorporated. Then beat in the eggs, one at a time, until fully incorporated. Add vanilla. Slowly mix in the dry ingredients.

Spread half of the batter on the bottom of a greased 12" dutch oven. Mix together the cinnamon filling ingredients and sprinkle evenly over the batter in the pan. Dollop the remaining batter in teaspoonfuls over the cinnamon filling. Don't worry about it not completely covering the filling - everything will spread out in the oven and have a great marbled look.

Bake at 350 for 20-25 minutes or until a toothpick inserted in the middle comes out clean. Let cool completely, then mix together the glaze ingredients (adding more milk if it's too thick, or more sugar if it's too thin) and drizzle over the top of the bars.

There are different ways to get the dutch oven to the temperature you want. One popular method is coal counting - for a 12" oven to cook at 350 you would want 16 coals on top and 10 on the bottom. But this doesn't take into account the size of the coals - some are bigger than others. Toni at Dutch Oven Madness prefers the Dinwiddie Ring method, because it allows you to accurately cook with any size coals and makes it so you don't have to count. I chose to use this method and it was easy to figure out, and the bars baked up beautifully.

Dinnwiddie ring method - one ring of coals on the bottom, one and a half rings on top to achieve approximately 350 degrees.


Actually, my cookie bars were slightly undercooked, but that's because I jumped the gun and didn't actually test them for doneness with a toothpick. They could have used a few more minutes, but even underdone, they tasted incredible, and I'm so excited to try more recipes! I don't think I'll be cooking in the dutch oven every single day, but I can say for certain that my new toy will not be put away in a closet only to be brought out for camping. It's too easy and too fun to only be used once or twice a year!


Linking to:
Link Party Palooza
Strut Your Stuff Saturday
Think Tank Thursday

Monday, July 28, 2014

Chocolate Berry Truffle Cheesecake


When I was a teenager, my dad decided he wanted to learn how to make gourmet cheesecakes. He bought a recipe book featuring a large variety of cheesecakes, and started baking. These cheesecakes were a big departure from the no-bake Jell-O cheesecakes of my childhood. There was a year or two when we were almost constantly trying new fancy cheesecake recipes, everything from Chocolate Turtle Cheesecake to No-Bake Peanut Butter Cheesecake to Banana Split Cheesecake. Mmm. Those were good times.

The very first cheesecake that Dad made out of that beautiful little book was called Chocolate Raspberry Truffle Cheesecake. It was a 10-inch cheesecake that used 2 full pounds of cream cheese, a lot of chocolate chips, and seedless raspberry preserves. He took the sides off the springform pan too soon, so it ended up being a giant shapeless blob in the refrigerator. But it was the richest, most decadently delicious shapeless blog any of us had ever experienced. It was amazing.


After that first cheesecake, Dad's skills improved and we had no more shapeless blobs occupying the place of honor on the fridge shelf. With each cheesecake, he (and those of us kids who watched or helped) learned about ways to keep the cheesecake from cracking, how to mix it properly to reduce lumps, how to bake it and cool it just right. For instance, scrape the sides of the bowl very frequently while mixing, especially after adding a new ingredient. The cheesecake is done baking when the middle half is still relatively jiggly - if it doesn't still jiggle it's overdone. Make sure to let the cheesecake cool completely (and slowly) before removing the springform pan sides. If your cheesecake cracks it's perfectly acceptable to top it with whipped cream or sweetened sour cream to hide the cracks! But still, no matter how many successful and beautiful masterpieces Dad turned out, that first sloppy pile of cheesecake-y goodness has always been my favorite.

The recipe calls for seedless raspberry preserves. But I can't always find those, I don't know why. So I'll sometimes use a different type of berry preserves, with great results. This time I used seedless blackberry preserves. I'll compromise on the type of berry the preserves are made of, but I won't compromise on the fact that they have to be seedless. To get the smooth, perfect texture in the chocolate truffles, you need to use preserves that don't have seeds or chunks.


Chocolate Berry Truffle Cheesecake
Crust:
1 1/2 cups finely crushed cream-filled chocolate sandwich cookie crumbs
2 tablespoons margarine, melted
Filling:
1 1/2 pounds cream cheese, softened
1 1/4 cups sugar
3 eggs
1 cup sour cream
1 teaspoon vanilla
Truffles:
8 ounces cream cheese, softened
9 ounces semi-sweet chocolate, melted
1/2 cup seedless raspberry preserves
Topping:
6 ounces semi-sweet chocolate
1/3 cup heavy cream

1. To make crust, combine cookie crumbs and margarine and press into the bottom of a 10-inch springform pan. Set aside.
2. Preheat oven to 325 degrees.
3. To make filling, with an electric mixer set on medium speed combine 1 1/2 pounds cream cheese and sugar until well blended (scrape sides of bowl frequently throughout steps 3-7 to prevent lumps).
4. Add eggs, one at a time, mixing well after each addition.
5. Blend in sour cream and vanilla and then pour into prepared crust. Set aside.
6. Combine 8 ounces cream cheese and melted chocolate, mixing at medium speed until well blended.
7. Add raspberry preserves, mixing together well.
8. Drop chocolate raspberry batter by tablespoonfuls onto plain cream cheese batter in pan (I used my 2-tbsp. cookie scoop). Do not swirl.
9. Bake for 1 hour and 25 minutes.
10. Remove from oven, loosen cake from sides of pan, and let cool on a wire rack for 1 to 2 hours before removing from pan (I actually leave it in the pan until ready to serve).
11. To make topping, cook chocolate and heavy cream over low heat, stirring constantly, until chocolate has melted and mixture is smooth.
12. Remove from heat and spread over cooled cheesecake.
13. Chill for 4 to 6 hours.

After dolloping on the chocolate truffle mixture and placing in the oven.

Immediately after removing from the oven. The cheesecake sinks quite a bit while cooling, that's normal. I baked the cheesecake last night, forgive my use of the camera flash!

After cooling, the cheesecake is at least half an inch shorter than it was before.

Freshly covered in chocolate ganache.


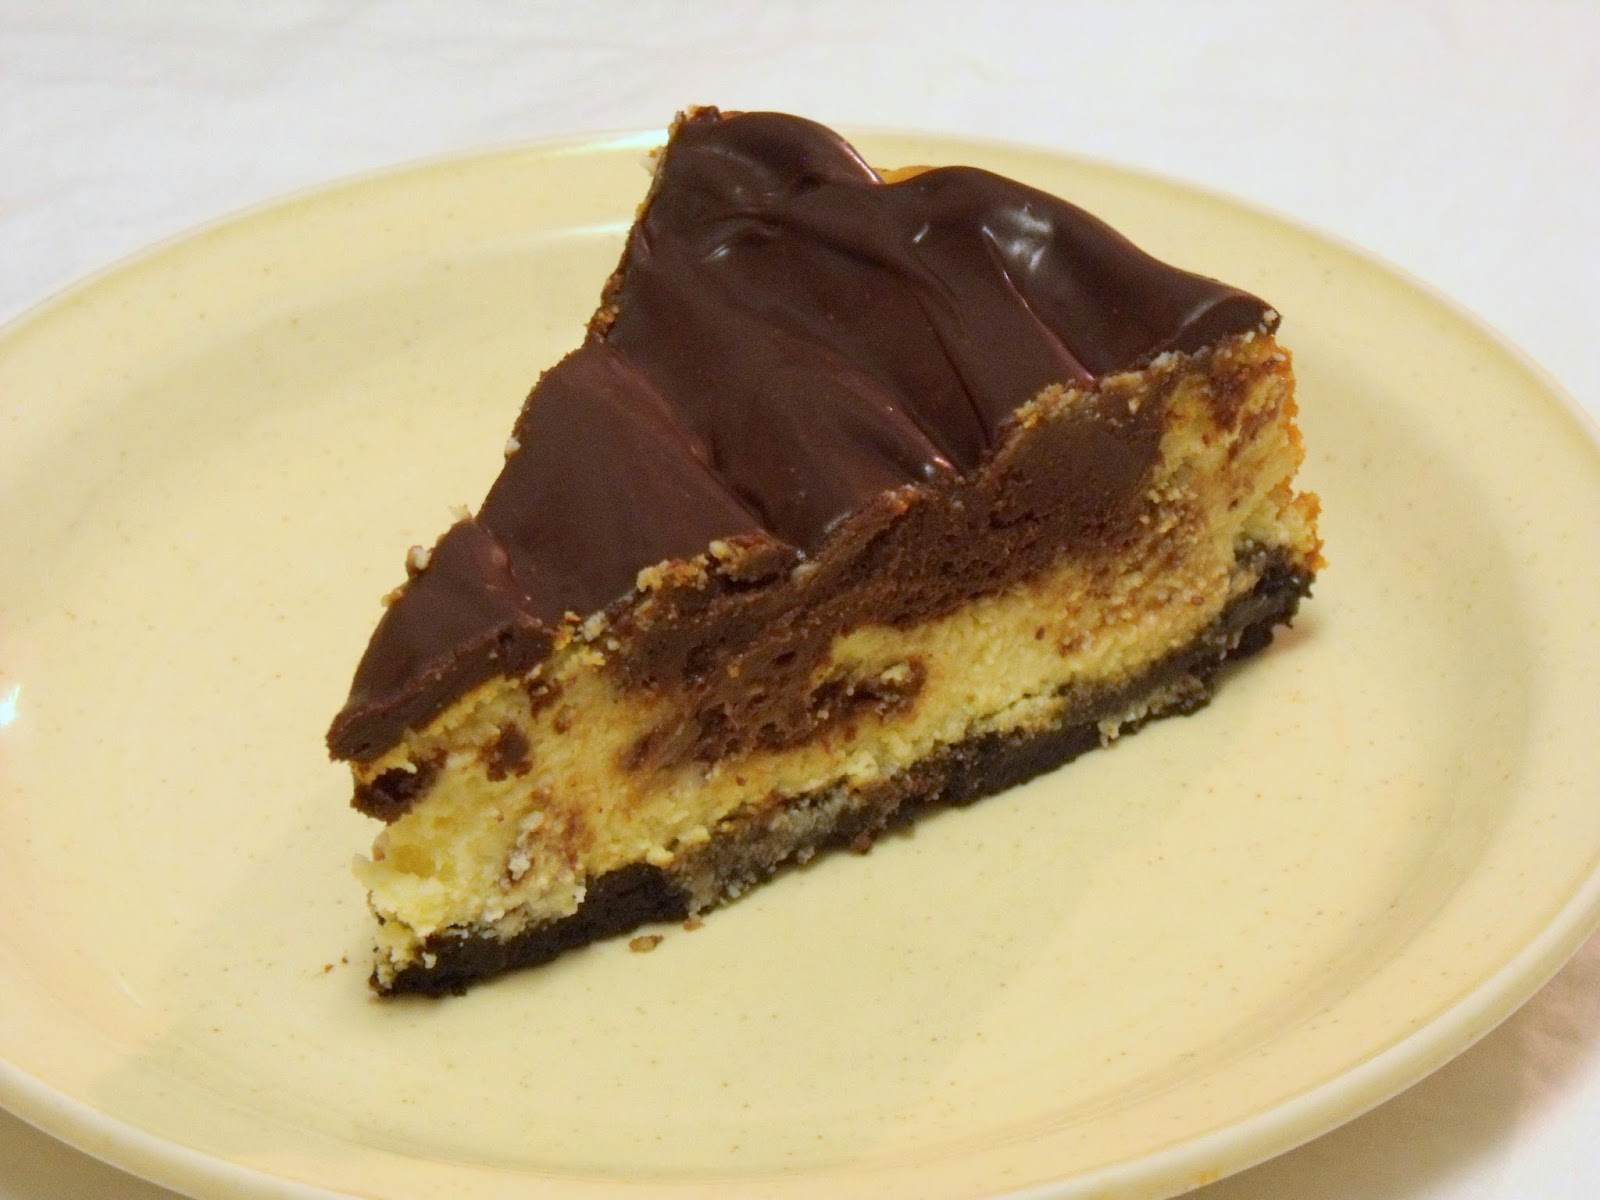
Rich, dense, chocolaty. The most intense cheesecake experience ever.

Linking:
Think Tank Thursday
One Project at a Time
Link Party Palooza
Strut Your Stuff Saturday